Free Shipping on orders of $99+ click for details

Ask the experts: 260.587.9501 | Customer Service

Call Us: 260.587.9501 | Customer Service

Your cart is currently empty.
Free Shipping on orders $59+ click for details
Welcome to the 3Rivers Archer's Den

Archer's Den

Welcome to the Archer's Den. Here you will find a gathering of traditional archery stories, tips and techniques, trophy animals taken with traditional bows, and plenty more. Stay a while and learn something. We hope you enjoy and even submit a trophy of your own, or leave a comment on a post.

All posts by 3Rivers Archery

Your longbow and recurve experts. Serving the archery community as the World's largest supplier of traditional and primitive archery supplies.

Broadheads for Wood Arrows

By: Dale Karch and Todd Smith

Woodsman Broadheads
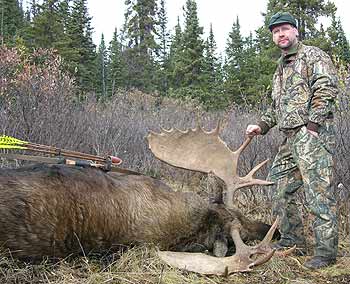
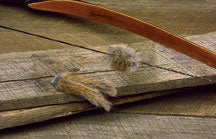
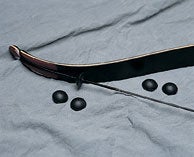
Glue-On Broadheads have taken every kind of big game known to man.

What’s up with all these glue-on broadheads? Which ones are the best? Which ones should I use? What are the differences?

These are all great questions and we hear them often from our customers who are thinking about adding glue-on broadheads to their gear for the first time. We’ve been supplying broadheads to the traditional market for more than 25 years now. Today we’re going to share with you what we’ve learned about glue-on broadheads. We hope that this column will shed some light on these ‘tried and true’ broadheads for wood arrows.

In the world of wooden arrows, longbows, and recurves we believe that broadheads must have three main attributes:

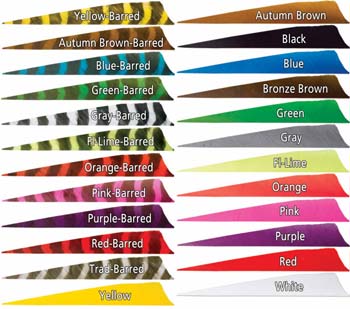
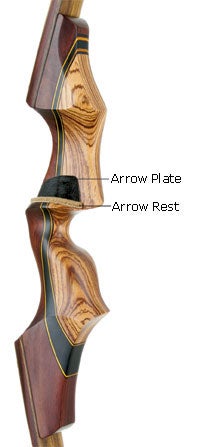
    • First, they must fly accurately. Broadhead design, length to width ratios, balance, and straightness will all affect good arrow flight. Generally speaking, wide non-vented heads will be more likely to wind plane (be deflected by crosswinds). Whereas more narrow heads, especially if they are long and slender, will be less prone to wind plane. Vented heads rarely, if ever, wind plane regardless of their dimensions. To fly accurately, not only must the head be manufactured and ground precisely, the bowhunter must also mount them on his arrows correctly. They must be in perfect alignment with the shaft and the shaft should be as close to perfectly straight as possible. That’s a tall order, especially for wooden arrows. But, if your arrows are straight AND your broadheads are aligned correctly then your arrows should fly straight and true. In this scenario any well-designed, glue-on broadhead should fly well. However, if your arrows are not perfectly straight, then vented broadheads will fly more accurately for you because they have less surface area and less wind resistance. With vented heads, the wind resistance flows through the openings whereas on non-vented broadheads the wind resistance pushes against the flat surface area causing lift on a miss-aligned broadhead. With lift comes broadhead steerage and erratic flight.
    • Second, they must penetrate well. Strength, shape and design are the major contributors here. All of the broadheads mentioned in this column are well designed. Strong sharp broadheads that are flying true, and don’t hit solid bone, will penetrate well. It is generally accepted that two-blade broadheads penetrate the best but also produce the smallest wound channel. Three and 4-blade broadheads still penetrate well and leave a much larger wound channel resulting in better blood trails. When considering which style to use, the bowhunter should consider the game being hunted, the draw weight of the bow and the overall mass weight of the arrow. Many traditionalists go for 2-blade broadheads on large animals such as elk and moose figuring that the deeper penetration will be more important that a better blood trail. We agree to a point, but Dale has used 4- blade broadheads on some pretty big critters, like kudu and zebra, with excellent results. It’s a judgment call on the part of the bowhunter. However, we prefer and recommend multiple blade heads in most situations.
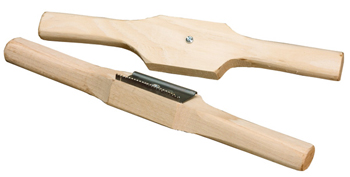
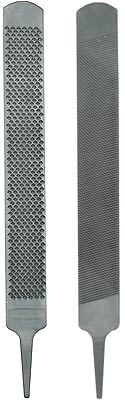
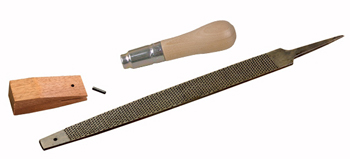
  • Third, they must be easy to sharpen. In today’s market of razor sharp, replaceable blades for nearly all screw-in broadheads, many bowhunters are not aware of the fact that the factory grind on most glue-on broadheads is not shaving/hunting sharp right out of the package. This factory grind gets them close to what we call ‘hunting sharp’, but the bowhunters themselves must put on the final edge. Ease of sharpening is influenced most by the relative hardness of the steel (its Rockwell rating). Basically, the harder the steel, the tougher it is, and the softer the steel the easier it is to sharpen them. The key to good broadheads is getting the steel tempered hard enough to give you strength, but soft enough to allow you to sharpen them with a file. For these reasons, we prefer broadheads with a Rockwell rating in the mid to high 40’s. Another factor that influences ease of sharpening is the angle of the factory grind. If it is too steep, most of the ‘quick and easy’ sharpening aids won’t work. This means that the bowhunter will have to reduce that angle themselves. For easy sharpening, stick with broadheads with a nice low factory grind like you’ll find on the Woodsman® Broadheads.

Woodsman Broadheads
Woodsman® Broadheads require little sharpening out of the package.

Which glue-on broadheads should I buy? Several brands come instantly to mind, and it’s only fair to start with the old timers in the industry like Zwickey, Ace Archery, and Howard Hill.

Zwickey broadheads have long been the standard that other broadheads are measured against. They have taken tons of big game, and the fact that they’re still one of the top producers of glue-on broadheads speaks very well of their entire operation. With longevity comes fame and Zwickey Broadheads have incredible name recognition. Almost everyone has heard of Zwickey. Available in both 2-blade and 4-blade versions, you can’t go wrong with Zwickey Broadheads. From the small 5/16″ Eskilite ‘Black Diamond’ to the famous Eskimo, and the massive Delta. Zwickey broadheads are hard to beat. They are priced right in the middle of the spectrum too so not only are they quality broadheads, but they are affordable too.

Zwickey Black Diamond BroadheadsZwickey Eskimo BroadheadsZwickey Delta Broadheads
Zwickey offers such popular broadheads as The Black Diamond, Eskimo, and Delta.

Ace Broadheads, another old-timer in the market, have a loyal following and are actually enjoying a recent revival in popularity. Available in 2-blade only, they are another excellent example of a reasonably priced, quality, traditional two-blade broadhead.

Ace 2-blade glue-on broadheads
The Ace two-blade broadhead enjoys a loyal following.

Howard Hill broadheads, like Howard Hill bows, have a following of bowhunters with a fierce loyalty to the old-time tradition and legendary accomplishments of one of the greatest archers of all time, Howard Hill. These broadheads have a long and colorful history, and die-hard Hill fans are certain to make them a part of their traditional set-up. They’re a bit tricky to sharpen, but they are an old time classic with a long and revered history.

Howard Hill Glue-on Broadheads
Howard Hill broadheads have as rich a history as the man for whom they’re named.

What about the old Bear Greenheads? No article about glue-on broadheads would be complete without the mention of Fred Bear’s ‘Greenheads,’ but we’re sorry to say, these venerable heads are no longer in production. Too bad… They were one of the best broadheads of all time and many bowhunters are still stalking their prey with quivers full of arrows tipped with their trusted old friend, the Bear Greenhead.

Now, what about the more recent entries in the glue-on broadhead market? Broadheads like Magnus Classic, Woodsman, and Grizzly?

Magnus Classic broadheads are the dominating force in glue-on broadheads today. With plenty of mix-and-match models of glue-on broadheads, available in 2-blade, 3-blade, and 4-blade versions they have a broadhead for any situation imaginable. Ever improving, they have an excellent out-of-the-package grind that is almost hunting/shaving sharp, and a diamond tip that dramatically increases the strength of this already tough broadhead over any ‘needle-point’ head out there. We have personally used these broadheads for years and have great confidence in them. In addition, they are reasonably priced and carry a lifetime guarantee.

Snuffer 3-blade BroadheadsMagnus Classic MA II Vented BroadheadsMagnus Classic MA I 4-blade broadheads
The dominating force in broadheads, Magnus Classic offers a wide variety of heads.

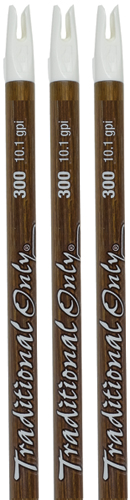
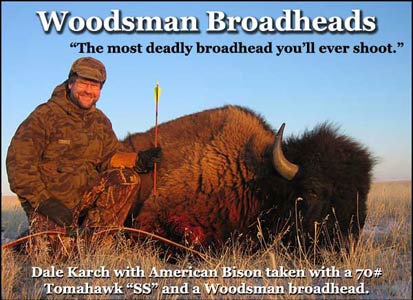
The Woodsman® Broadhead is our bestselling 3-blade broadhead. They’re long and lean vented 3-blade broadheads that have proven themselves on big game time and time again. They’re quickly becoming a household name. They fly true, and once you get used to the 3-blade configuration, they’re easy to sharpen. This is a ‘must have’ broadhead for any archer.

Woodsman 3-blade Broadheads
A great broadhead for big game, the Woodsman is a best seller.

Eclipse Broadheads are very reminiscent of the Zwickey Eskimo 2-blade, but they are unique in that they are Teflon® coated for superior penetration. They are a medium priced, 2-blade broadhead designed to penetrate the world’s toughest game.

Eclipse 2-blade Broadheads
Except for their Teflon® coating, Eclipse two-blade broadheads are similar in design to the Zwickey Eskimo.

The Grizzly single bevel broadhead (and its big brother the Kodiak) have been in great demand ever since their introduction over fifteen years ago. They are almost a 3:1 ratio, very long and narrow. They fly very well, penetrate well, and since they are sharpened with a single bevel, they are easy to finish sharpening to a ‘shaving-sharp’ edge. They are very popular with bowhunters hunting in Africa as they are nearly indestructible and have proven themselves on the toughest African game. Still very reasonably priced, they are a broadhead worth considering. The Bod-Kin is a 3-blade glue-on broadhead that has stood the test of time. Easy to use and inexpensive, a broadhead that many have seen in their Grandparent’s quiver.

Grizzly Single Bevel BroadheadsKodiak Single Bevel BroadheadsBod-Kin 3-blade glue-on Broadheads
The Grizzly Broadhead is popular with bowhunters pursuing African game. The Bod-Kin is a cost effective broadhead that gets the job done.

Zephyr Broadheads are quality and precision all the way. Offering cutlery grade stainless steel and shaving sharp blades right out of the package. Their unique bleeder blades sit forward in the ferrule so you don’t have to slot or cut off your wood tapers to use them. May be used with or without the bleeders as either two-blade or 4-blade broadheads. All these features do come at a price and you’ll pay a little more for a three pack than you will for most other glue-on heads by the six-pack. Still, there are bowhunters out there that don’t mind paying for convenience and quality, and these excellent broadheads offer both.

Zephyr Scirocco Glue-on Broadheads
Zephyr offers cutlery grade stainless steel and shaving sharp blades right out of the package.

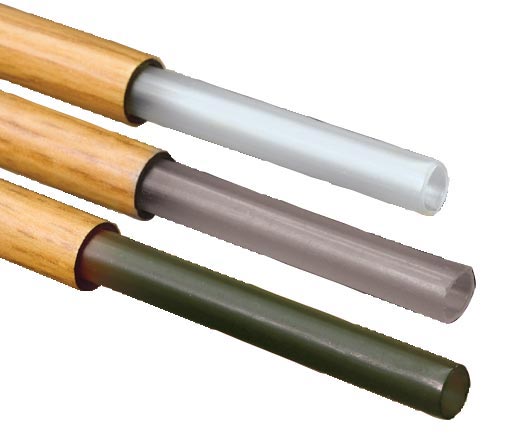
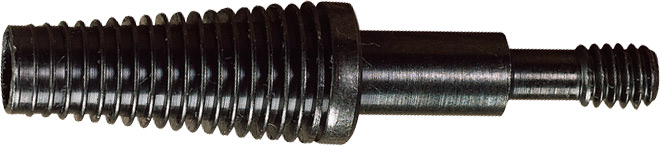
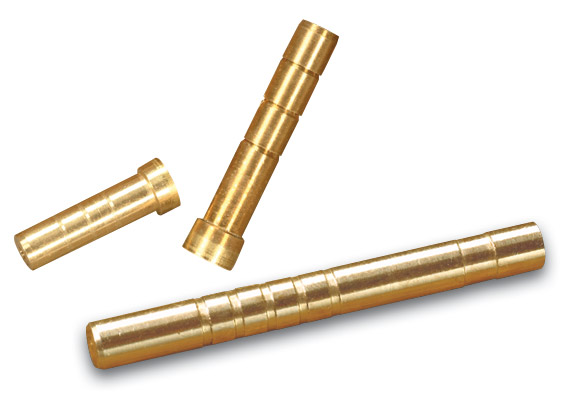
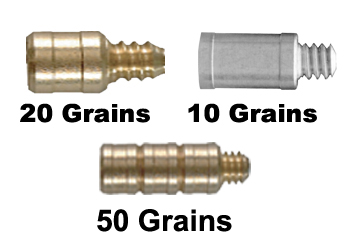
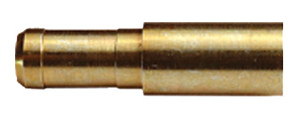
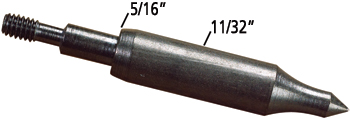
If you find a rugged, dependable glue-on broadhead that you want to use on your aluminum or carbon arrows, you’re in luck! Glue-on broadheads can also be mounted on broadhead adapters to work in carbon and aluminum arrows. Broadhead adapters are made out of aluminum or steel. The steel add extra weight to your set up and are very strong.

Steel Broadhead AdaptersBroadhead adapters
With the different adapters on the market, you have many options for mounting your glue-on broadheads on carbon or aluminum shafts.

Traditional, glue-on broadheads are in demand and for good reason. They’re solid, dependable, and lethal. Whichever broadhead mentioned above you chose, you now know that these tough, cut-on-contact broadheads are at home on any wood arrow, or even a carbon or aluminum arrow. So get some on your arrows now and go hunting. Try them, then tell your friends about them. See for yourself why you should be using glue-on broadheads for wood arrows.

Keep Hunting
Dale Karch & Todd Smith

For more information contact:
3Rivers Archery
PO Box 517
Ashley IN 46705

866-587-9501

[email protected]
or check us out on-line at 3RiversArchery.com

Tools for Making Self Bows

Rattlestick Selfbow Tutorial DVD
An age old tradition finds new life with today’s bowyer.

Handcrafting beautiful all-wood bows from staves split from tree trunks is an art. There was a time when we might have considered calling it a lost art. We remember reading an endorsement from the late Fred Bear when commenting to Glenn St. Charles about the bow building video Glenn had just produced. He said something to the effect that it was about time someone had documented the self-bow building process, and he was glad someone did it before the knowledge disappeared forever. That was nearly 20 years ago, and my how the times have changed! Now there are literally hundreds of thousands of people making their own bows from wood. The tide has turned and even many of those within the umbrella of “traditional archery” are coming full circle. They’re looking to find their roots, or at least the roots of the very bows and arrows they’ve come to love. They’re looking for a deeper connection to their sport, and with that connection comes an awareness of a simpler time. A time of carefully crafted “works of art,” bows and arrows that are so beautiful and so well made that they make you weak in the knees. It’s easy to understand why bowhunters are drawn to their past. It’s similar to the need to hunt… deep, primal, and natural.

There’s another group interested in this ancient and time honored art. Kids. We see youngsters, enthralled by movies like The Lord of the Rings, who decide they want to build their own bows and arrows. These kids normally start in on mom and dad to find them an archery shop they can check out. What an opportunity it is for mom or dad to encourage a great new hobby… something that takes effort, study, commitment, and responsibility. In other words, a perfect project to use as a growth experience for kids or grand kids. You may even want to consider it for your own youngsters.

If you’re going to build self-bows, you’re going to need tools. Yes the American Indians made them with nothing but stone tools. But be honest with yourself… how much time do you have? (Answer: Typically not the time it would take to use all stone tools!)

We’re going to discuss some of the more popular modern tools for making self-bows. (Self-bows are bows entirely made from one piece of wood.) It’s easy to get started building your own bows from wood but the many tools available may be a bit confusing for a newcomer to the craft. For that reason, we intend to describe the more popular tools for bow building to enlighten you on the benefits of each.

Once someone gets the passion for bow building, the tools used in the process become more than just tools. They represent bows yet to be made. A bowyer looks at a drawknife at a flea market, picks it up, and searches for signs of its past. He’s already drifted back in time to the workshop or farm where the tool was used. He’ll study the back edge to see if previous owners used it to split wood by pounding on the back with a hammer. He’ll look for chips in the cutting edge, and then, if it passes this inspection, you’ll see him staring off in the distance. This isn’t just a blank stare, no; they’re building their next bow with that drawknife. They probably already have the exact stave picked out they intend to work next. That’s when the decision to buy the tool is made… Bow making tools seem to almost have a life of their own, and bowyers value them highly.

For those looking to get started sooner, check out the Bowyers Bow Building Tool Kit. 3Rivers staff has put together this bow building kit for novice bowyers who do not know where to start. Great tools to get your feet wet, while not spending a lot to do it. It is a great starting point, and is highly encouraged that as you build more bows you expand to find the right tools for you.

Self Bow Starter Tool Kit

Great starter bow building kit for those needing a place to start on their first bow.

We’ll start with the most aggressive of the tools and proceed through our list. First on the list is the draw knife we’ve already mentioned. Called a drawknife because it’s designed to cut by drawing it toward you. The blade has only one bevel and as such, allows you to select bevel up, for more aggressive cutting, or bevel down for more controlled cutting. The drawknife is an indispensable tool. Few ever attempt to make an all wood bow without one, yet it’s really best used for the rough shaping of your bow and not for the more delicate work of final shaping and tillering. Many modern day bowyers are using antique drawknives they’ve picked up at garage sales and flea markets. Many of these old tools have plenty of life left in them and will do a great job. These older versions are shaped to facilitate the quick removal of wood from a bow stave. For bow building, we offer a unique French drawknife with round palm-filling handles rather than the elongated handles found on the antique varieties. It’s a smaller drawknife designed for more detailed work than the antique versions, it’s very well designed and lends itself perfectly to bow building They’re readily available and it’s easy to keep a supply on hand at all times.

Drawknife
The Drawknife is typically used for the rough shaping of the bow rather than detail work.

The short draw knife is a little gem that’s often overlooked, but is actually quite handy for all kinds of carving. The handles are in-line with the tool and offer you complete control of your depth and direction of cut. They can be particularly effective when working a stubborn spot in a bow belly that has grain running in opposite directions. Since the blade is beveled equally from both sides, it can be used in any orientation to your working surface. The short draw knife is a very handy tool to have in your workshop.

Short Drawknife
The Short Drawknife is effective for working out stubborn spots where the grain runs in opposite directions

Spoke shaves, as the name implies, were originally designed for shaping spokes for wagon wheels. They certainly have their place in the bow builder’s tool chest. When adjusted properly, they are capable of removing beautiful thin shavings in a very controlled manner. The design allows two-handed operation, which results in total control helps to eliminate fatigue. Spoke shaves are excellent shaping tools and are especially useful when the drawknife is too aggressive and it’s still too early in the shaping stage to switch to the cabinet scrapers. Can you get by without a spoke shave? Yes you can. Would you want to? We don’t think so. It’s a small investment for a tool that will last several lifetimes. We recommend the cast bodied Stanley flat based model for bow building

Spoke Shave
Originally designed for shaping wagon wheel spokes, the Spoke Shave is an excellent bow shaping tool.

Cabinet Scrapers are the ultimate bow building tools. If you’ve never used a metal cabinet scraper with a nice burr rolled on it, you’ve missed one of the true joys of wood working. Unfortunately, not everyone who acquires one of these tools knows about rolling the burr on them. If you’ve ever tried one without the burr, you were probably tempted to toss it in the trash can. Without a burr, trying to work wood with it is like trying to fillet a fish with a butter knife… it just doesn’t work. HOWEVER, once a good burr is rolled on these handy tools, we guarantee you’ll wonder how you ever got along without them. They’ll peel off the prettiest paper-thin curls of wood you’ve ever seen. Trees grow in wild shapes sometimes the grain may swirl, curl, and even change direction. For that reason scrapers come in several shapes, straight, curved, and gooseneck are the most common. Be sure to check out our 3-piece wood scraper set.

Cabinet Scrapers
Considered by many to be the ultimate bow building tools, Cabinet Scrapers come in many shapes, including straight and curved

You can’t discuss cabinet scrapers without mentioning the burnishing tool. Each tool is useless without the other. A good burnishing tool is the secret to good scraper results. What you need is a hardened steel burnisher tempered harder than the scraper so it can force the metal of the scraper edge into the proper hook-shape. “OK, but how do I do that?” You might be asking.

Burnishing a scraper is a straightforward process that once learned will take the mystery out of cabinet scraper usefulness forever. Think of your scraper as a rectangle of hardened steel about 1/32″-1/6″ of an inch thick. We’re going to dress-up the outer edges of the scraper first. First you must square up those edges. With a smooth file remove any burrs from the outer edge of the scraper. We’re striving for an edge with ninety-degree edges. Once you’ve removed all previous burrs with your file, polish all three surfaces of the edge with a medium to fine grit sharpening stone. When your edges are clean and smooth at ninety degrees, it’s time for the actual burnishing. Place the scraper in a padded vice with approximately one inch of the blade sticking up out of the vice and running parallel to the floor. Take your burnishing tool and with one hand on either side of the tool, push down on the top surface of the scraper as you push from back to front on that surface. Repeat many times, (10-20) each time bearing down on the scraper with the burnishing tool with a lot of force. Twist your wrists and visualize that you’re changing the shape of the nice ninety-degree square edges to a rounded mushroom-like shape. The bottom edges of this mushroom shape are actually sharp hook-edges of steel that, if shaped correctly, will perform like a tiny plane blade. They’ll peel fine delicate shavings of wood from your bow as you work it. Once you get your cabinet scraper properly “burred” it is a joy to use and it’ll become your “go-to” tool for working down the belly during the tillering process.

Burnishing Tool
The Burnishing Tool is an indispensable tool used in conjunction with the Cabinet Scraper.

A relative newcomer to the world of bow building is the Smooth Scraper. The idea here being that with your scraping blade mounted to a two-handed handle, you gain a lot of leverage and control. The hardened steel blade lasts and lasts while you scrape bow after bow, but this is not a tool for hogging a bunch of material off with a lot of pressure. It’s more of a shaping tool. Its design will let you know if you’re getting too aggressive with it. It’s definitely another tool that once you use it, you won’t want to be without it.

Smooth Scraper
The Smooth Scraper’s design offers a lot of leverage and control.

Another tool from the scraper family is the Mystic Scraper from Bernie Swank of Mystik Longbows. This tool comes ready to work. No burnishing required, its thick design utilizes more sharp corners than the more delicate burr-hook found on normal cabinet scrapers. That makes this a popular tool with self-bow builders everywhere.

Mystic Scraper
The Mystic Scraper from Mystik Longbows requires no burnishing.

Remember, you have to install your string grooves on the ends of both limbs, so the nock file is a necessity. There’s no better way to shape the string grooves than with a thin but fairly long round file. There’s no need to be any thicker than the string you’ll be using, so thin is good. Long is good too because the longer your file is, the faster the job will be for you. There are nock file handles available for them as well that help keep the file under your control and allows extra leverage. Even if you’re only looking to build a few bows, this is one tool you can’t afford NOT to have.

Nock File
The Nock File is used to shape string grooves on the bow.

If you plan on using bamboo to back a self bow you’ll need to look into a toothing scraper. The Toothing Scraper produces grooves on both of your gluing surfaces to allow the adhesive to expand and hold better due to the increased surface area. This tool is must have for the bow builder who wants to make bamboo-backed bows.

Toothing Scraper
The Toothing Scraper is a must if you plan to make a bamboo-backed bow.

An article on tools for building self-bows wouldn’t be complete without mentioning the Bow Horse. Modeled after the old “Coopers Bench” used by wheelwrights long ago when working on spokes for wagon wheels, the Shaving Horse lends itself perfectly to self bow building. With a little leg-pressure, the vice will hold your stave in place while you shape it with your tools. The shaving horse is quick, handy, and somewhat expensive, but certainly worth consideration. For those how are tight on space and budget, the StavePress Bow Vise holds wood firmly and gently, preserving the integrity of the wood grain as you work your stave. The StavePress will conform to the shape of your work piece, hold it firmly, and will not crush the wood fibers. While working with a rasp, drawknife, or other tools, you can now bear down as hard as you need to and the StavePress holds tight.

Shaving HorseStave Press
The Shaving Horse is modeled after the old Coopers Benches used by wheelwrights generations ago.
The StavePress was designed to firmly hold irregularly shaped wood such as rough staves, or hand-carved furniture pieces without harming them.

Many people use aggressive rasps to hog-off material. The Farrier’s Rasp Combo File fits that niche wonderfully. Designed offers an aggressive rasp on one side for removing material fast. Flip it over and you’ve got a course file for more controlled stock removal. Serious bowmakers will appreciate Dean Torges Bowmaking Rasp UBR10. This universal rasp is for shaping bows efficiently and accurately with total control due to dual handle design. Each cutting tooth is individually hand-raised with a mallet and chisel on a carbon steel blank, positioned in a quick cutting and non-clogging pattern to speed your work.

Farrier's RaspTorges Bowmaking Rasp UBR10
Farrier’s Rasp (above left) is larger in size to get work done faster, while Dean Torge’s Rasp (above right) is slimmer and dual handled for more controlled stock removal of wood from your bow stave.

Bow adhesives can be tricky, so we recommend keeping it simple. We suggest two types, Smooth-On EA-40 Epoxy, and Unibond. If you’re looking for only one adhesive, make it the Smooth-On EA-40 epoxy. It’s used almost exclusively on all fiberglass-to-wood style bows built in the United States. The bow laminations don’t have to be grooved, and bow failure is nearly unheard of. (Unless the bowyer doesn’t get enough glue in a joint, or uses too much pressure in his clamping system and forces too much of the glue out of the joint.) For you old timers, Unibond replaced Urac-185 for wood-to-wood applications and is superior to nearly any other glue in bow building applications. Some would argue that it’s even superior to Smooth-On EA-40 for wood-to-wood joints. Unibond expands as it cures so the surfaces you intend to bond must be scored. Unibond is not an epoxy. It can be used with or without the hardener. It sets up faster when you use the hardener and will do a better job of filling any voids in your joint. The bottom line is, if you want to carry only one adhesive, make it the Smooth-On EA-40 epoxy. If you’re open to the idea of a second adhesive, you can’t go wrong with Unibond. It’s very popular with the old-style bow building crowd.

Smooth-On EA-40 Epoxy
Smooth-On EA-40 Epoxy is a great bow adhesive.

With the proper mix of the tools mentioned above, you could start making your own bows. Some are more specialized than others, and some are indispensable. We hope we’ve shed some light on a somewhat confusing topic, and that you’re now comfortable in selecting the tools you’ll need to start your self-bow adventure!

Keep Hunting
Dale Karch & Todd Smith

For more information contact:

3Rivers Archery
PO Box 517
Ashley IN 46705
(260) 587-9501

[email protected]
or check us out on-line at 3RiversArchery.com

By: Dale Karch and Todd Smith

Learning More About Carbon Arrows

By: Dale Karch and Todd Smith

Dale Karch with Moose
Carbon arrow shafts offer a straight and sturdy alternative to wood arrows, perfect for taking down nature’s toughest trophies!

Like a thief in the night, carbon arrows have been sneaking away with an ever-growing share of the traditional archery shaft and arrow market. And why shouldn’t they? The carbon arrows of today are among the finest projectiles ever shot from a stick and string. They hold exacting tolerances for weight, spine, and straightness. They’re more durable than any other shafting material ever produced, and with the ‘wood-look’ patterns now available, they are very appealing to the aesthetic demands of traditional archers everywhere. With so many new people entering the sport of traditional archery, the need for quality, low-maintenance shafting is huge. With carbon arrows, there’s no need for straightening, sanding, painting, or sealing like on wood shafting. You just fletch, install inserts & points, and shoot. We predict it won’t be long till carbon arrows own the lion’s share of the total shaft and arrow market, including the traditional archery market.

Which types of carbon arrow shafts are the most popular with traditional archers? What are the unique needs of the traditional archer/bowhunter? Which styles sell best to traditional archers/bowhunters? Read on for the answers.

Everyone loves wood. Come on, you know it. The warm, natural look of wood is hard to resist. After all, if you’re shooting a beautiful custom wood bow, it only makes sense that you’d like your arrows to compliment the beauty of the bow, doesn’t it? The wood-look carbon shafts outsell all other patterns by a margin of about ten to one.

Traditional Only Wood Grain Carbon Shafting
Carbon shafts with a traditional wood look are best sellers.

Speaking of good looks, we need to insert a bit of an aside here. For carbon arrows to look ‘traditional,’ you’ll have to have feathers. Vanes just aren’t going to cut it for most of these guys. Most of them are shooting off the shelf anyway, so vanes do not work even if they wanted to use them. We find that 5″ Shield Cut TrueFlight Feathers in left wing sell the best.

TrueFlight Shield cut Feathers
Feathers offer a traditional touch to your carbon arrows.

The heavier the better! Traditional bows shoot arrows that are on the heavy side. This has historically been the largest obstacle, (and still is a concern), with shooters in traditional circles who wanted to try carbons early on. Fortunately, the carbon arrow manufacturers now offer heavier shafts that can be shot safely from traditional bows. How heavy is heavy? Look for a minimum of 8-10 grains per pound of bow weight. Think about it. We all know we’re not supposed to dry fire our bows. Yet some archers make a conscious effort to shoot the lightest arrow they possibly can, banking on the “speed kills” theory. They’re right too. Speed achieved like that does kill. It kills your bow! The dynamic recovery of the limbs on longbows and recurve bows casts heavier arrows better than ultra-light arrows. In other words, if the arrow does not weigh enough, it can’t receive all of the potential energy the limbs are attempting to transfer. This leaves an excess of energy in the limbs and creates an unpleasant “thump” (Or “slam” depending on the situation) when the limbs come home. The lighter the arrow set-up, the more like a dry fire the shot becomes. With light arrows the shot experience becomes harsh, the stress on the bow and string is dangerous, and your arrow ends up with much less penetrating power. Sounds like a bit of a “Lose-Lose” situation doesn’t it? Tests have confirmed the fact that longbows and recurve bows shoot heavier arrows best. Keep that in mind when shopping for carbon arrows.

Byron Ferguson Penthalon Heavy Hunter Carbon Shafts
Gold Tip Byron Ferguson Heavy Hunters are for the serious hunter looking for max weight for deep penetration.

Another feature to look for in carbon arrows is a smaller diameter, like 5/16″ or 9/32″. Since most wood arrows have a diameter of 11/32″ or 23/64″. Getting the arrow closer to the center of a bow helps with arrow flight and accuracy.

You may be wondering if any one company answers all of these needs. The good news is that we’ve found one! The tip of the hat goes to Easton Archery.

Easton Archery and 3Rivers Archery teamed up to offer the ever popular, Traditional Only carbon arrow. A 3Rivers Archery exclusive carbon shaft made from high-strength ICS® C2™ carbon composite fiber with a no-glare PhotoFusion™ wood grain finish for a superb look, and dead quiet when drawing your bow. Comes with white Easton Super nocks installed and aluminum inserts loose. 3Rivers sells them as bare carbon shafting and fletched. The fletched arrows have a white cap wrap and 3-fletched with 5″ shield cut TrueFlight feathers, one traditional barred, two solid colors (in red, white, yellow, or lime).

Easton Traditional Only Carbon Arrow
The Easton / 3Rivers Traditional Only® series offers five different shaft spines to match any bow.

Do you have any weight sets? No, not the dusty bench press and weights abandoned in your basement or garage. There are now a multitude of aftermarket weight accessories available for controlling the overall mass weight and even balance of your carbon arrows. Weight tubes, steel broadhead adapters, brass inserts, and other similar weighting systems are now available for carbon arrows.

3Rivers Arrow Weight TubesSteel Screw-in Broadhead AdaptersBrass Arrow Inserts
You can bump up the weight of your carbon arrows with weight systems such as 3Rivers Weight Tubes, Steel Broadhead Adapters, and Brass Inserts.

Weight tubes are thin plastic tubes that slide inside the shafts and are commonly available in three, five, and eight grains per inch weights for 5/16″ and micro 9/32″ arrow diameters. Solid steel broadhead adapters allow the use of glue-on broadheads and are considerably stronger than the aluminum type, and can themselves weigh up to 125 grains. They are an excellent choice for adding weight to your carbon arrows. Brass inserts replace your arrows included aluminum inserts. They are heavier, up to 100 grains, and more durable than the inserts that come with your arrows.

There is another popular weight-adding products offered by Gold Tip Arrows. It is an entire adjustable weight system comprised or weighted components that screw directly into special threaded inserts allowing you complete control of the total arrow weight. The Nock Adapters fit most carbon arrows and add 20 grains of weight to your nock end. These components are available from 10 to 50 grain increments and can open a wide world of fine-tuning to the arrow shooting ‘crank’ that lives for perfection in arrow flight.

Gold Tip Weight System Screw-in WeightsGold Tip Weight System Nock Adapters
The Gold Tip Weight System offers you complete control of your arrows’ weight.

Don’t forget good old screw-in points. They are now available in weights up to 300 grains! What an easy way to increase your arrow weight and test your arrow flight. Just screw in a heavier point. Be sure to pick up a test kit of field points when you are tuning your arrows.

Screw-in Field Points Heavy WeightScrew-in Field Points Test Kit
Screw-In Points are a great way to increase arrow weight and test arrow flight.

From heavy field points, to steel adapters, from weight tubes to point & nock weight systems, there are many ways for the modern traditional archer/bowhunter to customize their carbon arrows to match their bow type and hunting style. Spend some time investigating them, add them to your tackle box, and reap the rewards of personalized and optimized carbon arrows.

There you have it! The secrets to choosing and using carbon arrows with a traditional set-up. Go for a wood look. Make sure the shafts are heavy enough in mass weight. Consider at least a few selections of feathers. And check out some of the different weight systems.

You’ll soon discover that carbon arrows can offer the traditional feel and look, while also giving you a sturdier and straighter shaft. It’s the best of both worlds!

Keep Hunting
Dale Karch & Todd Smith

For more information contact:

3Rivers Archery
PO Box 517
Ashley IN 46705

260-587-9501

[email protected]
or check us out on-line at 3RiversArchery.com

How to Choose a Youth Archery Kids Bow and Arrow Set

Kids love shooting youth bows and arrows. A youth archery bow and arrow set can be the greatest gift a kid ever receives. Put a bow and arrow in a kid’s hand and watch them smile! It can be a life-changing event.

The thing is, it’s confusing getting them started. What’s a parent to do? There are so many questions. What kind of bow should I get? Which arrows do I need? What’s best for my kids?

In a Hurry?
The kids bow and arrow sets below are a snapshot of some of our best youth archery sets and their suggested age groups.
You can either click on the image, item number, or name below to go directly to our product page for that youth bow and arrow kit or continue down the page for more details.


Child's Bow and Arrow Set

2462X
Child’s Bow and Arrow Set

Recommended for ages 3 to 4 years old
1st Shot Junior Archery Set
2379
1st Shot Junior Archery Set
Recommended for ages 4 to 7 years old

Easton Beginner Archery Set

2377
Lil’ Indian Bow and Arrow Set

Recommended for ages 7 to 10 years old

3Rivers Youth Recurve Bow & Arrow Kit

2450X
3Rivers Youth Recurve Bow & Arrow Kit

Recommended for ages 10 to 18 years old

Looking for Help Choosing a Kids bow?

You’ve come to the right place. 3Rivers Archery has been helping parents get their kids started in youth archery for more than 30 years. We know kids. We know bows and arrows, and we’re going to make picking out the right bows and arrows for your kids easy.

Is My Kid a Right or Left Handed Archer?

Bows are either right handed or left handed an how do you know if your child shoots a bow left handed or right handed? A right handed bow shooter pulls the string with their right hand. A left hand shooter, their left.

How Do I Determine If My Kid Is Right or Left Eye Dominant?

One important thing to check for when choosing a bow and arrow set for your child is determining which of their eyes is their dominant one. We all have a dominant eye. Have your child stand face-on to a wall about ten feet back and with both eyes open, have them point at some spot, a clock for instance. While still pointing, have them close their left eye. Is their finger on the spot? If so, the are Right Eye Dominant and should shoot right handed if they can. If, when they close their left eye, their finger is not on the spot, have them open their left eye and close their right. If the finger is now on the spot, they are left eye dominant and should shoot left handed if possible.

Which Youth Bow and Arrow Archery Set For My Kid?

Age is a big consideration when picking out an archery set for a kid. As is the actual size and strength of your child. Our recommendations here are for kids of average size, strength, and build. If your child is especially big or strong and you find they are near the end of one age group and the beginning of the next, you might want to go up to that next age group for him or her.

We have just the right set for you among these listed below.

Our Child’s Youth Archery Set, (shown below) is the first bow and arrow set most kids start with. You may even remember having one of these “toy” archery sets when you were that young. They’re a lot of fun and perfect for kids between the ages of 3-4 years.

Child’s Archery Set

The bow works for both right handed and left handed shooters and pulls about one pound. The arrows have suction-cups on the front for safety. (We used to let our two and a half year old son shoot our front door and refrigerator with his.) Even though it is a “toy” bow, it should always be treated with respect. Adult supervision is required and all children who are going to shoot this (or any) bow and arrow set should be taught proper bow and arrow safety.


Next in line is our 1st Shot Junior Youth Archery Set (shown below). It’s for kids between the ages of 4-7 and includes a fiberglass bow that allows either right handed or left handed shooting and pulls approximately 8-12# when drawn back 14-16″. Also included are: Two Safetyglass™ arrows, a vinyl belt quiver (holder of arrows), and a shooting tab (A piece of “leather” that protects the shooter’s fingers from the string). These arrows have target tips on them and could cause damage if shot at anything fragile.

(Adult supervision required)

1st Shot Youth Archery Set

Again, the 1st Shot Youth Archery Set is suggested for kids between the ages of 4-7. This solid fiberglass bow is very tough and should last through many years of use allowing you to “hand it down” from child to child.


If your kids are between the ages of 7-10 our Lil’ Indian Youth Archery Set is just what you need (shown below). The set comes with a 50″ solid fiberglass Sentry recurve bow that allows either right handed or left handed shooting and pulls approximately 15# when pulled back 24″. Also included are: Three feather fletched fiberglass youth arrows with steel target points, a belt quiver (belt required), an armguard, a bullseye paper target, and a shooting tab. This archery kit comes with everything need to have your child shooting 10 minutes after your package arrives!

(Adult supervision required)

Lil’ Indian Youth Archery Set


For older kids, of the 10-18 range, you’ll need to start paying attention to the weight of the bows and have a feel for how strong your kids are. You never want a bow that’s too strong for them to pull, but you want one that is heavy enough to make them work at pulling. Our 3Rivers Youth Archery Bow Kit was designed for kids in the 8-18 year range. It’s available in right or left handed models in weights of 24# (Ages 8-12) and 36# (Ages 12-18). Please note that some kids between the ages of 16 and 18 are ready for adult bows. This youth archery page is targeting kids who have never shot archery before and are just getting started. When you get into the higher age brackets you have many more adult bows to choose from.

The 3Rivers Youth Archery Bow Kit (Pictured Below) comes with everything your child needs to get started shooting bows and arrows. These kits come with a nice take-down (comes apart in three pieces for storage or travel) recurve bow with a warm hardwood riser and laminated hardwood and fiberglass limbs. Also included are: A bow stringer, a belt quiver (belt required), three durable 27½” feather fletched fiberglass arrows, an armguard, a shooting tab, an arrow rest, 25″ x 25″ paper FITA target, and a bow case. Once your kids graduate from this last kit, they are ready to move into the adult longbows and recurves.

(Adult supervision required)
3Rivers Youth Recurve Bow Set for ages 10 to 18 years old


Basic Longbow and Recurve Set-Up

by Dale Karch and Todd Smith

Dale and Teresa outdoors shooting their Tomahawk longbows
Dale Karch of 3Rivers Archery

Imagine you just picked up a new bow and it’s the first longbow or recurve you’ve ever owned. How do you get started? What do you do first? What steps do you take to get your bow out and start shooting? Read on for the answers!

For the scope of this column we have to assume that your shooting form is solid. The one constant in all of the set-up and tuning tips that follow is that your form is not flawed. If we can agree that the form is good, then the symptoms and cures outlined below will be valid.

This entire tuning system is based on the adjusting of the arrow, string, and bow to achieve the desired results. The challenge is getting all three factors working in harmony, producing shot after shot of perfectly flying arrows. Once you’ve accomplished that, you’re there!

Most traditional longbows and recurves are shot right off the shelf; meaning they have no adjustable rests or plungers. They are, however, somewhat adjustable if you know a few basic tricks. With these kinds of bows, it may be easier to tune the arrow to your bow, but we’ll share with you some of the techniques traditional archers use to help tune the bow to the arrow as well.

If your bow comes to you ready to shoot, consider yourself lucky. Most new bows need to have an arrow rest and arrow plate installed before you shoot them. The arrow rest is attached to the arrow shelf of your bow and serves as a soft, smooth surface for your arrow to launch from. On the sight window side of your bow, just slightly above the arrow rest is where you’ll install an arrow plate. Like the rest, this arrow plate provides a soft, smooth surface for the edge of your arrow to slip around as it clears the sight window. Before you even string your bow, install your arrow rest and arrow plate.

Arrow Plate and Arrow Rest

When purchasing a new bow, find out if it comes with a bow stringer. If it doesn’t, make sure you get one. Always use a commercial bow stringer when stringing and unstringing any bow. If you do, you’ll avoid potential physical danger to yourself and your bow. Your grandfather may have used the “step-through” method, but that is totally unsafe for you and the bow, and should NOT be done, even in a pinch. Using a stringer is not really an option; it’s simply something you must do! We can’t stress that enough.

(Click Arrow for Bow Stringer Demo)

There are quite a few bow stringers to choose from and they’re all pretty good. We recommend the rubber pad pressure type like the Selway Limbsaver Recurve bow stringer or Selway Limbsaver Longbow bow stringer. Both products use a moveable rubber pressure pad on the top limb and a non-moving cup or pocket on the lower limb. Follow the directions included with the stringer, and you should have no problem stringing or un-stringing your bow. They’re designed for both longbows and recurves, so with one bow stringer you’ll be set for any bow you might encounter.

Using a Bow Stringer to String your bow
Stringing a longbow

When you buy a new longbow or recurve, chances are the bow has never been strung before. Or, if it has been strung, that it hasn’t been shot much. New bow strings, especially the Flemish-twist style, will stretch. We recommend that you string your new bow and either let it sit overnight (not recommended for self bows) or take it out and shoot it straight away. This will cause the string to settle-in and stretch about as much as it’s going to. As a bow string stretches your brace height and nocking point will change. Bear that in mind that when “shooting in” a new string. Once the initial stretch is gone, your string should be much more consistent and you should notice little if any additional stretching.

Note: Always carry at least one spare pre-stretched and set-up string with you. If you accidentally cut or break a string, it’s good to know you have one ready to go that shoots just like the old one.

Bow Brace Height
Bow Brace Height

Now you need to get your brace height figured out. What is the perfect brace height? The true answer is, “Wherever your bow shoots best.” It sounds too simple, but it’s true. You experiment to find the best brace height for you and your set-up. It may even change if you change to different arrows. You have to actually shoot arrows from the bow to see how the changes in brace height affect your arrow flight. Here are some guidelines…

Longbows generally are never braced lower than six inches and recurves rarely less than seven. Many modern longbows like to be braced at or around seven inches and recurves, depending on design, between seven and nine inches. Brace height is determined from the deepest portion of the grip.

Setting the Nock Point

Note: You can measure your brace height from whatever point on the bow you wish, back to the string. Some folks measure from the middle of the sight window, some from the belly side of the arrow shelf, and some from the deepest portion of the grip. If you’re discussing brace height with someone, make sure you’re both on the same page. Regardless of where you measure from, brace height is a critical measurement for tuning your longbow or recurve. For measuring brace height, nothing beats a T-Square.

Checking Brace Height with a T-Square

Anyone shooting traditional bows needs a T-Square for both measuring brace height and for measuring string nock location. It is a safe bet, that there is a T-Square found in nearly every archery tackle box in North America. We’ve always used the aluminum version here at the shop. It’s easy to use and lasts for generations. Back to brace height…

If you brace a bow too low, the feathers will hit the shelf before the nock leaves the string. The arrow actually stays on the string past the brace height measurement. It travels forward a bit before pulling itself loose. If the feathers come into contact with the shelf before the nock clears the string, your arrow flight will be erratic. You’ll be prone to having the string slap your wrist with ultra-low brace heights too. The bow will be a bit smoother and pull a little less at the lower brace heights and conversely if you short-string your bow, the weight will increase slightly and the angle of string pinch will increase. You can’t hurt a bow with a high brace height, but you can hurt performance. The bow will pull harder and the short string will force the limbs to stop short in their travel path, robbing you of energy. You should be looking for the “sweet spot” – that special brace height where the bow feels good during the draw and release, and your arrow flight is crisp, clean, and straight.

It’s best to start at the manufacturer’s suggested brace height and twist up and down from there. When using Flemish twist bow strings, you can twist the string tighter to shorten it, thus raising the brace height or you can remove twists to lengthen it, lowering the brace height. Caution: You must be careful when removing twists from a Flemish twist string. These strings rely on opposing twists to stay together. If you remove too many twists, the string loops may unravel and your string may come apart. It can be re-twisted, but many archers don’t know how to do that.

Once you have your brace height figured out, you need to get a nocking point in place. A nocking point allows you to nock your arrow at the same place on the string every time. You can use the common brass crimp-on nock sets, or you can tie on a nocking point using regular string material.

For installing brass nocking points you’ll need a set of nocking pliers and, of course, a package of brass nock sets. They’re easy to install and easy to move as you’re expermimenting to find your best nocking point location. Tip: When experimenting with different nock locations, don’t crimp the nocking point too tightly. Crimp it just enough to keep it in place until you decide if you have to move it again. Once you get it where it needs to be, crimp it on firmly. After that, you don’t want it moving on you. How about a few tips on figuring out where the best spot for the nocking point is?

As a general rule, if your arrows are porposing (wagging up-and-down) during flight, you have a nocking point problem. We find that most traditional bows like to have the nocking point approximately 1/2 inch above the shelf. Start by attaching your nocking point 1/2 inch high. This means that the bottom of the brass nock is 1/2 inch above the arrow shelf. Your T-Square makes this measurement easy. Your arrow is then placed on the string under the brass nock and you shoot. If your arrow flight looks good, congratulations!

If you see an up-and-down “porpoising” of your arrows, you’ll need to try raising and lowering your nocking point until the flight is straight, and really all you see is your arrow nock flying straight away from you.

If the arrows are wagging side-to-side (fish tailing), it’s an issue of spine (where the stiffness of your arrow does not match the bow weight or bow design). Fish tailing can be manipulated by trying points of different weights. We offer field points from 70 grains all the way to 250 grains. Adjusting point weight is an easy test for figuring out what’s wrong with your set-up. We even have test kits available with several point weights in one package. With a test kit you can shoot your arrows with several different weight points until you find the one that flies best. For instance, if your arrow looks like it wants to go straight but always impacts the target to the left of where you’re shooting, it’s too stiff (For a right-handed archer, opposite for a left-handed archer). Test this by switching to a heavier point. If by increasing the point weight you see your arrows impacting more directly in line with where you’re aiming, then your arrows are a bit stiff and needed the extra weight to make them flex more. Likewise if your arrows are more or less jumping out of your bow and impacting to the right of where you’re aiming, try a lighter point. The arrow may be too weak and need to be flexed less to get it to shoot where you’re looking.

Note: Once you find the right combination, record it in a notebook so you can always refer back to it. It’s a good idea to keep a record of each of your bows and the set-ups and products that work best with it. It’s recommended that you record each of your batches of arrows as well. It’s not always easy to remember how you built a particular set. Also, this way, if you find a combination that works extremely well, you’ll know how to duplicate it.

Another method of defeating fishtailing is to install a small shim of leather or even a small piece of toothpick behind the arrow plate to push the arrow further away from the sight window. If this helps clean up the arrow flight, the arrows were too weak and needed to be pushed out a bit from the sight window.

Another facet of setting up a new bow is how shooting the bow feels during and after the shot. Recurves especially benefit from both string silencers and brush buttons. String silencers dampen the after-the-shot string vibrations and quiet the string down fast. Longbows are typically much more quiet to begin with, but a small string silencer on them can make the shot feel better to the archer as well.

Bow String Silencers Installed
Bow String Silencers

Recurves also have an issue with brush, sticks, grass, and twigs getting caught between the limb and the bowstring. For that reason every recurve bow string should have brush buttons installed on it. They come in two sizes and either size works well. When deciding on which size to use it’s really just a personal preference.

Brush Buttons
Brush Buttons

One last bit of gear that is often overlooked when thinking about setting up a new bow, is a quality bow case. You’ve invested your time and money into this bow, right? Doesn’t it make sense to protect it? There are many cases to choose from. On the high end there are hard cases, even suitable for airline travel. In the middle you’ll find nice fleece-lined nylon cases that do a very good job. And finally, at the very least, there are knit and fleece bow socks. For as lightweight as they are, they do a fine job protecting your bow. Whichever way you go, remember, every bow deserves a case. You want a lot from your bow, so keep it safe in its own bow case.

3Rivers Travel Bow Case

With the techniques outlined above you should be able to get any traditional longbow or recurve shooting accurately in short order. Familiarize yourself with these techniques, think about how they interrelate, and you’ll have some “ah-ha” moments. Once you understand the relationship between bow, bowstring, and arrows, you’ll have what it takes to have a perfectly matched set-up at all times.

See all available Longbows and Recurve Bows here at 3Rivers Archery.

For more information contact:

3Rivers Archery
PO Box 517
Ashley, IN 46705

866-587-9501

[email protected]
or check us out on-line at 3RiversArchery.com

October Hunting Tips

film-canisters-cotton-balls-deer-scents
Film canisters filled with cotton balls socked in deer scents

By Dave Echterling and James McKenzie

October is a favorite time of year for most bowhunters. In addition to hunting, many of us spend every spare second in the woods looking for rubs, scrapes, and general signs. There is nothing better than a fall afternoon in the woods.

Deer hunting is an ever changing challenge. Just because one spot was good last year does not necessarily mean that it will be a productive area the next. Remember, deer patterns can change rapidly. Just as soon as we think we have them figured out, hunting pressure can cause deer habits to change very quickly. Early gun seasons before bow season and youth firearm seasons can contribute to this change in deer habits. So it’s important to keep your options open, be observant, and not get complacent.

Let the wind dictate your stand choice for a morning or evening hunt. Always be on the downwind side of travel routes. Never risk sitting in a stand with a questionable wind. If the wind is wrong wait for more favorable conditions. On days with unfavorable wind conditions, you might want to find a new stand location or set up a ground blind. Fence rows can be ideal locations for ground blinds, as they are frequent travel paths for deer. Even a perch in between the branches of a downed tree can work well in a pinch. Always be on the lookout for new stand locations. As deer habits change do not be afraid to adjust with them.

Another thing you might consider is to not use a cover scent. A Hunter’s Hack that some have found works very well, is to carry three film canisters, each having a cotton ball in them soaked with doe urine. Place each one about ten yards from the tree, always in a shooting lane because there is a probability that a deer will stop and smell one or two. This will hold their attention and possibly allow you to get a shot off. It is also something new, and deer, being curious animals, will tend to check it out. When you leave the woods take the canisters with you. You may find this is a lot better than placing scent on the ground and leaving it, or using it as a cover scent. Even if it does cover your scent you still have a smell and deer will stop to investigate rather than fleeing.

It is good practice to always carry a blunt tip. When you get ready to leave your tree stand, pick a leaf to shoot at. This keeps you in tune, provides confidence, and improves your shooting from an elevated position.

If it’s a rainy day with a swirling wind try hunting from the ground and spend some time stalking. The woods is noisy during a rain shower and deer tend to typically take cover at these times. The noise also helps drown out any sounds you make. Cornfields are also great during windy and rainy weather. You just need to slowly move from row to row looking both ways one row at a time. Always use this time for a little scouting too. See where the deer are moving and if patterns are changing. You might even take the opportunity to still hunt on the way to your stand locations. You never know what you might encounter. The important thing is to not limit yourself.

As deer season progresses toward the rut, the ability to be flexible and think outside of the box can make or break your hunt. But whatever your preference, the most important thing is that you get out in the woods, enjoy nature, and experience the hunt.

Becoming an Archery Coach

Archery Training Booklets

Recently I completed the USA Archery Level 2 Archery Coach certification course. My love of traditional archery inspired me to take the course. I wanted to be ‘certified’ to teach archery, and be able to help others to enjoy archery as much as I do. Though I have literally been shooting a bow and arrow as long as I can remember and have been working in the traditional archery industry since the mid-90s, I have always felt that I was ‘missing something’ that I could refer to as being qualified to teach others how to shoot a bow and arrow. Do not get me wrong, I am very comfortable tuning bows, arrows, or any other archery gear, but when someone says, “What am I doing wrong” when I’m shooting on a 3D target course with them, I hold back a bit with my opinions. I consider myself a decent shot, and have plenty of experience shooting a bow, but I didn’t feel like the right person to be telling others how to shoot all the time. Though I have done my best through the years, and I do hope that I have helped fellow archers.

To become an archery coach I first went to the USA Archery Web site. I found an entire section of the site devoted to coaching. I learned about the different levels of coaches and requirements, and decided on a level two coach certification. I believed my background and lifetime of experience would advance me past a beginner level 1. The level two course covers teaching intermediate archers, as well as teaching level 1 coach certification, which I hope to do with the staff of 3Rivers Archery.

It is relatively easy to take the coaching course. The level two course (at the time I took it) required a background check (since you will be qualified to work with children), taking the SafeSport online class (focuses on preventing abuse in sports), and being a member of USA Archery or NFAA. Once these prerequisites were met I easily found a course in my area and signed up.

I was pleasantly surprised to learn my class had only three other students. This offered a lot of personalized learning and plenty of discussion about each topic covered. Everyone else at the class was an archery coach on one level or another, which gave me many ideas on how to apply myself as an archery coach. The class was 12 hours long spread out over two days. We had hands-on learning with shooting bows and taking turns being a coach for another student. I really did enjoy the range time as learning about something and doing it are very different things. We covered many topics, from warm up techniques, in-depth coverage of shooting form, coaching positions, setting up and maintaining archery gear, and tons of archery skills and drills to help teach archery students. This is a brief overview, but in the near future I intend to post more articles about what I learned and how to apply it.

The class was a great experience for me and I look forward to applying what I learned in my work when talking with fellow archers on the phone and online. I even hope to get involved with local archery programs, sharing my new knowledge with others. I plan to check with local churches and schools about starting archery classes, or even offer private lessons myself. Time will tell.

By: Johnathan Karch

Sizing Charts for Archery Gloves, Tabs, Hats, and Clothing


3Rivers General Sizing Charts

How to Size our Products
 

Shooting Gloves/Tabs
Extend your hand flat. With a measuring tape, wrap it around the hand just
below the knuckles and fingers, but above the thumb. Apply the measurement to
the chart below.
 
Berlin Style Gloves
If Hand Measures Men’s Sizes
7.5″ – 8″ = Small
8.5″ – 9″ = Medium
9.5″ -10″ = Large
10.5″-11″ = X-Large
Damascus Gloves
If Hand Measures Men’s Sizes
8″ = Small
9″ = Medium
10″= Large
11″= X-Large
 
For our other manufactors’ sizes, they fall similar to above charts. If a size
you order does not fit, 3Rivers 100% Satisfaction Guarantee allows you to return
the glove/tab for the correct size.
 
Hats/Headwear
Measure around the largest part of your head, just above the eyebrows. Try to measure where you would like the hat/headwear to sit when wearing it.
 

Fred Bear & Art Young Hats

Small Medium Large X-Large
Size 6 3/4"-7 1/8" 7"-7 1/8" 7 1/4"-7 3/8" 7 1/2"-7 5/8"
Head (Inches) 21 1/8"- 21 1/2" 21 7/8"- 22 1/4" 22 5/8"- 23" 23 1/2"- 23 7/8"
 

Clothing/Gear
Standard unit of measurement to clothing you wear daily. Sitka gear is not form fitting, but is not loose fitting. They are exact to size. If you like a baggy fit, we recommend ordering one size larger.
 
First Lite
Medium Large X-Large 2X-Large
Chest 39"- 41" Chest 42"- 45" Chest 46"- 48" Chest 49"- 52"
Waist 31"- 33" Waist 34"- 36" Waist 37"- 40" Waist 41"- 44"
Inseam 29"- 32" Inseam 32"- 34" Inseam 32"- 35" Inseam 34"- 35"
 

Art Duffy California Blacktail Deer

2013ArtDuffyBlacktail

Art Duffy harvested this nice Blacktail on opening day in California. Art tells us: “I arrowed this, my first Columbian blacktail deer in velvet with my 67# Kanati longbow at 12 yards using a Beman MFX 340 arrow and Ashby Broadhead. The arrow stuck in the ground and the deer barely reacted before going for a 30 yard half circle and collapsing.”

Equipment Used:
Kanati longbow 67#
Beman MFX Classic 340 arrows
Ashby Broadheads

3-Rivers Hat

Rich and Chase Niblock Africa

Rich and Chase Niblock had a very successful trip to Africa recently. Chase harvested many local animals, including wildebeest, warthog, impala, and more. Rich took a nice zebra. Nice job, guys!

Equipment Used:

Chase – 60# 60″ Dalaa Takedown Recurve

500 Traditional Only Arrows

Muzzy broadheads

2-Blade Magnus 125

Rich – 62# 62″ Dala Takedown Recurve

2-Blade Magnus

340 Traditional Only Arrows

2012NiblocksAfrica

Back to Top