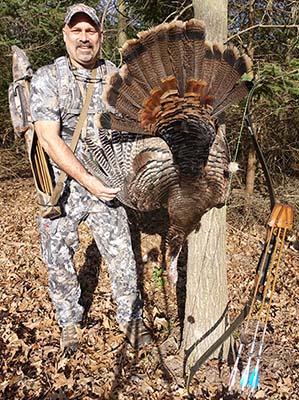
.jpg "Welcome to the 3Rivers Archer's Den")
How to Load a Traditional Muzzleloader
For enthusiasts of historical firearms and traditional shooting sports, using a black powder muzzleloader provides a unique experience and a connection to the past. Loading and firing these classic firearms requires a certain level of knowledge and skill to ensure safety and accuracy. Whether you’re a beginner or a seasoned shooter, this guide will walk you through the essential steps to properly load a black powder muzzleloader and enjoy a rewarding shooting experience.
Step 1 – Safety First:
Before we delve into the loading process, safety should be the primary concern. Always treat any firearm with the utmost respect, and adhere to strict safety practices. Keep your muzzleloader pointed in a safe direction, and only load it when you’re ready to shoot.
Step 2 – Gather Your Supplies:
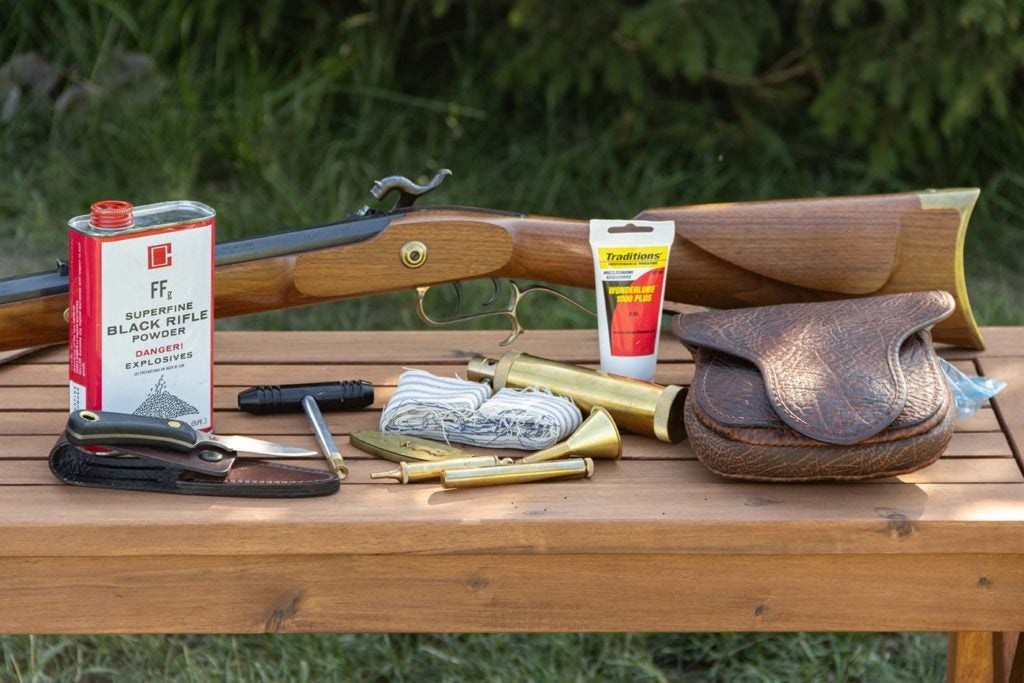
To properly load a black powder muzzleloader, you’ll need a few essential items:
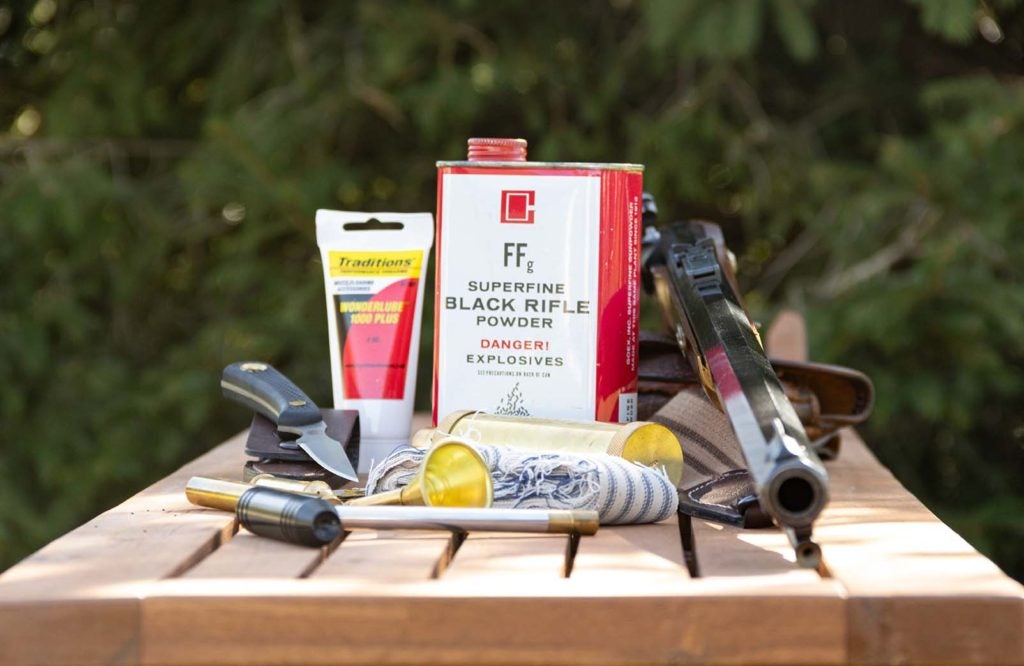
Black powder: Select the appropriate grade of black powder recommended for your specific muzzleloader.
Projectile: Choose the appropriate size round ball for your firearm.
Patching material: Usually made of cotton or synthetic materials, the patch wraps around the projectile to ensure a proper seal and better accuracy.
Lubricant: Lubricate the patch to reduce friction during loading and improve consistency.
Powder measure: Use a powder measure to achieve consistent powder charges for better accuracy. Do not exceed the maximum load per your firearms manual.
Ramrod: The ramrod is used to seat the bullet and powder in the barrel.
Capper (optional): For cap-lock muzzleloaders, a capper can make it easier to place percussion caps on the nipple.
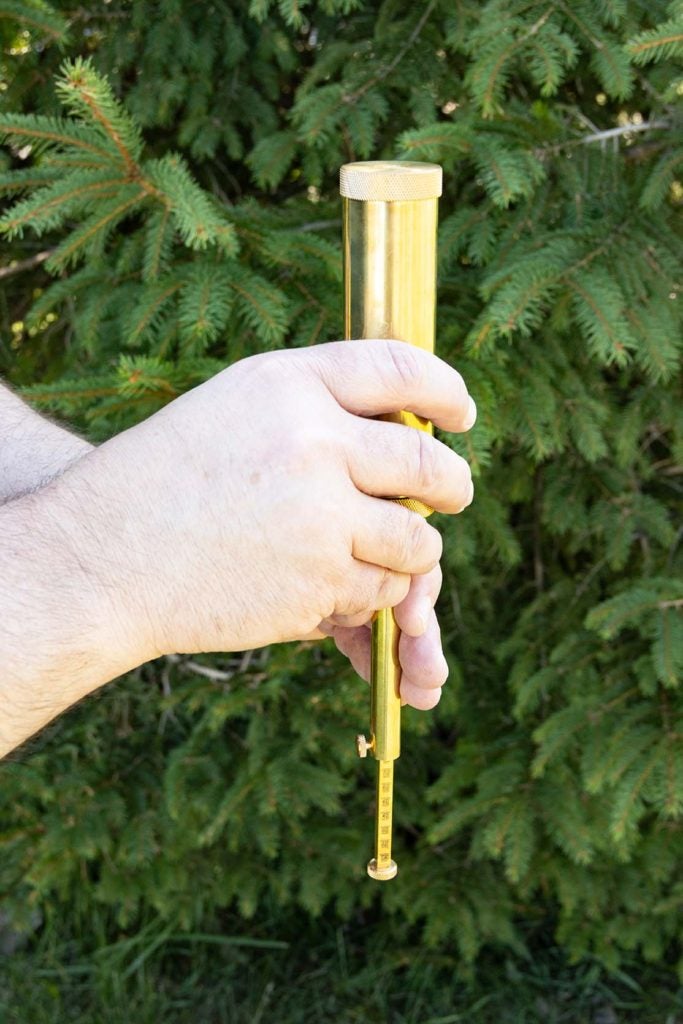
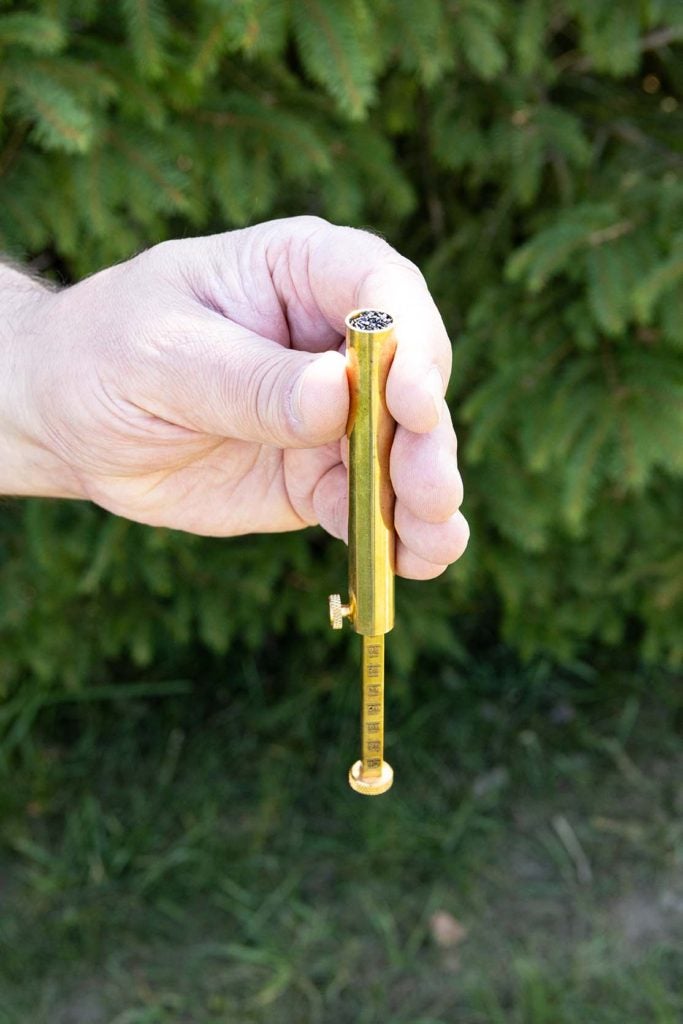
Brass Priming Flask: For flintlock muzzleloaders, a priming flask dispenses priming powder from the spring-activated spout into the pan.
Step 3 – Clear the Muzzleloader:
Ensure your muzzleloader is not loaded before beginning the loading process. Point the firearm in a safe direction making sure there isn’t any percussion cap installed and run a cleaning patch through the barrel to ensure it’s clear of any obstructions or residue.
Step 4 – Measure the Black Powder Charge:
Using a powder measure, carefully measure the desired amount of black powder according to your firearm’s recommended load.

It is crucial to avoid overloading, as it can result in dangerous pressures and potential damage to the muzzleloader.
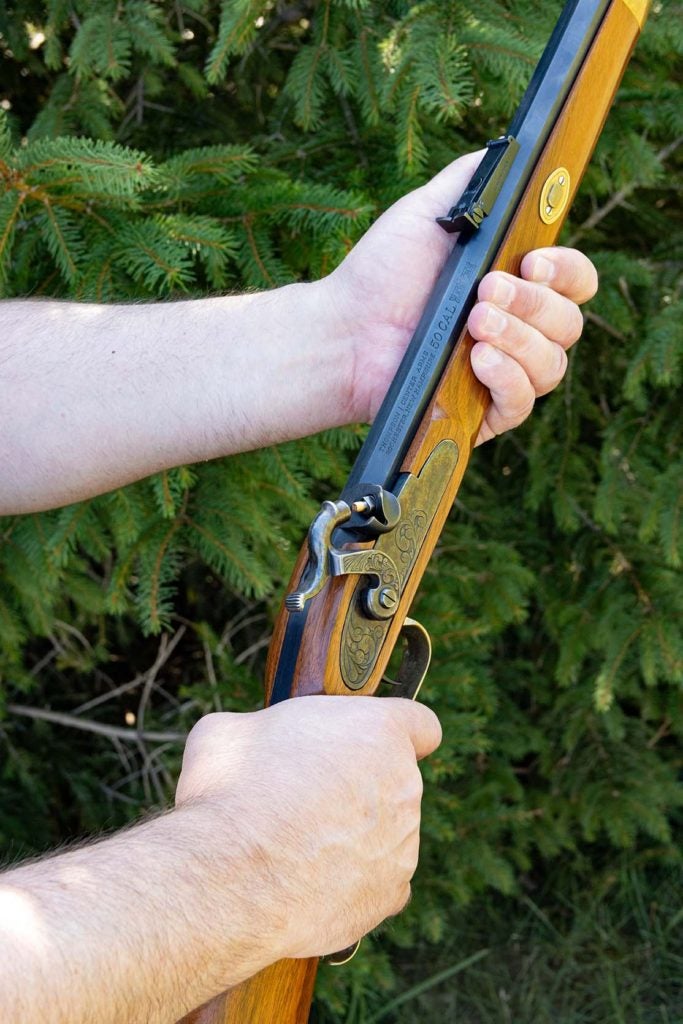
Step 5 – Load the Projectile:
Wrap the lubricated patch around the bullet or ball.

Place the patched projectile on the muzzle of the firearm, making sure it sits squarely.
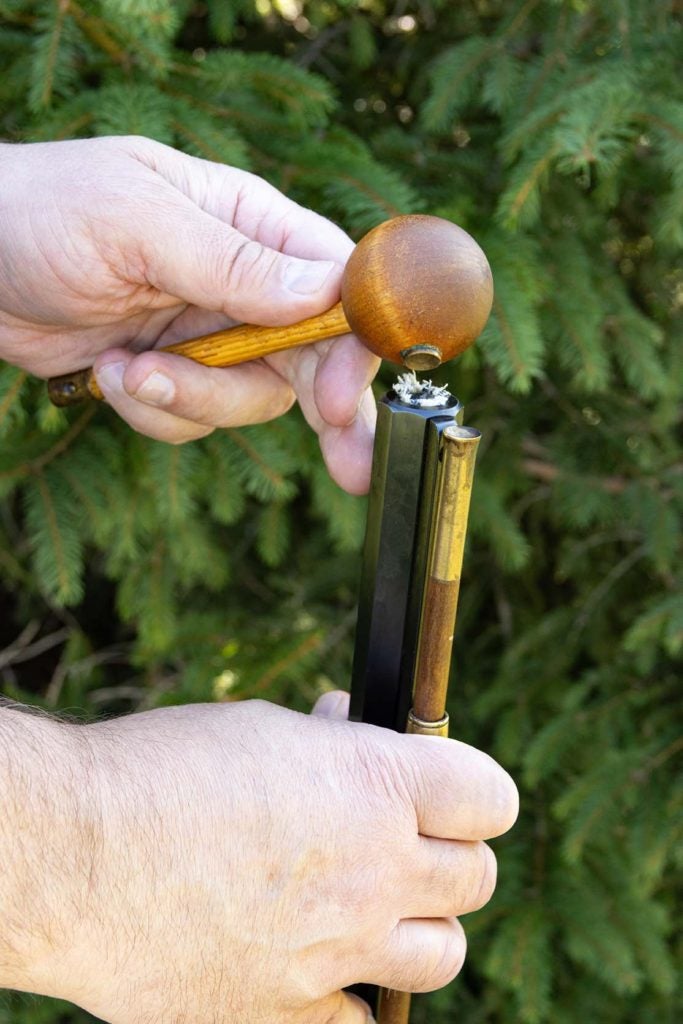
Using a ball starter, gently push the projectile into the barrel.
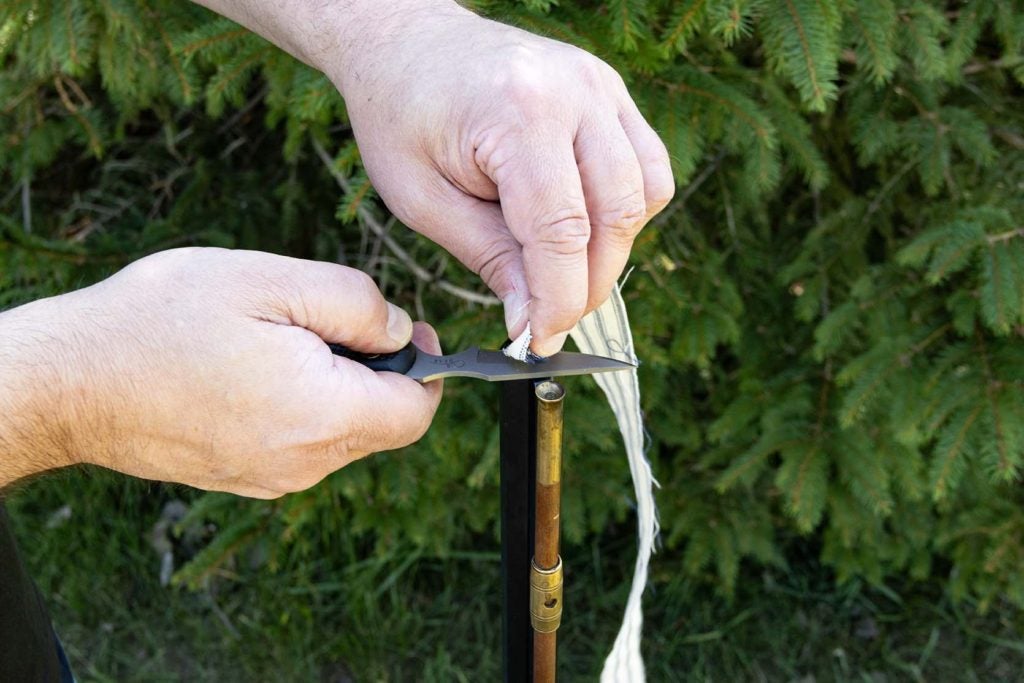
Cut off the top of the patch using a patch knife.
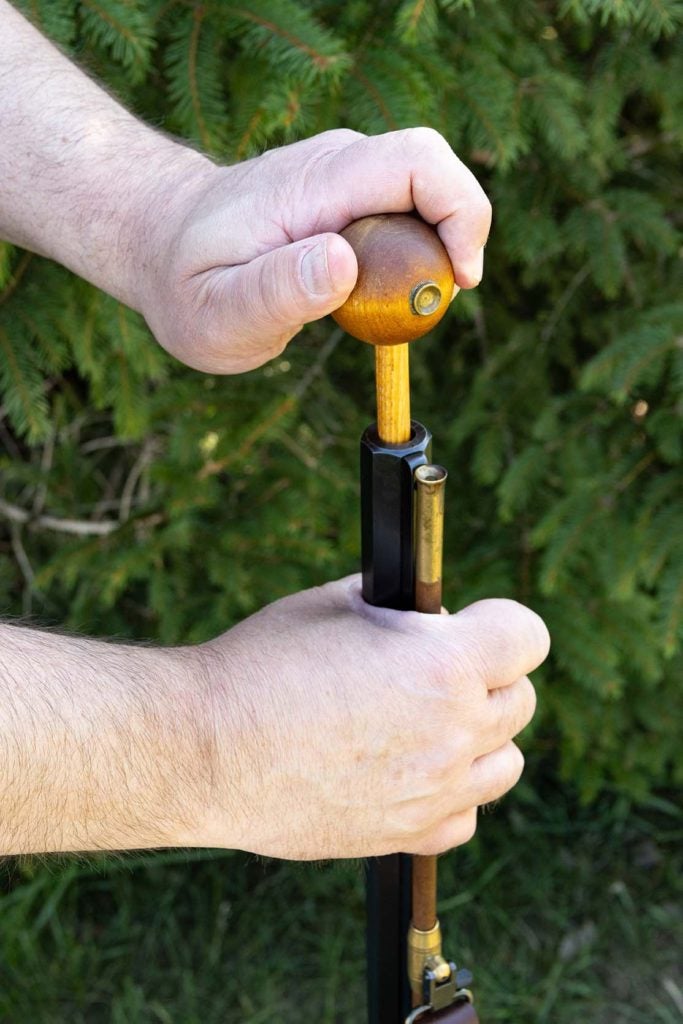
Using the long end of the ball starter, push the round down a few inches.

Next, using a ramrod, push the round down the barrel until it seats firmly on top of the powder charge.
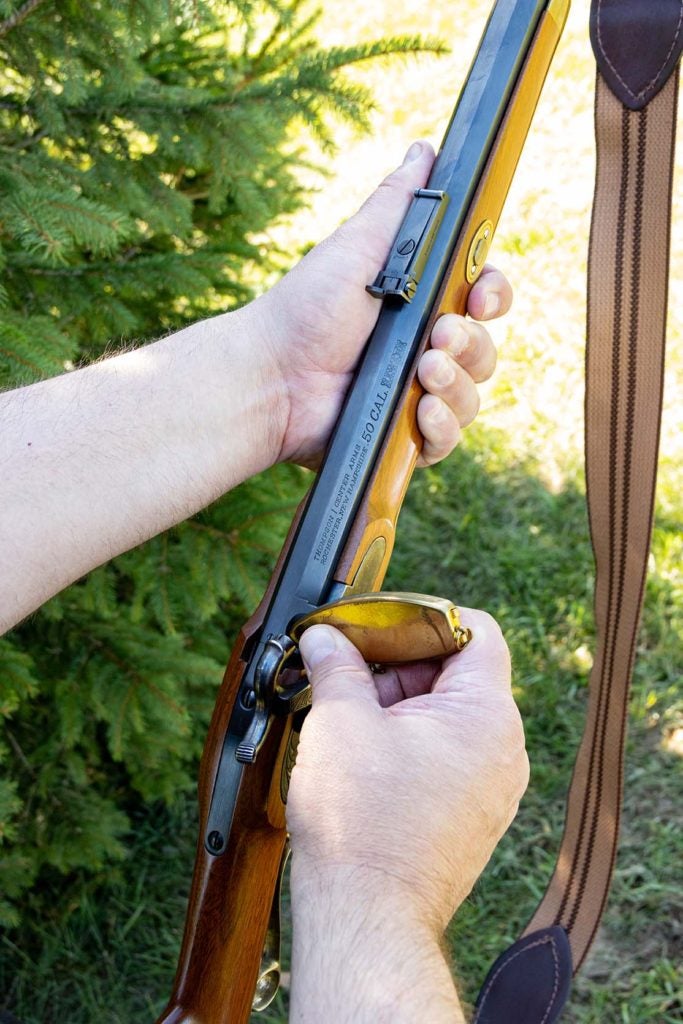
Step 6 – Seat the Projectile:
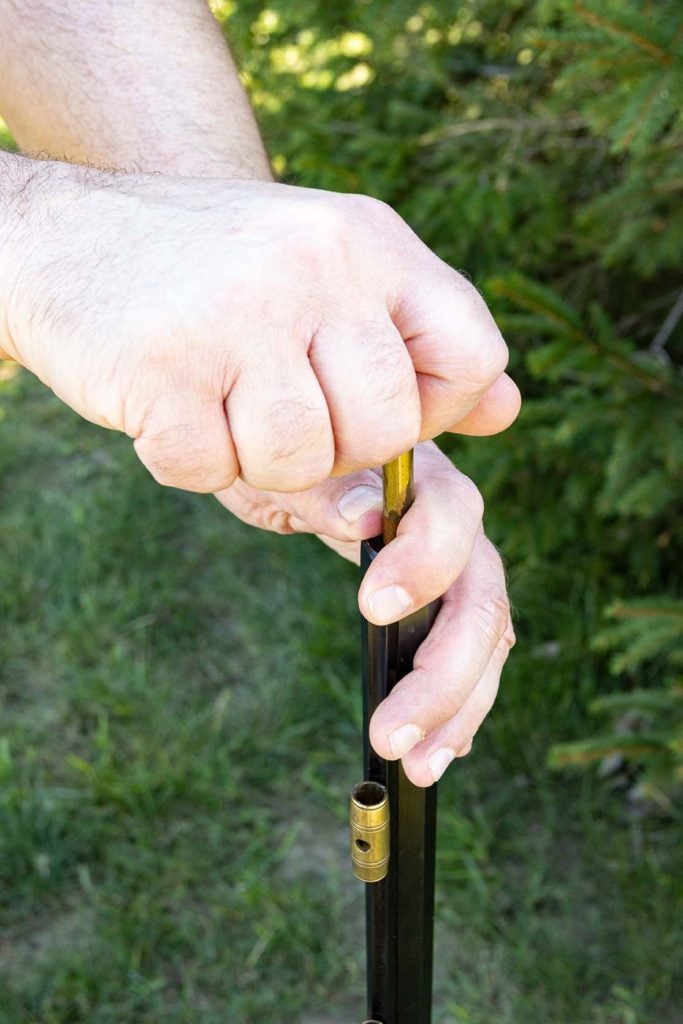
With the projectile in place, use the ramrod to apply gentle, consistent pressure to seat the projectile firmly against the powder charge. Ensure it is seated properly but avoid using excessive force, as this could deform the bullet or ball and affect accuracy.
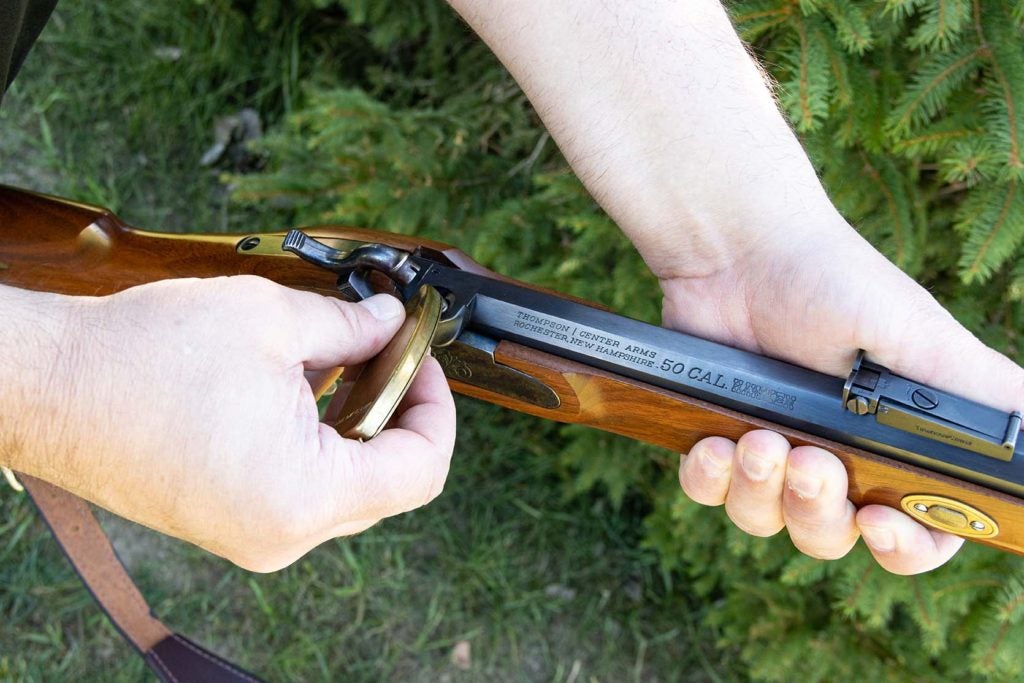
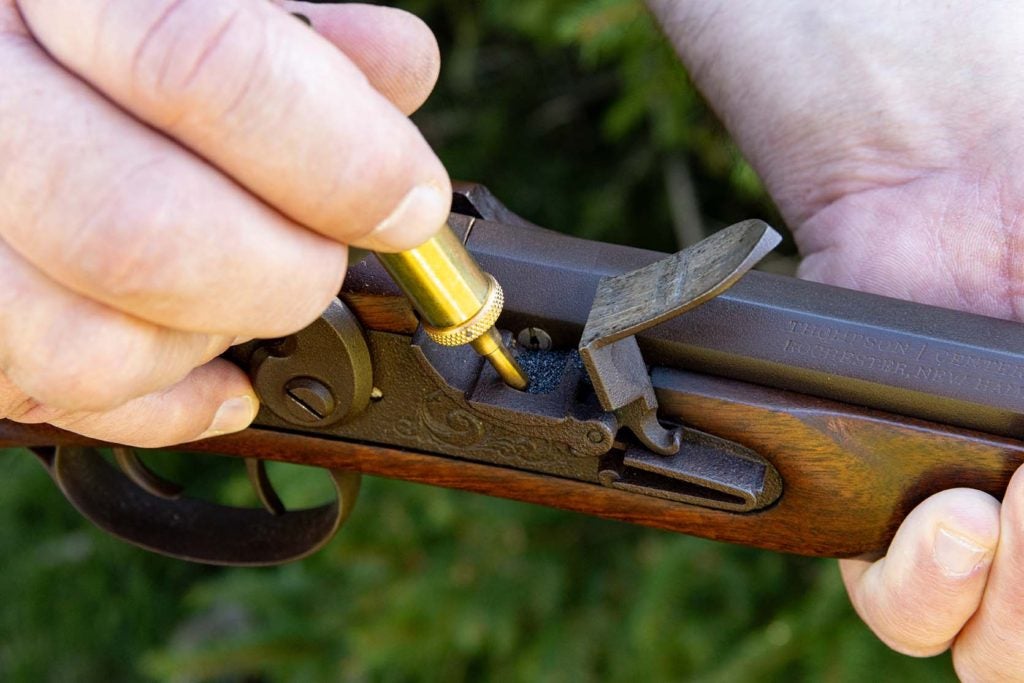
Step 7 – Cap the Nipple/ Prime the Pan:
For cap-lock muzzleloaders, place a percussion cap on the nipple.
If using a capper, carefully seat the cap onto the nipple to avoid any accidental ignition.
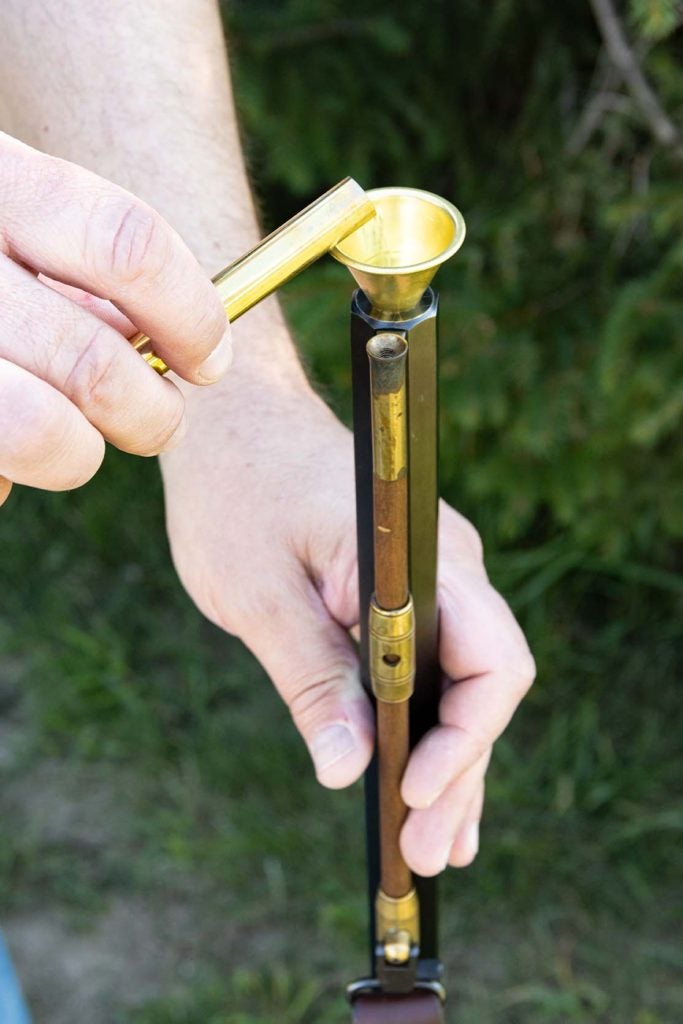
For flintlock muzzleloaders, prime the pan by opening the frizzen and filling the pan approximately half full with your priming powder (typically 4F).
Step 8 – Take Aim and Fire:
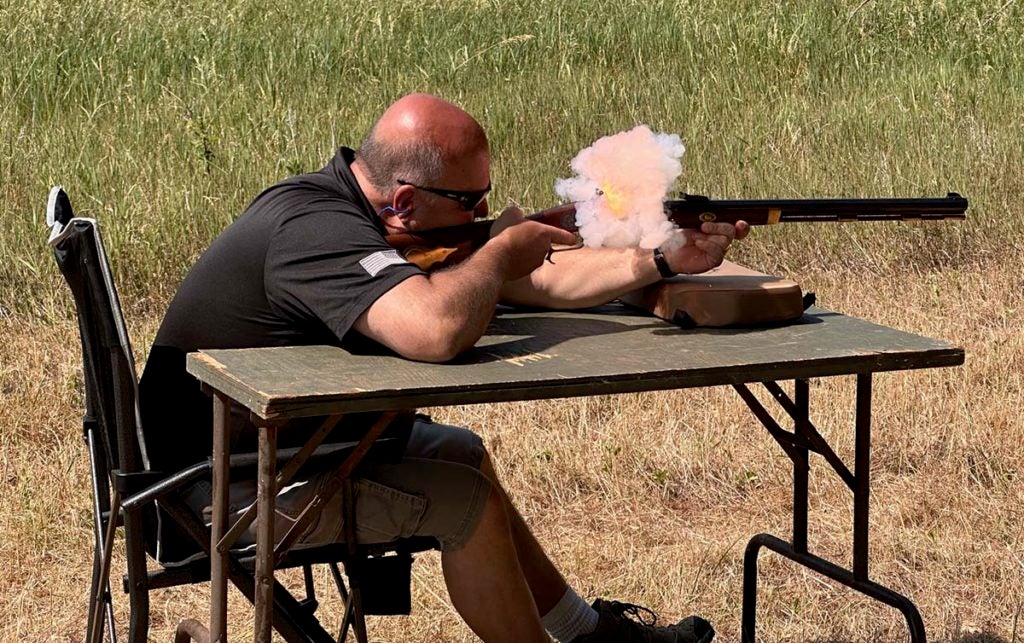
With the muzzleloader fully loaded and capped, assume a proper shooting stance, cock the hammer, align the sights, and carefully take aim at your target. When ready, squeeze the trigger to fire the shot.
Loading a black powder muzzleloader is an engaging process that requires precision, care, and adherence to safety protocols. By following this comprehensive guide, you can ensure a safe and enjoyable shooting experience with your muzzleloader. Always remember to clean your firearm thoroughly after shooting to maintain its performance and longevity. Embrace the art of loading a black powder muzzleloader, and you’ll be rewarded with a deeper appreciation for historical firearms and traditional shooting sports.
Happy shooting!
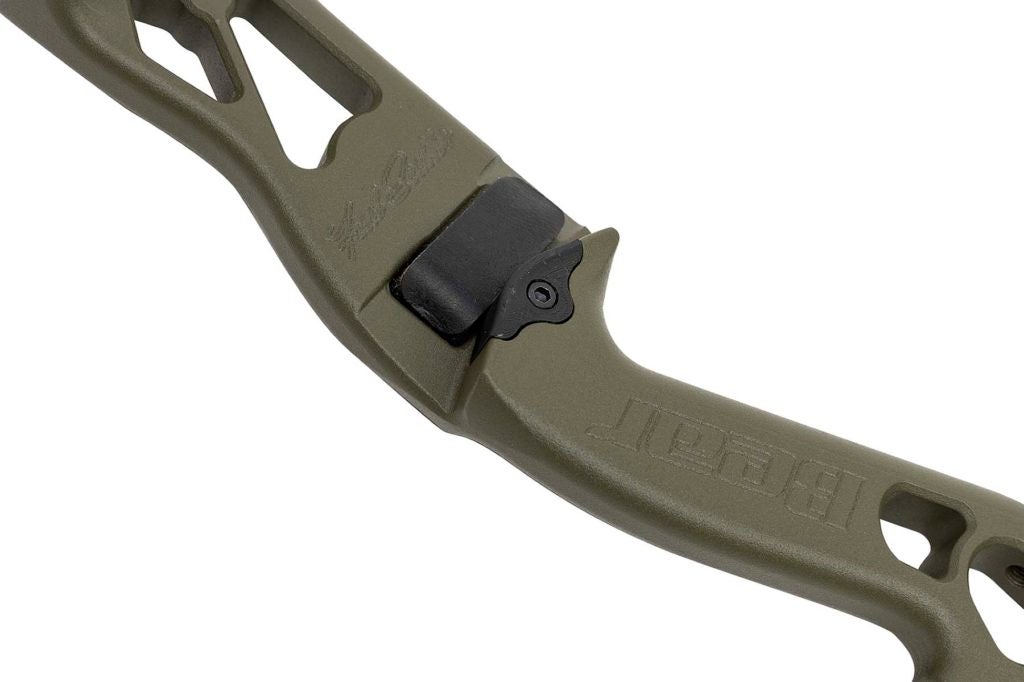


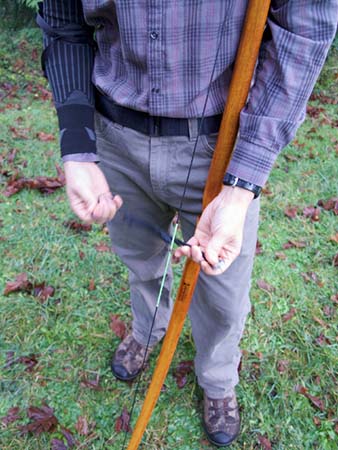
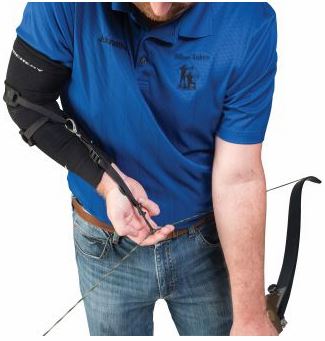
 A clicker, or draw check, makes an audible noise (click) when an archer hits his desired draw length. They are used by almost all Olympic archery shooters to achieve the precision accuracy needed to succeed in that field. They work great as a signal, or trigger, to release the arrow.
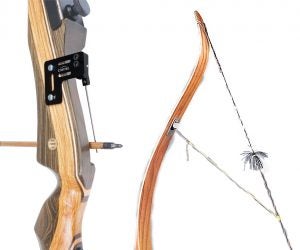
 I consulted with Jason Wesbrock who has successfully used a clicker for years. Jason is an amazing bowhunter, world champion archer, and star of
 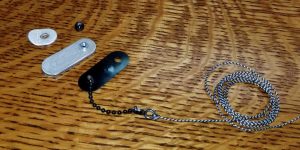 Step 1: Remove the clicker blade, the piece of metal that makes the noise, from the clicker. For the Crick-it clicker mine required a Phillips screwdriver.
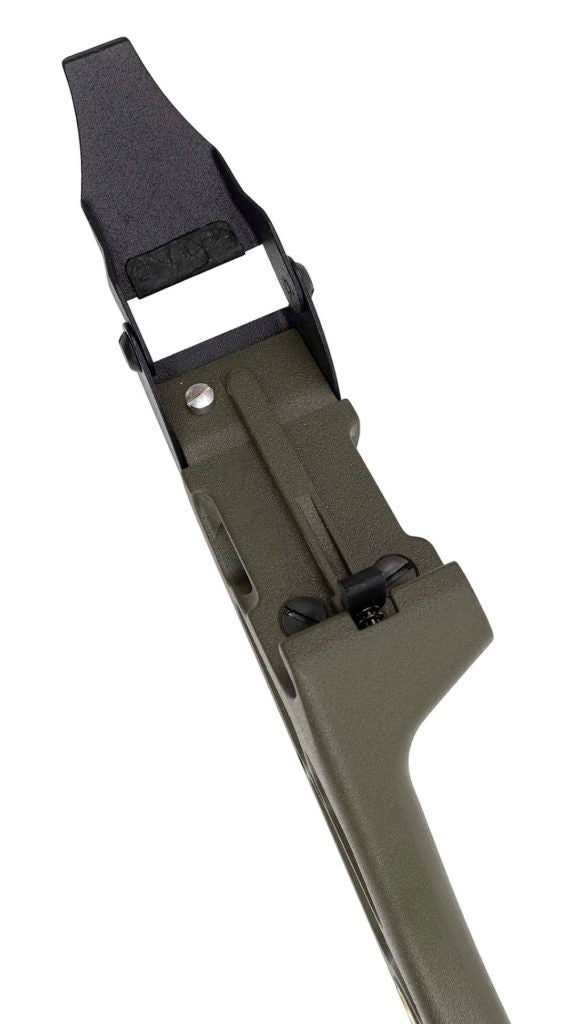
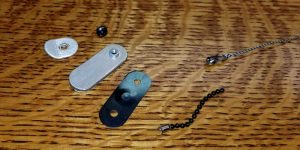 Step 2: You want to remove the chain grommet from the clicker blade. It may require a small amount of force, but be gentle.
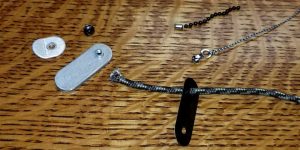 Step 3: Slide
  Step 4: Using a hand lighter, singe the end of the nylon cord and extinguish it by pushing it straight down into a couple drops of water on a flat, non-combustible surface. This should leave a hard, flat collar on one end of the cord. You can test to see if the end will hold by pulling on the cord to get the blade to make the click sound.
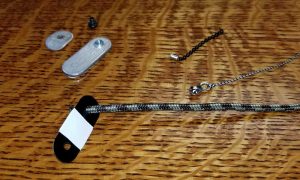 Step 5: To silence your clicker blade you can apply heavy duty outdoor tape to the center of the blade. The more layers you apply, the quieter it will get. It is up to you how much this will be.
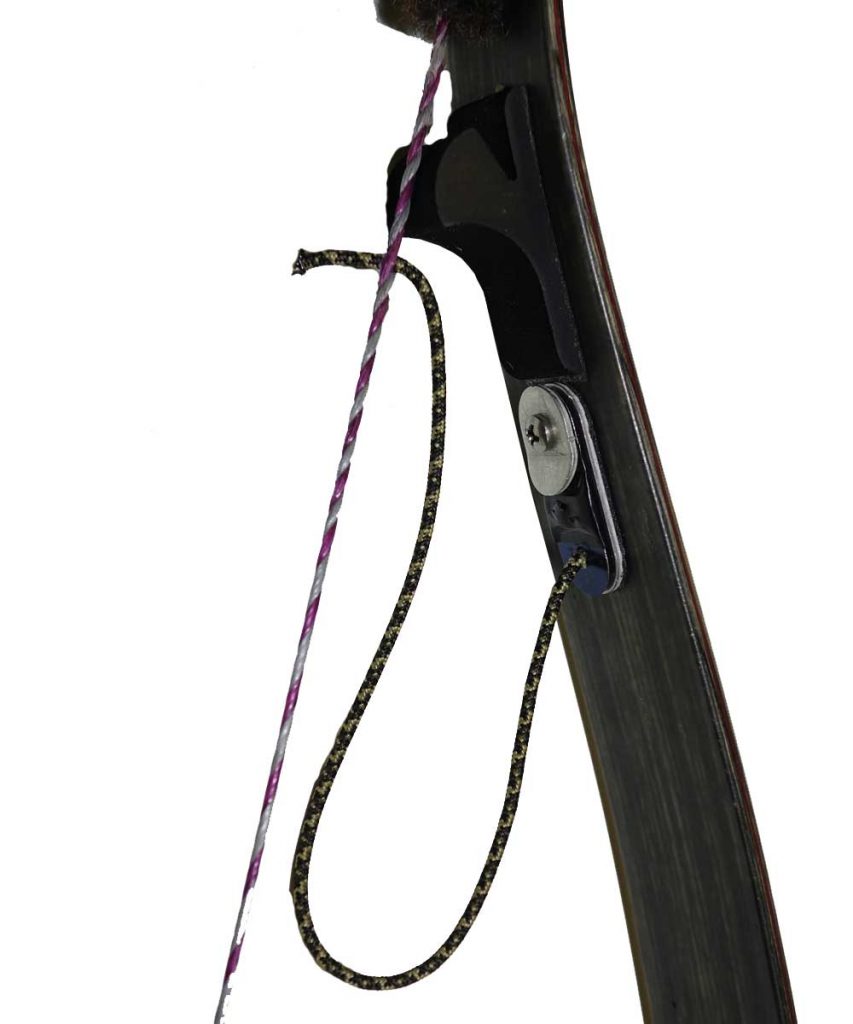 Step 8: Remove the sticky backing from the clicker and press onto the center of the top bow limb with the string positioned down.