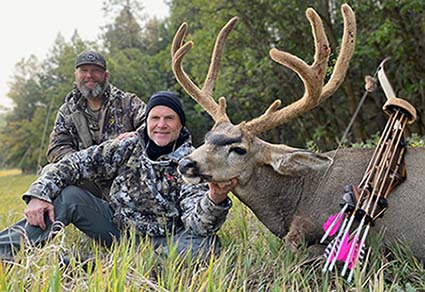
Welcome to the Archer's Den. Here you will find a gathering of traditional archery stories, tips and techniques, trophy animals taken with traditional bows, and plenty more. Stay a while and learn something. We hope you enjoy and even submit a trophy of your own, or leave a comment on a post.
As an outfitter and guide in Colorado I am constantly amazed at how ill prepared some people are that show up at my camp. I once had a client miss an animal with me and then say, “Those broadheads seem to fly different than my field points.” Needless to say, he was ill prepared.
Besides guiding clients myself, I am also occasionally a client at other outfitters camps. I usually go on one or two guided hunts every year. I have had some great hunts and others have been a waste of time, money and in some cases even dangerous. To help avoid a bad experience and to help you up your odds on a guided hunt, I have compiled a list of things I check into before spending my money on a guided hunt.
Are they experienced in guiding Traditional bowhunters?
This is more important than many people realize! A lot of outfitters unfortunately aren’t experienced when it comes to traditional bowhunting. I have been to places where blinds or treestands were set-up for shots at 30+ yards. It is important to either hunt with outfitters or guides that understand traditional equipment and it’s attributes and limitations or it is our job to explain it to them.
What is the guide to hunter ratio?
Will it be one on one or will you be sharing your guide with another hunter? It is worth knowing before you go. If your hunt isn’t a one on one guided hunt and that is what you want, talk to the outfitter. Some outfitters will offer a one on one ratio for a higher fee.
How much will I spend including licenses?
Make sure there are no hidden costs. Request in writing, a list of all costs including license fees or additional transportation costs. Is food and lodging included and is there a trophy or kill fee? These are all important questions.
How many days is the hunt?
Does that include travel days? Most guided hunts average 5 to 7 days, however, they all vary. Be sure you are happy with the number of days versus what you will be paying. If you want a longer hunt, some outfitters will allow hunters to extend their trip on a pay per day basis. This is always important to me since I have already invested my money and time getting to camp, one or two extra days may be all I need to get a shot opportunity. Remember things like weather can also knock a few days off of a hunt in a hurry. Bring this up ahead of time. It may save your trip.
How physical is the hunt?
Obviously, physical ability varies from person to person as do the requirements of different hunts and terrains. A hunter that is totally out of shape can easily walk a hundred yards from a truck to a tree stand, whereas an elk or lion hunt will demand a totally different set of requirements. How much walking will we be doing on average?
How much stand hunting? Will we be using horses? Make sure you can do what may be required.
What percentage of bow hunters harvest their intended species? And how many have opportunities?
Ask for specific numbers. How many bow hunters did you take last year for elk? Out of those, how many harvested elk? How many had shot opportunities? In fairness to the outfitter, I like to ask about shot opportunities, not necessarily numbers harvested. Also bear in mind that sometimes a low success rate may be due to bad weather, inexperienced or out of shape hunters. Try to feel the guide or outfitter out so you understand why the success rate is high or low.
Can you send me references?
Most outfitters have a prepared reference list. Of course, most reference lists are filled with hunters that harvested animals. Ask for a list of specific references and, if possible, for hunters in your state that have hunted with the outfitter. Be sure to ask for bow hunting references that hunted the same area you will be in, or that at least hunted the same species you are planning to hunt. Talking to other bow hunters can often give you a good feel of what to expect from terrain to guides. Also, ask for references of hunters who were not successful. Sometimes your best information will come from these guys.
Does the Outfitter have any game violations?
A simple call to the area game officer can answer this one. If the game officer advises against the outfitter, I wouldn’t go.
Does the Outfitter hunt private or public land?
Some pubic land areas are great, and others are crowded with public hunters. Find out about where you will be or how many other people you will likely encounter. Most outfitters will charge more to hunt private ranches. Just be sure to ask how much land they have available to hunt on. If its 5 acres and 7 people will be hunting it, it may not be such a great deal. Usually an outfitter will charge more to hunt private ranches. I also always ask how much land they have available to hunt on.
What gear or equipment do they recommend that I bring?
Most outfitters will have a list of items they recommend for the hunt you are going on. If they don’t offer one, ask for one.
In general, most of my bad experiences have come from outfitters I have not communicated with enough. I have also had some tremendous experiences with outfitters that will provide me with fond memories for the rest of my life. And while some of these great memories include harvesting an animal many of them did not.
My next column will be about how to be a good client for an outfitter. Your honesty makes a difference!
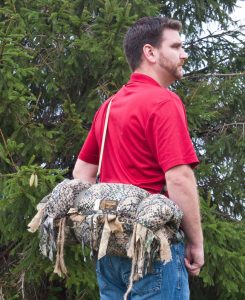
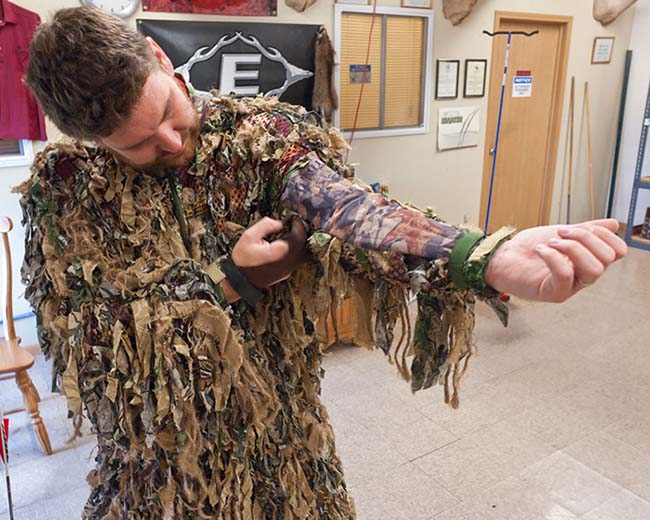
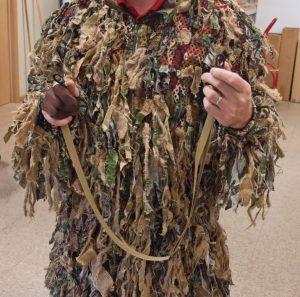
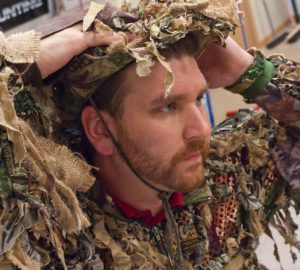
The ghillie suit is an excellent addition to the traditional bowhunter’s bag of tricks. The textured camouflage clothing of a ghillie suit is designed to break up your outline to help you blend into your environment. Ghillie suits are also called sniper suits as they are used by military sniper units all over the world.
Wearing a ghillie when bowhunting can offer more opportunities to get you closer to big game and out of the treestand. The challenge for the traditional bowhunter is customizing the ghillie suit to not interfere when you are shooting your bow. Getting your ghillie suit ready for hunting season only requires time and a good pair of scissors. We are using the Rancho Safari Shaggie® longcoat. If you use a different brand of ghillie suit, it may require more trimming.
Ghillie suits are hot. Adding strips of material, such as jute burlap and cotton, helps to break up an outline, but it also reflects your body heat back on you. So when wearing a ghillie suit you have to take into consideration that it will not be comfortable to walk around in. Many hunters will carry them to where they intend to hunt, then put them on.
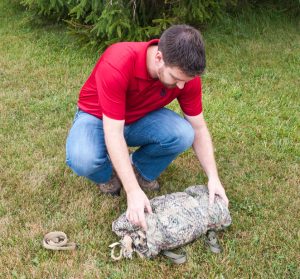
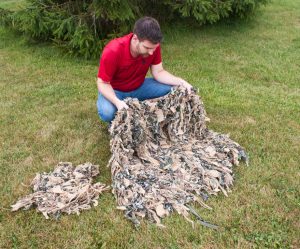
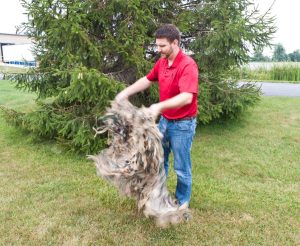
When you first get your ghillie it is best to open it up outside in case of any loose material. We recommend giving it a good shake into the wind to force anything not sewn down to come off.
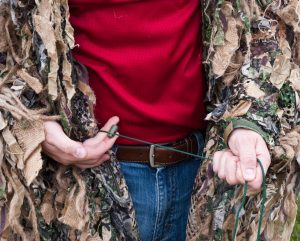
When first fitting a ghillie suit be aware of all straps, ties, and Velcro® strips. You want your suit to fit tight against you so as not to be cumbersome, get in the way when shooting, or get snagged on brush. The Shaggie longcoat has a waist level cinch cord, zippered front, forearm straps, and a Velcro® collar strip.
Now with the ghillie suit situated, do some walking around. Try some stretches, stalking (crouched slow walking), and just anything to confirm the ghillie fits properly to your body.
One great accessory to have is an extra long armguard. Rancho Safari offers the Cat-Guard Armguard and fits nicely on most arms and is made to bend with your arm for great comfort.
TECH TIP: When putting on your armguard, turn your arm so your palm faces up and the straps point downward. This will get more of the camo strips to the outside of your arm and away from the bow string.
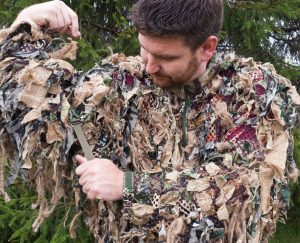
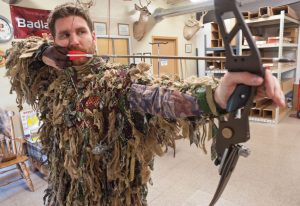
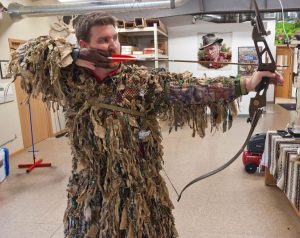
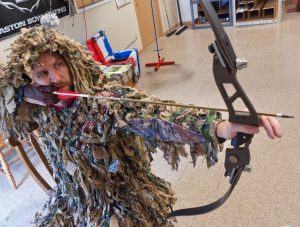
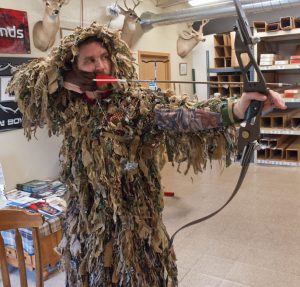
Now, it is time to practice shooting your bow and arrow with a ghillie suit on. This is best done with a friend to watch where the ghillie suit is interfering with the bow string. You can do this step alone, either by setting up a camera to record yourself, or by pulling to full draw and holding while inspecting. Pay close attention to your upper chest nearest to the bow. Depending upon your form, this is the area that will require the most trimming.
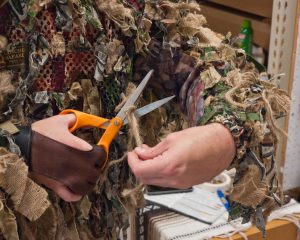
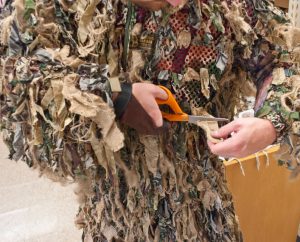
Using a pair of good scissors, trim down any strip that comes in contact with the bow string when at full draw. How much that will be cut is up to you, but you don’t want to miss the shot of a lifetime, or wound an animal, because your bow string got caught on a strand. This process can be quick, or it can take an hour(s). It really depends on how much the string is being interfered with and how many different shooting positions you are trimming for.
TECH TIP: Wear a chest guard, or the included carry strap, to cinch down material across your chest.
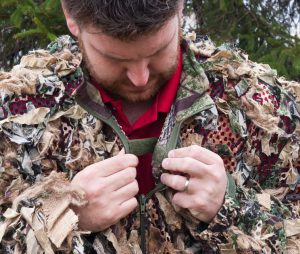
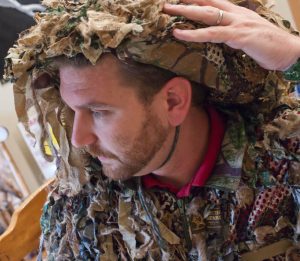
Most ghillie suits will include something for your head; a facemask and/or a hat. These help break up your outline, and may require trimming as well to make sure they do not interfere with your anchor.
The Shaggie longcoat comes with a boonie hat. It is best to trim all that you can in front of your face so as not to have any strands in your peripheral vision that may distract you during the shot.
TECH TIP: For the right handed shooter, put the straps of the boonie hat behind your LEFT ear and in front of your RIGHT ear. This will help keep the hat in place when you go to draw your bow.
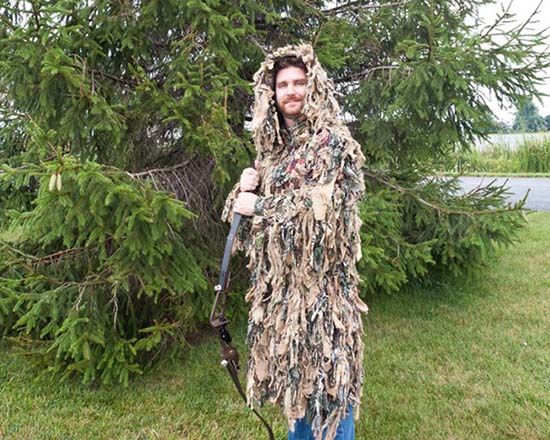
With all of your trimming done it is time to practice, practice, practice. Shoot your bow with your ghillie suit on any chance you get. You want to be 100% comfortable shooting with it on by the time you are using it during a hunt. Be sure to shoot standing, sitting, kneeling, and any and all positions you can safely shoot a bow from. Always be willing to trim unneeded pieces to make sure your shot is not interfered with.
Bowhunting with a ghillie suit is an exciting undertaking. Once you get your ghillie suit fitted to your body and shooting style you will be on your way to an exciting new chapter in your hunting career. Best of luck, and be sure to share with us your hunting successes at our online trophy room here.
Sharpening broadheads is a misunderstood, but necessary art.
The guy behind the counter hands you your first pack of cut-on-contact broadheads. First there’s the blank stare… the deer in the headlights look. Then you see a glimmer of the light flickering on as the realization sinks in.
“You mean I have to sharpen ’em?”
This is a valid question that we get all the time. It makes sense too, if the only broadheads you’ve ever been around are the ‘razor-sharp right out of the package’ kind, then why would you have to sharpen them? The truth of the matter is, 95% of all cut-on-contact broadheads need to have their final edge sharpened by the bowhunter before they are taken into the field. The good news is, with the sharpening aids available to all bowhunters today it’s not difficult to do. Read on and we’ll describe some hand sharpening techniques as well as introduce you to some of the more popular tools and accessories available for sharpening traditional broadheads.
Safety first. Use extreme caution whenever working with broadheads.
They are extremely sharp and may cause serious injury or death if used improperly or carelessly.
Hand sharpening without sharpening jigs and aids is demanding but also gratifying. Many bowhunters take pride in the fact that they can sharpen broadheads well this way. Before starting the sharpening process, mount all your broadheads on your arrows and make sure they spin straight and are installed correctly. As you go through the steps of sharpening, you’ll need to continually check the finished edge for sharpness. How you test for sharpness is up to you. In bowhunter education courses we teach a technique of stretching rubber bands across a small wooden frame from both directions to create an overlapping pattern. Then we push the broadheads through. If they cut the rubber bands easily, the broadheads are sharp. Most archers simply see how well the broadheads shave the hair off of their arms. We do not recommend this as the potential for injury is too high. Some folks carefully rub the edge of their thumb sideways across the edge. (Not along the edge! If you do that you’ll cut yourself for sure.) In time, you’ll acquire the knack to know, by feel, just how sharp the edge is. Once you think it’s sharp try the rubber band test.
Now, let’s sharpen some broadheads.
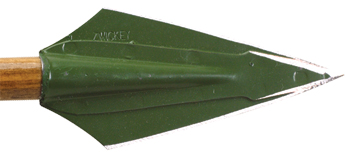
Well-designed, quality broadheads will be easy to sharpen. Take a close look at the factory grind. This is the angle of the grind on the broadhead right out of the package. It should be a smooth, straight, gradual grind terminating to a nice ‘almost sharp enough’ factory edge. Broadheads with grinds like this will be easier to put the final edge on. As we mentioned in the last column, another key to good broadheads is having the steel tempered hard enough to give you strength, but soft enough to allow you to sharpen them with a file. We recommend giving your broadheads the file test. Make a pass or two along the bevel of your broadhead with a good quality file. If the file skips off the broadhead and doesn’t bite into the steel, the steel is too hard for file sharpening. This is not necessarily the end of the road for that broadhead as there are diamond hones on the market that can sharpen nearly any steel no matter how hard it is. Still, for the bowhunter who wants to be able to re-sharpen broadheads in the field, they must pass the file test.
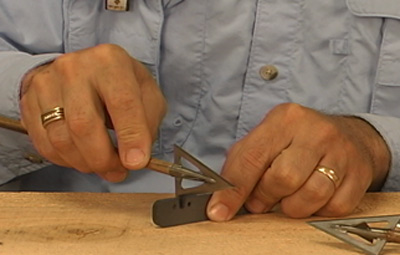
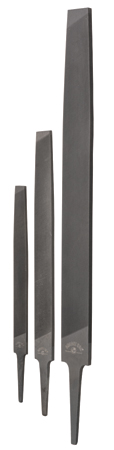
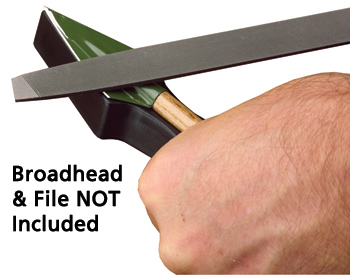
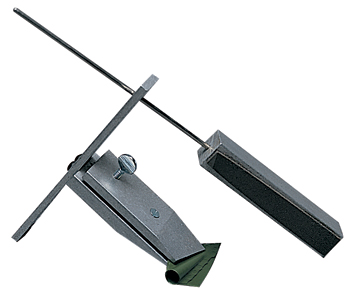
Two and four blade broadheads first. For smooth stock removal, we recommend a bastard file. For home sharpening a 10-12″ file is suggested. For ‘in the field’ sharpening get a 6-8″ model. Buy only high quality files, this is not the time to scrimp. Right-handed bowhunters will normally hold the arrow in their left hand and sharpen the broadhead with a file held in the right hand. Some people chuck them up in a padded vise and there is even a tool on the market called the Arrow Grabber that you hold in your hand and it supports the arrow and broadhead while you work.
A bastard file and Arrow Grabber are valuable broadhead sharpening accessories.
We always file from the back of the broadhead toward the tip. You can sharpen from either direction and there are arguments that defend both schools of thought. Still, sharp is sharp, so file in whichever direction you prefer.
The object is to follow the primary angle of the main bevel, removing the same amount of steel from both sides until you have a very thin, razor sharp edge. Before you see the final razor edge, you will see what is called a ‘wire edge’. This is the result of removing stock evenly from both sides of the broadhead. The wire edge is a sign that you’re doing a good job and you’re almost there. When the wire edge is removed properly, a sharp edge is left behind. It’s a good idea to count the number of strokes you make on each side. Push firmly but not too hard. You’ll be able to feel when the file is removing steel. You may want to take a marker and color in the factory bevel. Then when you start making passes with the file you’ll be able to where you have removed material and you can adjust your angle as needed as you go to match the factory angle. Once all of the ink is removed, go to the other side and repeat the process. Many bowhunters believe in and use the coarse, ‘file sharpened’ edge that you’ll have at this point and this is as far as they go. To really finish the edge though, some sort of stropping is still necessary. You can use a piece of tooling leather, a hard Arkansas stone, or even ceramic crock sticks for this. Smooth, steady light pressure is the key here. The closer the edge gets to final sharpness, the lighter your strokes need to be. When you’re finished stropping, test for sharpness. If they pass inspection, they’re ready to hunt.
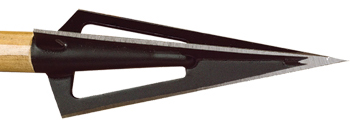
Three-blade broadheads like the Woodsman are actually quite simple to sharpen if you follow some basic guidelines. The nice thing about three blade broadheads is you always work on two blades at a time so the blades themselves act as guides helping you maintain the all important, consistent angle. For these 3-blade broadheads it’s best to first mount them to your arrows and use the shaft as a handle to pull the broadheads across your sharpening tool. Start with a 12″, quality single cut bastard file. This file will be wider than the two blades of your broadheads so you can remove material from both blades at the same time. Don’t press too hard! This is the mistake most people make when sharpening broad heads. Light, steady pressure consistent throughout the stroke is the key. As mentioned before, you may want to use a marker to cover the factory bevel and help you gauge how much material you have removed. If you mark over the bevels and only remove enough material to remove the ink, then go to the next two blades, then to the third set, you should have removed almost the exact same amount of material from each blade. This leaves you ready for polishing. The polishing step is best done on a fine diamond sharpening surface like the JewelStick® Diamond Bench Stone. Remember light controlled strokes. Now your three-blade broadheads should be ready for hunting, but you may also want to strop them lightly on a piece of tooling leather at this point. This final stropping action will align the microscopic steel particles taking your edge from sharp to ‘scary’ sharp.
Three blade broadheads like the Woodsman are quite simple
to sharpen if you follow some basic guidelines.
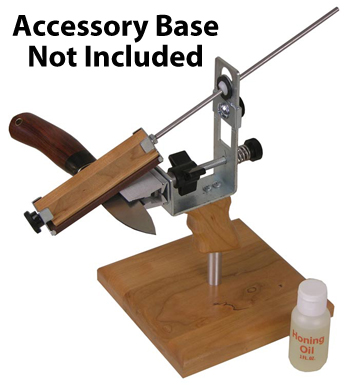
If you did everything described above correctly your broadheads are ready. If not, you might be thinking that the process is easier said than done. You would not be alone! When sharpening anything, maintaining a consistent angle is the key. This is where most people run into trouble and this is exactly why there are so many excellent sharpening systems and aids available on the market. Some of the most common are: The KME Knife Sharpening System, 3Rivers CC Sharpener, Lil’ Shaver, and the Hollowground Sharpener.
For fast and accurate sharpening, you can’t beat using a sharpening jig.
The Lil’ Shaver is another tried and true unit. It’s a jig with three angle choices built into it. Clamp your mounted or non-mounted broadhead into the jig. A file on a positioning block does the cutting. Slide the jig arm through the locating hole of the jig body and push the file against the broadhead from one side to remove stock. Then take out the arm, flip the unit over, re-install the arm and stroke this other side of the broadhead until a sharp ‘file sharpened’ edge results. This jig sharpens all two or four-blade heads. The file that comes with the kit is aggressive and removes stock quickly. The LIl’ Shaver is another good choice for re-shaping blunt factory grinds or reestablishing a good primary angle on dull broadheads.
The LIl’ Shaver is a jig with three built-in angle choices.
The Hollowground Sharpener is a bit unorthodox but very effective. Instead of flat, it uses two round files to sharpen and they actually create a slightly concave shape to the edge. Quite a few archers put faith in this hollow ground edge and it is a strong seller. The kit includes a ceramic rod for polishing the final edge. For the fans of hollow ground edges, this sharpener is a good choice.
The Hollowground Sharpener uses two round files to sharpen,
creating a slightly concave shape to the edge.
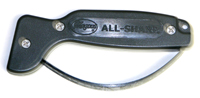
Have you got all that? Good! But wait, there’s more. Now for the rest of the story. For broadheads that have good factory grinds right out of the package, or for broadheads that you’ve used a sharpening aid to revamp the edge, here are a couple of tools that take you to ‘hunting sharp’ with the greatest of ease. They are the AccuSharp and the 3Rivers CC Sharpener. Both of these sharpening tools utilize carbide teeth to actually strip metal off of both sides of the blade bevel at once. Especially if you already have a wire edge established, these tools will remove that and align the entire final edge resulting in a sharp, ready to hunt broadhead in a matter of moments.
The AccuSharp has a comfortable handle and a safety guard to protect your fingers. Operation is simple. Hold your arrow on a hard surface and draw the AccuSharp from the back of the head to the tip. Repeat as needed with less pressure each time until you are satisfied with the edge.
The AccuSharp offers simple operation as well as safety features.
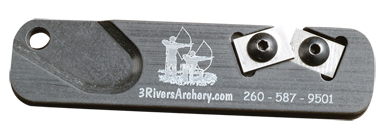
The 3Rivers “CC” (Ceramic-Carbide) Sharpener also uses carbide teeth, but with this tool you hold the unit on a hard surface and draw the broadhead through and between the teeth allowing it to remove metal on each pass. As always, use less pressure as you continue. Once you are satisfied with the edge, stop. The “CC” also has the advantage of a ceramic surface that can be used like a crock stick for finally polishing of the edge. You may even alternate at the end of the process between the teeth and the ceramic stropping surface until you reach ultimate sharpness. This sharpener is one of the handiest tools we’ve ever found for broadhead and knife sharpening. They’re small (approx 3/4″ x 3″), lightweight, and sharpen edges perfectly! Keep one with you at all times when hunting for fast field touch-up of broadheads and hunting knives.
Small and lightweight, the 3Rivers “CC” Sharpener provides two
sharpening surfaces… one carbide and the other ceramic.
As you can see, broadhead sharpening is a bit of an art. A very straight forward and necessary element of bowhunting with cut-on-contact broadheads. It’s an important skill to learn, and whether you hand sharpen with a file or take advantage of some of the many time saving commercial sharpening systems available, always make sure your broadheads are, ‘hunting sharp’. We owe it to ourselves, to the animals, and to the great sport of bowhunting. Yes, you’ll have to touch up those edges yourself but after a bit of practice and with the right tools, you’ll have no problem at all sharpening traditional broadheads.
This story has been re-published with the permission of Core4Element. The link to the original story is no longer available.
One of the most important things a hunter must consider before going out into the field is choosing the best hunting clothing for the conditions. But even the best gear is useless without knowing the best way to wear it. The Core4Element line of hunting clothes is designed to be used as a system of three layers: a base layer, a mid-layer, and an outer layer. Dressing in layers like this allows you to control your core temperature in any weather, which helps you stay focused on the hunt instead of your clothes.
Layering allows you to prepare for all weather extremes, but there is a right way to do it. The first thing you need to keep in mind when creating your layering system is to abandon the thought of wearing cotton on your hunt. Cotton is a light fabric, yes, but it also traps moisture and chafes after wearing it for a long time. These are not ideal conditions for anyone, especially hunters competing with the elements for long periods of time.
Merino Wool Base Layers
Begin your layering system with a base layer. This layer will have direct contact with your skin, so you’ll want to choose something relatively lightweight, breathable and comfortable against your skin. At Core4, we create our base layers with 100% Merino wool, which is soft to the touch, anti-microbial, and has moisture wicking capabilities. Base layers should fit snuggly to make the most use of the wicking technology and allow for other layers to be put on top without bunching up. Depending on the climate of your preferred hunting area, you may want to consider heavier (thicker) or lighter base layers. Since base layers are pretty much impossible to remove once you’re out in the field, do your best to anticipate the weather conditions of your hunting grounds so you can choose the appropriate weight.
Versatile Mid-Layers
Mid-layer hunting clothes allow for a little more versatility than base layers because you can either wear one or several, depending on your comfort level. Mid-layers tend to be looser than base layers, but they do not need to be baggy by any means. The mid-layers are where you really control the body temperature. Adding multiple mid-weight layers for colder temperatures will better protect your from the cold than a heavy, bulky outer layer. Core4Element hunting apparel is tailored to an “athletic fit” to maintain contact with the base layer in order to optimize wicking capabilities. This will keep you warm while still being moisture and odor free. Mid-layers typically have special features to provide maximum comfort and breathability. Core4Element mid-layers often have underarm zippered vents and extra long front zippers for superior ventilation on all-day hunts. Layer the Mid Mountain Vest over the Selway Zip for extra warmth or use the Pivot Shirt as your mid-layer on warmer hunting days.
Protective Outer Layers
The outer layer of a system is going to be the most important layer in terms of protecting against the elements. Whether hunting in rain, wind or snow, Core4 has the high-performance, high-quality gear you need for creating the best final layer to your system. The key to the most effective outer layer is durability. Your pants and jacket need to be able to stand up against tree branches, rocks and whatever else you may encounter in the woods or backcountry. All of our pants and jackets are treated with Durable Water Repellent (DWR) to provide maximum protection against the elements. This is exactly what you want in an outer layer. Pay attention to the weights of the pants and jackets, as some are made for colder conditions than others. Pay close attention to the moisture in the weather. An outer layer protected by a DWR treatment will keep the rain and snow out for a while but if heavy rain or wet snow is in your future you’ll want a fully waterproof outer layer like the C4E Torrent jacket and pants. Torrent is waterproof, breathable, and just as important on the hunt, quiet.
When building your layering system, be sure not to neglect your head, hands and feet. Core4 offers Merino wool or synthetic options to keep you as comfortable as possible on your hunt. Be sure to keep your head covered on bitter hunts, as heat leaves most quickly through the head. Keep extra pairs of wool socks in your pack in case your boots do not protect your feet from water, as they should. Nothing ruins a hunt faster than suffering from soggy socks. Choose a pair of gloves that provides warmth, grip and mobility.
Layering is one of the smartest choices you can make on a hunt. Using the right method, you won’t have to worry about your clothing and comfort for the rest of your hunt, and that’s how it should be. Stay dry, warm and odor free when hunting with the Core4Element layering system. Ready to turn your hunting clothing into a system of specialized gear? Build your system now.
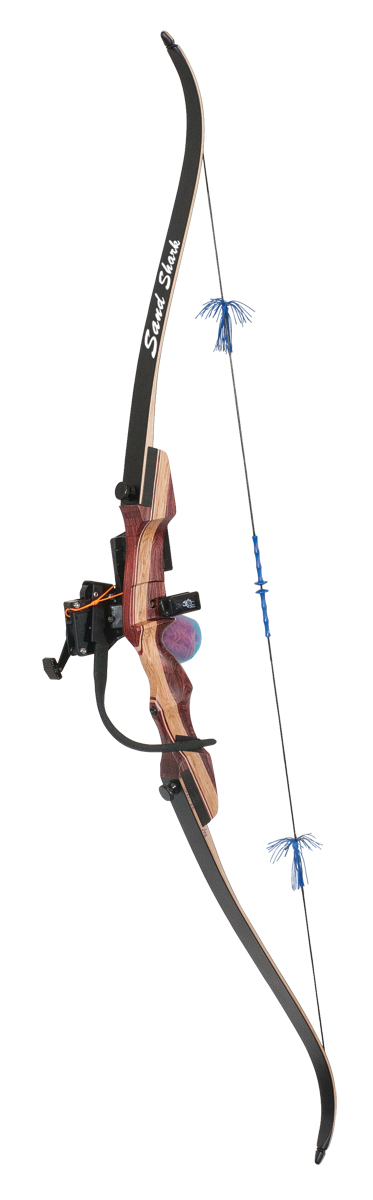
You know what bowfishing is, and you’re interested in trying, but you’re still not quite sure how or where to start. Bowfishing is unique in the world of archery in that it can be practiced day or night, on land, while wading in the water, or on a boat.
To get started you’ll need a bow, a recurve is best simply because smaller bows are a bit easier to manage while bowfishing. There is no need for sites because of refraction and because they can’t account for depth. You’ll probably want a bow that shoots 45 pounds or greater in order to have sufficient force.
You will also need a reel and special bowfishing arrows; typically, bowfishing arrows are heavier, use barbed broadhead, don’t have fletchings, and are longer than traditional arrows. They are also attached to a fishing line. On that note, never tie a line to the back of an arrow, it should always be attached to the slide near the front of the arrow. If tied to the back, the line could get tangled in the bowstring, causing the arrow to snap back at you, resulting in facial injuries and even death.
You might also want to bring a pair of hip waders, some gloves, sunglasses (if you’re fishing during the day), sunblock, and a hat. If you’re fishing at night you’ll probably want to bring a decent flashlight or spotlight.
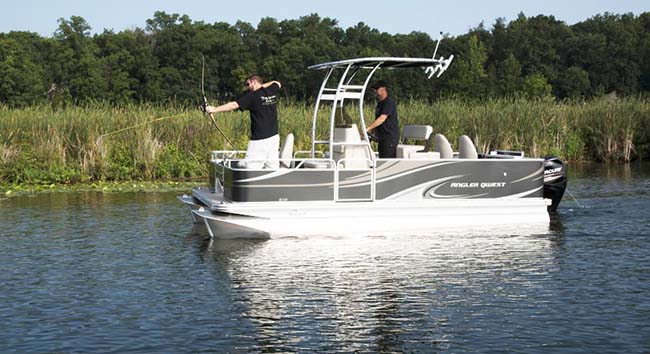
If you have the option, and if you’re shooting from a boat, you’ll probably want to use a flat-bottom vessel, so you can take it into shallower water. Like sport fishing and hunting, individual states regulate bowfishing, so you will probably have to pickup a fishing license.
When you’re bowfishing on fresh water you’ll be looking for fish like carp, eels, suckers, perch, catfish, gars, or even alligators. If you’re saltwater bowfishing you’ll probably target fish like dogfish, sharks, and stingrays. The exact type of fish that you’re allowed to bowhunt legally is regulated by the state, so check on your local regulations.
Something that seems obvious, but should also be mentioned about bowfishing. there is no catch-and-release in this sport. Bowfishing kills the fish.
If you decide to give bowfishing a try, but you don’t have access to a boat, then you’ll be limited to wading or bank bowfishing. You’ll want to do this kind of bowfishing in the spring, while the fish are spawning, before and after the spawn the fish can be harder to find. If you’ll be bowfishing from a bank, you’ll want to target lakes, rivers, and ponds with shore access. If you’ll be wading, you have the option of heading to a marsh with tall grass, where the fish feel safe.
If you’re having trouble narrowing down a good spot for your first bowfishing trip, just give your local DNR fisheries biologist a call and tell them you are looking for heavy concentrations of carp, eels, suckers, perch, catfish, or gars.
If you’ve got a few places in mind, but you’re still not sure about the perfect spot, the most important thing you should consider is the consistency of water depth and overall water clarity – clear water that is between 3-4’ deep is ideal for bowfishing.
Now, if you’re like me you don’t hunt what you won’t eat. That said, many of the fish that you’ll be after (such as carp) can contain contaminants, so it’s a smart idea to contact your local DNR office and ask about fish advisories before heading out.
When you finally do get to your fishing spot, the main difficulty that most new bowfishers have is refraction. When light waves pass through water they are deflected, which makes things look like they are where they are not. This is most easily demonstrated using a straw and a glass of water.
To compensate for this, you’ll want to aim about 10” below the fish you’re aiming at; keep in mind this is just a general rule of thumb and you should be prepare to miss quite a bit your first time out.
Bowfishing has been growing in popularity in recent years as more beginning archers look for fun shooting opportunities for spring and summer. As with almost everything in archery, you can get into bowfishing at nearly any price point you choose.
For basic equipment, some archers simply buy a kit that includes:
Some people who bowfish transfer all the equipment back and forth to their regular hunting bow, or buy a new bow for hunting and put their bowfishing gear on the old bow. Regardless of what you choose to do, our expert techs at 3Rivers Archery can guide you into the right product whether you’re just starting out or looking to upgrade your equipment.
Carp 101
Various species of carp are the most commonly targeted fish. Carp aren’t native to North America. They were brought over from Europe in the 1800s and released across much of the continent.
Because carp are destructive rough fish that reproduce readily almost everywhere they’re found, archers who bowfish typically shoot all they can, often using the fish as fertilizer for gardens and flower beds. Some also are smoked, canned or added to fish stew. About the only requirement is that those who bowfish take home everything they catch.
Bowfishing Is a Good “Next Step” From Recreational Shooting to Bowhunting
Bowfishing provides multiple shooting opportunities. For those archers interested in expanding their interest and archery skill into an outdoor adventure, it’s an ideal stepping-stone between target archery and bowhunting. No two shots are ever the same in bowfishing, and there’s usually much more action than in bowhunting. When bowhunting deer, elk or bears, bowhunters can go weeks – or several hunting seasons – between shots.
It’s also accessible.
Bowfishing can be done from piers, shorelines, and boats. This includes canoes, kayaks, airboats, motorboats, and Jon boats. As paddleboards become increasingly popular across the U.S., bowfishing from paddleboards is also gaining traction, particularly among a younger demographic eager to get outdoors. Several years ago, the Florida-based company, BOTE, partnered with ATA member Realtree, to offer its customers several camo-clad boards.
With bowfishing, you’re seldom restricted to one small area like you are when bowhunting deer from a tree stand or turkeys from a ground blind. If you see carp or gar nearby, you can stalk closer to try intercepting them. Those experiences also help prepare you for stalking or setting up on deer, elk or other game animals.
Gators Too?!
Carp and other rough fish like gar and buffalo make for exciting bowfishing, but perhaps the ultimate in big-game bowfishing is an alligator hunt. States like Florida, Georgia, and South Carolina allow bowfishing for ’gators, but no state offers more alligator tags each year than Florida. This requires specialized equipment, however, so it’s probably best to hire a guide or hunt with an experienced friend before taking on an alligator.
This story has been republished with the permission of Patrick Kelly, who, at the time of writing this article, was preparing to go on a bear hunt.
I was planning on leaving for my bear hunt early Friday (June 12) morning, but I decided to leave Thursday (June 11) instead, so I could make a stop on the way. I cleared it with my hunting partner, and got off of work around 7:30 p.m. on the 11th, and headed home. After dosing a sick horse with some medicine, I decided to go grab a battery from a light by a feeder, so that I could charge it and put it out tomorrow morning before I left, so that, hopefully, it would last through my bear trip.
“No sense in not taking a bow,” I thought to myself. So, I grabbed my Silvertip recurve, and one arrow tipped with a 175 VPA 3-blade broadhead and a lit nock and began the 1/2 mile walk to the feeder.
I got there around 8:30 p.m. and, wouldn’t you know it, there was a hog under the feeder who spotted me and took off – with a raccoon hot on his heels.
“Oh well, nothing ventured, nothing gained,” I thought.
I decided to back off into a small cluster of trees around 90 yards from the feeder and see what happened in the short time until dark. I promised my wife that I would head home by 9:45 p.m. to eat the steak she was cooking.
A little before 9:30 p.m. came around, and I was just getting ready to head out, and I saw a hog sneak out of the drainage to my east and make it’s way to the feeder. I figured it to be around 100 pounds or so.
I was wearing very faded jeans that seemed to glow in the low light, so waited a few minutes for it to get a little darker to make my move. I slowly moved to the west to put the light (a slow glow light, which was already in position) between me and him, and then headed toward the feeder.
The stalk was a little complicated, because between me putting on some weight and my jeans having shrunk some, they actually were squeaking when I walked, and the wind was dead still. I was also wearing a pair of hard sole Wellingtons and the ground had dried out considerable in the last two weeks in which we haven’t had any rain. I actually covered the distances sidestepping as quietly as I could, while holding my pants to keep from squeaking, all the while bearing in mind that a light wind could swirl at any minute and bust me.
I quickly covered the distance, and as I approached the light, I could see the hog, which now looked more like 175 pounds, under the feeder, and a raccoon feeding between him and the light. The light is not even 10 yards from the feeder.
Just before I made it to the light, the raccoon heard my slight noise, which the hog didn’t hear with his corn munching, and stood on it’s hind legs. He couldn’t smell me, and the light was blinding him, but he knew something wasn’t right. He decided to head for the drainage, and I moved a couple steps closer to the light, now only around 8-10 yards from the hog.
I could see him bending at the knees to get under the feeder, and I could see his front leg clearly, but waited a few moments to see if I would get a better shot. He was facing to my right, and he decided to back up to my left and step just away from the feeder. When I saw his front leg clear the feeder, I quickly came to draw and release. The nock lit up, but the hog took off toward the west (my left), banging the arrow off of the feeder legs and breaking the nock. I heard him circle into the brush toward the south and it sounded like thrashing. I thought that he probably was dead, but I texted my wife to tell her I was on my way to get flashlight, and that I had shot a 150-175 pound hog.
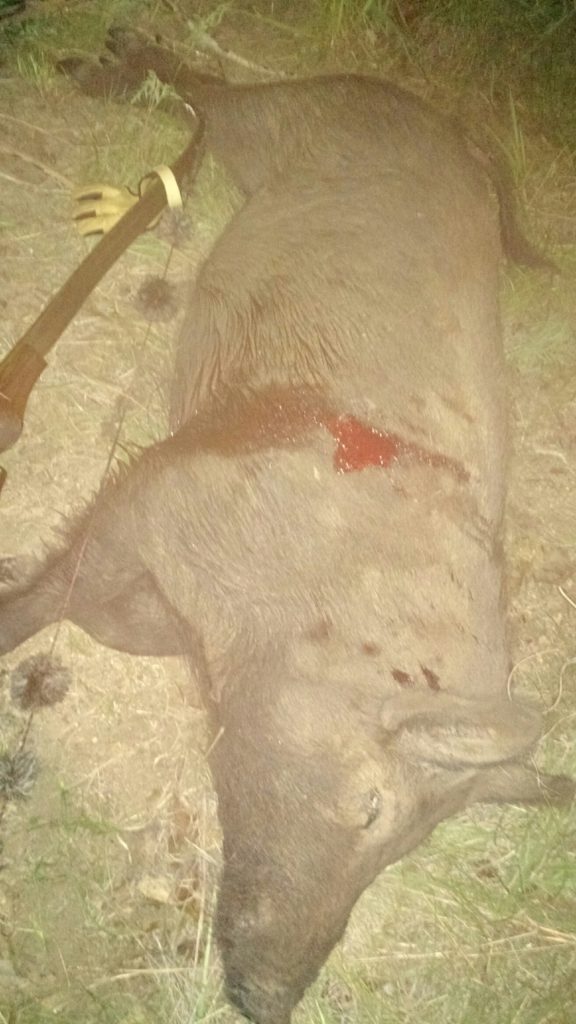
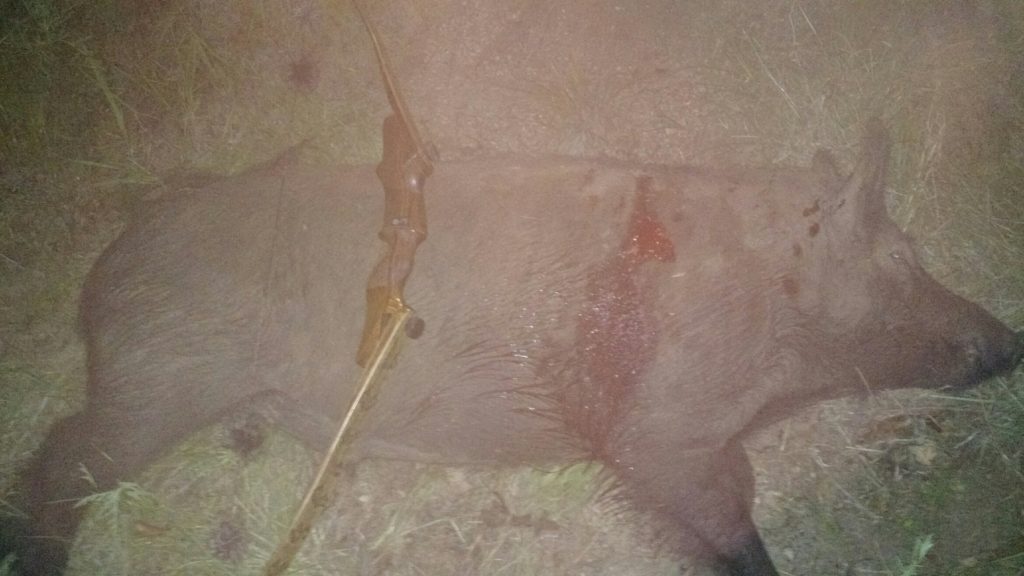
I headed home, ate some steak, and went back out with my wife and the dog to make a quick track and get started. Poor blood on the dry ground, but the dog found the hog in a couple of minutes, and I was pleasantly surprised with my very quick glance that the hog would go 225 pounds. I marked the spot, drove my wife back to the house, headed in to town to pick up a couple bags of ice, then came back to start the field dressing. When I got a good look, I was very happy. I didn’t weigh him, but I am sure that he would go 275 pounds. What a chore it was getting him into the truck. I really had to be creative.
I double lunged him, and he went around 50 or 60 yards, but no more. The arrow stopped on the far side of the shield and broke off when he dropped. Dropping this hog off at the butcher for my mother-in-law, but I’m going to really be needing another freezer if my luck holds up on this bear hunt.
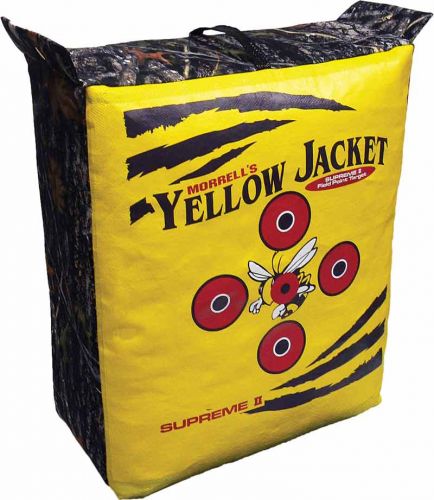
For the traditional archer, high quality archery targets are awesome, but they can get expensive quick. Personally, I love my Yellow Jacket Supreme, but there are many people who love traditional archery because of the DIY aspect, which seems to accompany the sport. It’s for those reasons that I’ve decided to do a DIY traditional archery target blog.
Note: These DIY projects are meant as traditional archery targets; although they may work, they are not meant for compound or crossbow shooters.
All supplies are not created equal, for this reason I recommend taking a few practice shots at close range at half draw to make sure the target is stopping your arrows. Slowly increase your draw until you’re at full draw at close range. If the target is still doing its job, then feel free to enjoy your new DIY traditional archery target.
The Dressed-Up Bag of Mulch
Difficulty level: 1/10
Cost: Less than $15
Time: About 5 minutes
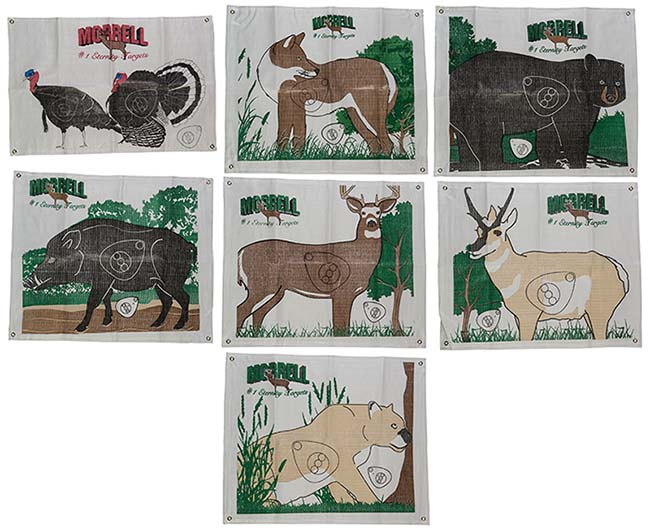
The name of the game for this project is “Cheap.” We’re keeping costs down while maintaining functionality. For this project you’ll need a Polypropylene Target Face and a bag of tightly packed mulch or peat moss from your local hardware store. You want the bag of mulch or moss to be at least 12” thick and VERY TIGHTLY PACKED. I prefer moss because it’s less likely to mess-up your arrows. This target is great because any mess that’s created will benefit your lawn, so there’s really no impact on the environment when the target starts to fall apart.
After you’ve got your supplies, simply affix your burlap target face onto the front of the bag of mulch or moss (unopened). You’re done. What’s bad about this target? It’s not going to stand the test of time. So, although it is cheap and easy to make, be prepare for it to break down quickly.
For a more lasting target, you might consider putting your mulch or moss inside of the U-Fill It bag target or, for an even better (self-healing) target, put your bag of moss inside of the Replacement Cover for the Yellow Jacket Supreme. You’ve just made a long-term, outdoor target that is good for your lawn for less than $25.
The Saran Wrap Filled Box
Difficulty level: 1/10
Cost: Less than $10
Time: About 10 minutes
If you saw the Dressed-Up Bag of Mulch and thought that the price was still a bit much, then this is the project for you. You’ll need an empty box, a bunch of used plastic wrap (enough to fill the box), some duct tape, and a Peel and Stick Target Face.
Note: If you ask a local business (try a superstore or hardware store) you might be able to get the box and plastic wrap for free, which would really keep the cost down. You could also try factories, as they have a ton of excess plastic wrap from shipments.
The bigger the box, the bigger the target – however, the bigger the box, the more plastic wrap you’ll need.
After you have all of your supplies, stuff the box with the plastic wrap. Stuff it in until it’s impossible to fill it anymore. Just like the Dressed-Up Bag of Mulch, you want this target very tightly packed. After you’re sure it’s packed, close it up and tape it shut with the duct tape. Finally, stick your target face on the box and voila – you’re done.
This project is not only easy, but it can be nearly free for those traditional archers who can easily come by the supplies. However, cardboard will not hold up in the rain (or in any wet conditions) and it will break down quickly if you use it often (as it is not self-healing).
The Compressed Carpet Target
Difficulty level: 3/10
Cost: Less than $50
Time: About 2 hours
If you’re a bit more adventurous and you’re not afraid to spend a few extra bucks then this is the target for you. For this project you’ll need to visit your local hardware store and pick up a pressure treated 2x12x8 (should be about $12), four 36” x 5/8” standard threaded rods (about $6 each), eight 5/8” x 1-3/4” zinc-plated standard flat washers (less than $0.20 each), and eight 5/8”- 11 zinc-plated standard hex nuts (less than $0.20 each). You’ll also need a decent target face and some target face pins. Finally, you’re going to need a whole lot of scrap carpet. This is really the biggest variable in price for this whole project. If you’ve got the scrap laying around then you’re going to save yourself a lot of money. However, if you have to buy it, try and find the extra carpet from you local big-box hardware store, you should be able to buy a lot of it for not a lot of money.
For tools, it would be best if you had at least two pipe clamps or some ratchet straps, but if not, then your elbow grease will have to do. You will also need a knife, saw, measuring tape, drill with a 5/8” drill bit, and a 5/8” wrench.
You’ll want to cut your 2x12x8 in half, which will give you two 2x12x4s. Drill a hole in each of the four corners of both boards. You’ll want to make sure each hole is 1” away from the end and side of the board. After you’ve threaded one side of each of your standard rods with a washer and hex nut push each rod through one of the holes on one of your boards (use your measuring tape to make sure the same amount of rod is sticking through each nut).
Now, you will want to cut your carpet in 12”x3’ 10” sections (you’re not cutting them 4’ long because your holes are 1” deep on both sides, which effectively makes your target 2” smaller). After you’ve cut your carpet, start stacking it on top of the board that has the rods threaded through it. Stack it as high as you can – ideally until it’s almost at the top of your rods.
Next, you’re going to put your second board on top of your pile of carpet. Thread the screws through the holes you drilled earlier. Put on the washer and the hex nut – make sure the hex nuts are all finger tight. Gently lay the target on its side and pack it down with your feet to make sure the carpet on one side of the target is flush. Stand the target back up and tighten the boards down with your pipe clamps or ratchet straps. Get them as tight as you can and then re-tighten your hex nuts. If you don’t have pipe clamps or ratchet straps, then you’ll have to tighten the hex nuts with your wrench as much as you can. If needed, you can sit on the target, or apply pressure with your knee to aid in compressing the carpet. After you’ve gotten the hex nuts as tight as they’ll get, use your measuring tape to make sure an equal amount of the rod is coming out of each hole.
Now you’re ready to apply your target face and send some arrows down range. This target is great for those traditional archers who want a target that will last a long time and are determined to make their target themselves.
Clear as mud, right? If you’re having trouble visualizing it, then the below video might help
The Sandbox Archery Target (great for broadheads)
Difficulty level: 5/10
Cost: From $110 (if you use only plywood instead of 2x6s) to $150 (if you use 2x6s)
Time: About 4 hours
So, you want a high-quality target, something that’s going to last a long time AND you want to be able to shoot broadheads into it, but you still want to build it your self –because you’re a masochist.
Although I’m not a masochist, I do love DIY projects and this is one that I think just about anyone can do. What makes it cool is the fact that you can shoot just about anything into it. Yes, that means you can shoot this target with broadheads. However, this is a sand target, which means it can make your broadheads blunt – no problem if you have a few that are for practice anyway or if you know how to sharpen them.
For this project you’ll need a saw, measuring tape, and a drill. You’ll also need to visit your local hardware store and buy six 2x6x8s (about $6 each), one 5 lb. box of 3” screws (about $23), two 4x4x8s (about $10 each), one sheet of 3/4″ pressure treated plywood (about $35), 10 50 lb. bags of all purpose sand (about $3 each).
As this build is a bit more complicated, I’ve made a graphic (above) to help out.
First, cut a 4’x2’ section out of your piece of plywood – this will act as the floor for your new Sandbox Archery Target. If you want to keep costs down, you can cut your plywood into four 4’x2’ sections and use it for the floor and three walls – otherwise, use the remainder of your plywood as a backstop behind your target.
Then, cut one of your 4x4x8s into four sections and screw them onto the bottom of your 4’x2’ piece of plywood 1’ apart from each other. Cut your other 4x4x8 in half and attach it to the other side of your plywood (as shown above).
Next, cut four of your 2x6x8s in half. Cut your remaining two 2x6x8s into four 2’ sections.
If it were me, at this point I would cut two holes in the ply wood, so that you could slide a 2x6x2 down into it – helping hold the sand. Affix the 2x6s together as shown above. Next, simply fill with sand and get shooting.
A good idea would be to staple a rugged outdoor target face to the front of your new Sandbox Archery Target, so you have something to shoot at.
The below video shows what a Sandbox Archery Target should look like after it’s completed:
DIY 3D Style Target
Difficulty level: 8/10
Cost: Less than $20
Time: A weekend
That’s right; I’ve saved the best for last – a DIY 3D style target for less than $20. However, this one is the most time consuming and can be the most technically difficult. Expect this project to take at least one full day if not a weekend. If you value your time, you might want to stick to a traditional 3D archery target. However, if your times not worth that much, or your pretty budget conscious and don’t mind tedious work, this is the project for you.
You’re going to need a sheet of plywood (about $15, but if you want to go all-out get pressure treated plywood for $35), a pencil, tracing paper, a ruler, a computer with a printer, and a jigsaw (if you want it to look a bit more lifelike, then get some paint as well). An old school projector would also be a huge help with this.
First, find a picture of an animal that you would like to turn into a 3D target online. Print the picture, make sure that it will fit in a 4”x8” box (if you don’t have a printer, use the tracing paper to trace the image one the screen – don’t press too hard, you don’t want to puncture your monitor). Next, use your ruler (or measuring tape) to measure out a 4”x8” box on your tracing paper. Next, make 1” squares in that box, making a grid pattern. Next, lay that tracing paper on top of the picture you printed out earlier. Trace the outline of the animal onto the paper. If you have an old school overhead projector, now would be the time to put your outlined image onto it and project it onto your plywood. If you don’t have a projector, then lightly (using pencil) draw your grid pattern (except instead of 1”x1” squares they will be 1’x1’ squares) onto your plywood and transfer the image onto the plywood that way. After you’ve traced your image onto the plywood it’s time to cut it out using your jigsaw.
Be sure to cut out the vital area of your new target. Place a box target behind the vital area of your target and you’re good to go!
If you opted to buy paint, now would be a good time to paint the target to your liking.
Here is a video that might help explain it:
For even more great DIY ideas and toturials, check out the book “Bow Accessories” by Volkmar Hubschmann.
This story has been republished with the permission of Randy Madden. Randy was shooting “Hope,” one of two bows made by Bob Sarrels of Sarrels Archery. The bows, Hope and Faith, are identical mirrors of each other – one is right handed and one is left handed. They were made with the express purpose of being donated to raise money for Trad Gang’s annual St. Jude Children’s Hospital auction. Every year, Trad Gang members donate and auction off hundreds of items, worth tens of thousands of dollars – 100% of the money raised goes directly to St. Jude Children’s Hospital. After the bows were made, they were passed around the community for more than a year to drum up interest. While he had her, Randy was able to harvest a prize.
By Randy Madden
I was recently asked if Hope had a new story to tell, and as a matter of fact she does! But I better tell the story, so she doesn’t tell everyone about how fast my heart was beating and how bad I was shaking and how I almost messed the whole thing up!
After gathering with some friends last week I almost decided not to hunt, but my wife said I should go because I only have Hope for a few more days. So, I headed out the door around 6:20 that evening. I climbed up in the same stand that I used in a previously unsuccessful hunt around 6:40 p.m.
My feeder had already gone off, but I wasn’t worried about it. The trail cam pics show that the hogs usually don’t come by until right at dark or a little after. With a storm front approaching my hopes that something would move a little early was high. I didn’t hang my feeder light because these hogs have been hunted and usually won’t commit to the feeder if anything is out of the norm.
So, I sat and enjoined the cool breeze, which was perfect most of the time with an occasional errant swirl. I watched the doves, cardinals, blue jays, and squirrels take turns running each other away to take their turn at the free golden bounty. I sat there just enjoying the evening, contemplating what to do about the coons that seem to get the most of what is meant for the hogs. As the light started to fade I texted my wife and told her that if something didn’t come in soon I would be coming home earlier than normal as I was concerned of shooting something late with the storms coming. As last light came I was mentally getting ready to start packing up. I say mentally because I have to make myself quit or I would have stayed until I got wet.
Then I heard the slightest noise to my left and not very far away. I thought “Oh great, another dang bait stealing coon”.
Next thing I know I see a hog step out on the trail to my left at 5 yards. This sucker snuck to within 5 yards of me and I never knew he was there! Always amazes me how quiet they can be when they have to.
Anyway, I was already standing because I was about to pack it in so I eased Hope off the hook she was hanging on and got ready. I couldn’t shoot because of a few limbs from the cedar tree I was in but all he had to do was take two steps and he was mine. Well, he just stood there staring at my feeder and smelling the wind for a min which seemed like forever then he turned and headed back the way he came! Crap!! I thought he was gone.
After another minute long eternity, he comes out at 15 yards to the left of my feeder and I guess he was convinced all was safe because he walked straight in and started eating. It also amazes me how they can always be broadside to everything except you! I watch him eat for a few minutes and every time he moves, he always stops head on. One time he turns broadside and I start to draw and he starts walking to the opposite side of the feeder and I almost let one fly, but it didn’t feel right, so I let down. This goes on for several minutes and all I can do is pray the wind holds.
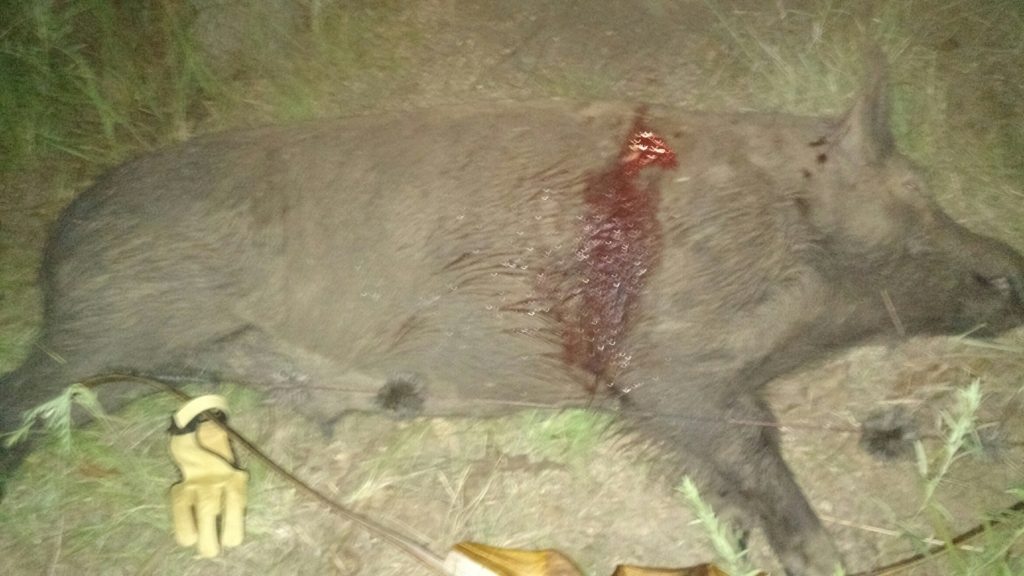
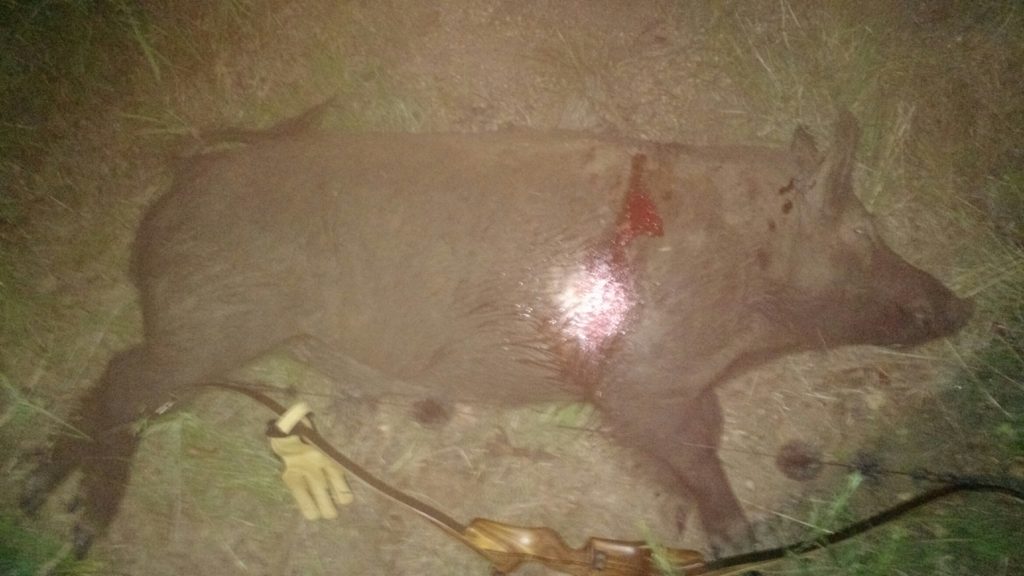
He finally walks back to the left side of the feeder and I know he’s going to have to turn around to face the feeder to eat so I put some tension on the string. Sure enough he turns to face the feeder and stops broadside. He’s about 9 yards, head down, wind is in my favor, and I start to draw. I honestly do not remember coming to full draw. All I see is the soft spot above his elbow and the next thing I know the woods erupt with a loud grunt and string is coming out of my tracker so fast I was scared it was going to break off.
After what seemed like forever it starts to slow down, then it’s slowly but steadily coming out. Then it stops. Then it starts going slow again. Then it stops again. Then it goes slow again. The next time it stops it doesn’t move. I keep thinking the worst like maybe the arrow pulled out, so I give him a few more minutes and I call my wife and ask her to bring my spotlight. After she arrives we start the tracking job. We slowly follow the string while constantly searching ahead as far as we can see. All I can say is thank God for my string tracker. Due to the downhill angle and the lack of penetration (only got about 6-7” of penetration, and only got one lung, but my Grizzly broadhead did its job) I only found eight drops of blood in about 250 yards. At the end of the string, I was ecstatic! He was much bigger than I thought, he weighed 272 lbs.
Therefore, I had to recruit my brother to help with the drag. We had to drag him about 150 yards to get close enough to load him in my truck. That was tough. As I pulled into my driveway it started to rain. For once everything went right. But that’s why we do what we do. All the times we fail are washed away by each success!
Definitely my best hog with any bow to date thanks to Hope.
Hope, 54#@28″, Grizzly 175 grain Instincts on D/F shafts, string tracker from Chad Orde.
You can purchase Hope, Faith, and hundreds of other items at Trad Gang’s annual St. Jude Children’s Hospital auction – 100% of the proceeds are donated to St. Jude.
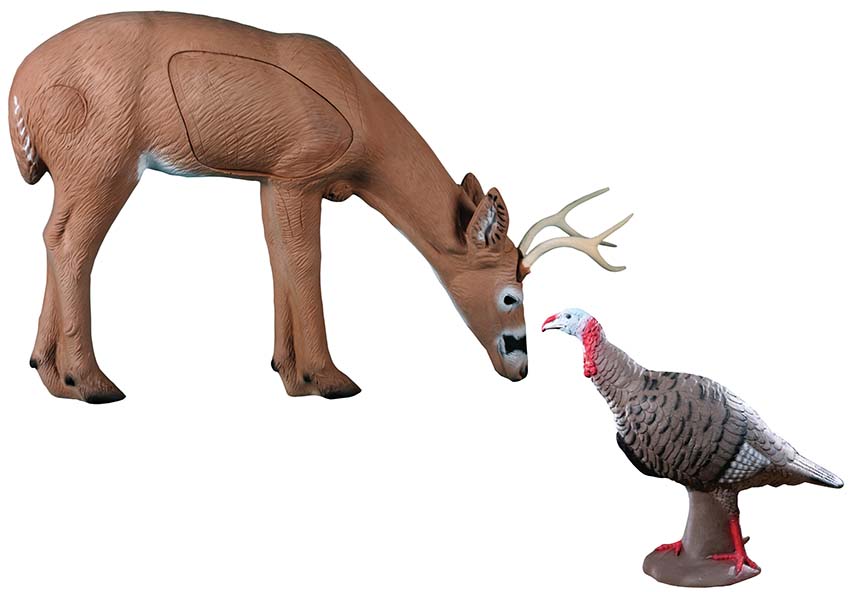
What is 3D archery? Generally, when an archer talks about 3D, they’re referring to shooting at three-dimensional life-like targets – normally made from foam and situated in such a way as to simulate a true-to-life hunting experience. At its inception, 3D was focused mainly on hunting practice, as such most of the targets were shaped like game animals, but 3D quickly evolved into a sport of its own, with rules, scoring, and a nearly limitless cornucopia of targets.
3D archery can make for a fun family outing.
As such, 3D is a great way to get ready for an upcoming hunt, or to just have some fun. It can be practiced alone, with friends, or family. In fact, it’s common for young children to participate in 3D. It’s a great way to experience the outdoors (if shooting at an outdoor range) and gain experience in shooting your bow in a realistic situation.
Before you head out to the range, there is some basic equipment you should bring with you. That said, there’s no special 3D bow that you’ll need; just shoot the bow you’re most comfortable with or the bow you plan to hunt with. You should used field points (don’t shoot broadheads at 3D targets!), it’s a good idea to have a pair of sunglasses handy, some sunscreen, an arrow removal tool (just in case you hit a tree, a cheap arrow puller and target arrow release fluid are good ideas too), a decent quiver, a towel for your hands and gear, and some arrows. Many outdoor shoots can be a mile or more in length, so it’s a good idea to bring something to snack on as well as some bottled water, but please don’t litter.
Six arrows should be plenty, but feel free to carry as many as you need. There are many archers who will bring an extra dozen and leave it in their vehicle just in case they need them. If you plan on shooting for score, you’ll want to bring something to write with and on (sometimes that’s not needed, but it’s better to be safe than sorry). Misses do happen and arrows will be lost (arrows are a lot easier to find with lighted nocks). When you do miss the target, don’t take too much time looking for the lost arrow, as it will slow down the whole event.
Most ranges will charge a small fee for shooting, whether you’re competing or not. This money covers normal wear and tear on the targets and on the range.
On how 3D is scored; typically, the high score shots will be in the vital section of the animal you’re shooting at. There are two primary scoring formats used: ASA and IBO. The ASA, or the Archery Shooters Association, uses 14-12-10-8-5-0 scoring areas. The IBO, or the International Bowhunting Organization, uses 11- 10-8-5-0 scoring areas.
When shooting for score, one arrow is shot at each target; the score is determined by where the arrow enters the target. Below is an example of what the ASA and IBO scoring rings look like.
(I can hear you asking, “why is the 14 score in such a weird spot?” While it’s true, you wouldn’t want to shoot a deer there in a real world situation it has to do with risk and reward for those trying to get the highest score possible. The ring is pretty small, and if the shooter misses in any direction they’ll end up with either an 8 or a 5.)
However, this scoring system does pose a problem in some situations. What if the animal is at an angle facing away from the shooter? Under normal circumstances a hunter would shoot the deer so that their arrow would hit midway between the front and rear legs, which would be a lethal, clean harvest. Despite being the most lethal shot in a real-world application, this shot would result in a score of 5 at a 3D shoot. Instead, the archer would need to aim as if they were trying to pass through the outer shoulder, which would result in a much higher score. Further, some targets will have multiple scoring areas marked. In which case, just ask which one is being shot at – if you’re shooting alone just use your best judgment.
Now, what happens if your arrow is on the 10 and the 12 mark? In most situations you get the higher score, if your arrow is touching it, then that’s your score. If you can’t see the scoring rings from the shooting stake, just aim for what would be the most natural lethal area. Some shooters opt to bring a good set of binoculars, but if you choose to bring binoculars remember to be courteous of other shooters and not take too long. There are also some archers who will bring reference cards of each target, so they know where to aim for the highest score.
Although many 3D courses are set outdoors, there are just as many indoor 3D ranges, which is nice when the weather gets too nasty for outdoor shooting. Most shoots will have between 20 and 30 targets arranged at different distances and positions. Usually traditional shooters will have a maximum distance stake at around 30 yards, but not always. If you’re participating in a tournament there will normally be club rules that you’ll have to obey in order to qualify (it might be a multiple day shoot or there might be different classes). During outdoor shoots be prepared to shoot off of elevated platforms, down hillsides and through brush. Some areas might be highly wooded and other areas might be in wide-open fields. Most targets will not have any indicator of what the distance to the target is, which gives the instinctive shooter a real advantage.
Indoor 3D ranges usually have a single line where all archers shoot from. Generally, archers are grouped by class and skill level. Targets can be as close as 2 yards or as far as 50 yards, normally distance is only limited by the venue.
Outdoor ranges, in my opinion, can be a lot more fun as they are usually a walk-through course (just like mini-golf). Normally, there will be three or four archers per lane – your group will finish one target and then move on to the next. Be aware if you or your group is moving slowly – it’s courteous to let faster archers pass you. Each class and skill level will have a designated stake to shoot from – most shoots are operated via the honor system, so no cheating. The shooter is normally required to touch the stake with at least one part of their body (i.e. foot or a knee) when shooting.
Although each club will have its own rules and restrictions, here are some basics to remember:
Although archery is generally a safe sport, it can be dangerous, so stay smart and stay safe. Know what you’re shooting at. Know what’s behind your target. Make sure there are no children about to dart out in front of you or behind your target. Be aware of other shooters at all times.
Try not to talk or be disruptive while others are shooting. If you’ve brought children, make sure they’re not making too much of a ruckus.
Take your time, but don’t stall other shooters. Some people like to really take their time, others love to move quickly – be courteous either way. If you’re a slower shooter, then let the faster archers “shoot through.”
Avoid foul language. These are often family activities and no one wants their children exposed to that.
Feel free to bring something to snack on and some water to drink (in fact, I’d encourage it), but don’t litter.
When you miss a target, don’t take all day looking for it, as it will slow down the entire event. Misses will happen (so be prepared) and arrows will be lost.
You might want to bring a ‘throw away’ arrow for novelty targets, such as steel or iron elks.


.jpg "Welcome to the 3Rivers Archer's Den")