Free Shipping on orders of $99+ click for details

Ask the experts: 260.587.9501 | Customer Service

Call Us: 260.587.9501 | Customer Service

Your cart is currently empty.
Free Shipping on orders $99+ click for details
Welcome to the 3Rivers Archer's Den

Archer's Den

Welcome to the Archer's Den. Here you will find a gathering of traditional archery stories, tips and techniques, trophy animals taken with traditional bows, and plenty more. Stay a while and learn something. We hope you enjoy and even submit a trophy of your own, or leave a comment on a post.

Tag Archives: bowhunter

Up Your Odds on a Guided Hunt

Client of a guided hunt with a beautiful buck Mule Deer

As an outfitter and guide in Colorado I am constantly amazed at how ill prepared some people are that show up at my camp. I once had a client miss an animal with me and then say, “Those broadheads seem to fly different than my field points.” Needless to say, he was ill prepared.

Besides guiding clients myself, I am also occasionally a client at other outfitters camps. I usually go on one or two guided hunts every year. I have had some great hunts and others have been a waste of time, money and in some cases even dangerous. To help avoid a bad experience and to help you up your odds on a guided hunt, I have compiled a list of things I check into before spending my money on a guided hunt.

Are they experienced in guiding Traditional bowhunters?

This is more important than many people realize! A lot of outfitters unfortunately aren’t experienced when it comes to traditional bowhunting.  I have been to places where blinds or treestands were set-up for shots at 30+ yards. It is important to either hunt with outfitters or guides that understand traditional equipment and it’s attributes and limitations or it is our job to explain it to them.

Fred Eichler and client with a beautiful antelope

What is the guide to hunter ratio?

Will it be one on one or will you be sharing your guide with another hunter?  It is worth knowing before you go. If your hunt isn’t a one on one guided hunt and that is what you want, talk to the outfitter. Some outfitters will offer a one on one ratio for a higher fee.

How much will I spend including licenses?

Make sure there are no hidden costs. Request in writing, a list of all costs including license fees or additional transportation costs. Is food and lodging included and is there a trophy or kill fee? These are all important questions.

How many days is the hunt?

Does that include travel days? Most guided hunts average 5 to 7 days, however, they all vary. Be sure you are happy with the number of days versus what you will be paying. If you want a longer hunt, some outfitters will allow hunters to extend their trip on a pay per day basis. This is always important to me since I have already invested my money and time getting to camp, one or two extra days may be all I need to get a shot opportunity. Remember things like weather can also knock a few days off of a hunt in a hurry. Bring this up ahead of time. It may save your trip.

Gorgeous buck with a happy bowhunter.

How physical is the hunt?

Obviously, physical ability varies from person to person as do the requirements of different hunts and terrains. A hunter that is totally out of shape can easily walk a hundred yards from a truck to a tree stand, whereas an elk or lion hunt will demand a totally different set of requirements. How much walking will we be doing on average?

How much stand hunting? Will we be using horses? Make sure you can do what may be required.

What percentage of bow hunters harvest their intended species? And how many have opportunities?

Ask for specific numbers. How many bow hunters did you take last year for elk? Out of those, how many harvested elk? How many had shot opportunities? In fairness to the outfitter, I like to ask about shot opportunities, not necessarily numbers harvested. Also bear in mind that sometimes a low success rate may be due to bad weather, inexperienced or out of shape hunters. Try to feel the guide or outfitter out so you understand why the success rate is high or low.

Can you send me references?

Most outfitters have a prepared reference list. Of course, most reference lists are filled with hunters that harvested animals. Ask for a list of specific references and, if possible, for hunters in your state that have hunted with the outfitter. Be sure to ask for bow hunting references that hunted the same area you will be in, or that at least hunted the same species you are planning to hunt. Talking to other bow hunters can often give you a good feel of what to expect from terrain to guides. Also, ask for references of hunters who were not successful. Sometimes your best information will come from these guys.

Does the Outfitter have any game violations?

A simple call to the area game officer can answer this one. If the game officer advises against the outfitter, I wouldn’t go.

One happy client with a big, beautiful tom turkey

Does the Outfitter hunt private or public land?

Some pubic land areas are great, and others are crowded with public hunters. Find out about where you will be or how many other people you will likely encounter. Most outfitters will charge more to hunt private ranches. Just be sure to ask how much land they have available to hunt on. If its 5 acres and 7 people will be hunting it, it may not be such a great deal. Usually an outfitter will charge more to hunt private ranches. I also always ask how much land they have available to hunt on.

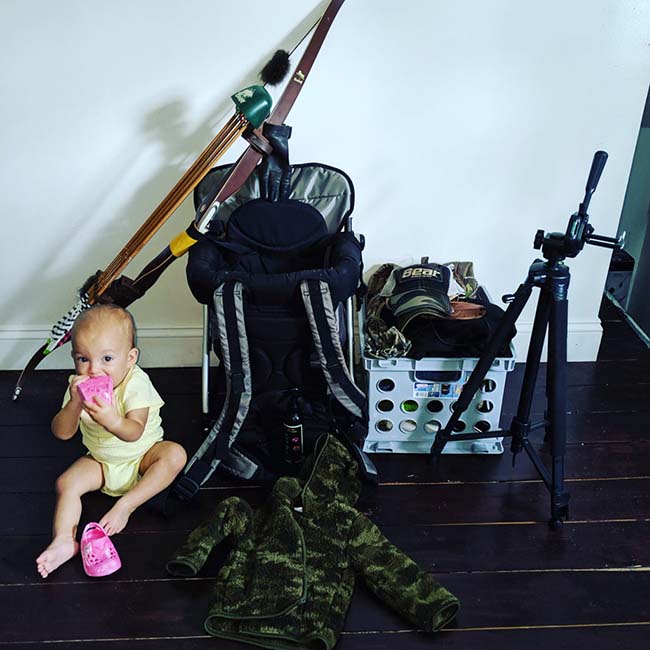
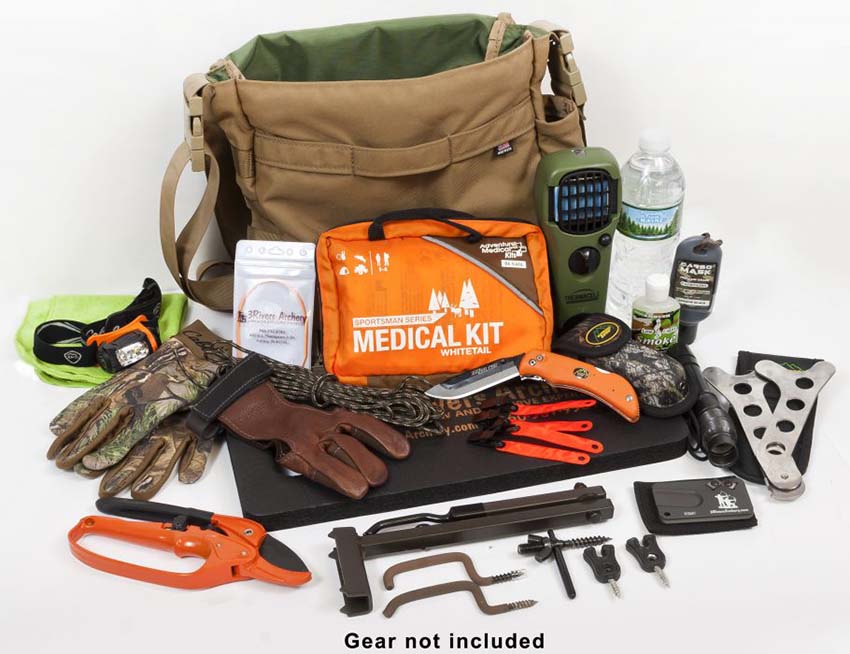
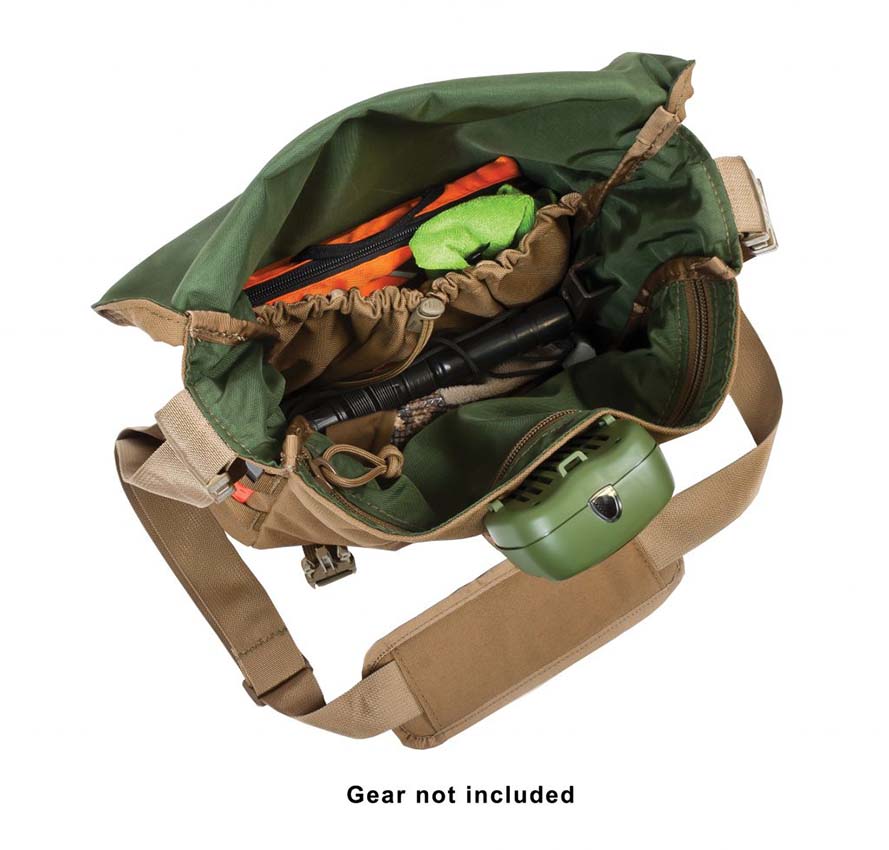
What gear or equipment do they recommend that I bring?

Most outfitters will have a list of items they recommend for the hunt you are going on. If they don’t offer one, ask for one.

In general, most of my bad experiences have come from outfitters I have not communicated with enough. I have also had some tremendous experiences with outfitters that will provide me with fond memories for the rest of my life. And while some of these great memories include harvesting an animal many of them did not.

My next column will be about how to be a good client for an outfitter. Your honesty makes a difference!

As always… Have Fun, Fred

By: Fred Eichler
Everything Eichler

6 Steps for Pre-Season Prep

At the time of writing this, deer season is just days away here in Ohio, and I’ve been running down a mental checklist in my head of all the things I need to do and have ready for opening day.

I’ve always been a very prepared person, so these things are just something I do every year, and I think it’s something every hunter should do.

1. Practice. This is something that should be a given, but you’d be surprised how many people will pick up their bow for the first time in months, on opening day, and expect to be shooting perfectly. Even if it’s just a few arrows a day, practice is something every hunter should be doing. As a traditional hunter, it should be something that you do year round.

Bear Kodiak Recurve with Bear Bow Quiver

2. Bow Maintenance. This is something that needs to be given a once over every year, but that doesn’t necessarily mean you’ll have to change anything. Check your bow string and make sure it doesn’t need to be replaced (once a year is roughly the life of a string depending on how often you shoot). Check your hunting arrows for any any cracks and make sure they don’t need to be refletched. If you are shooting feathers in particular, this can be the case. 

Beka Garris Woodsman Broadheads

If you’re reusing your broadheads, make sure they are sharp. It’s easy enough to sharpen fixed blades and a dull broadhead isn’t doing you any favors.

Knowing your bow and accessories are in working order will ensure you can rely on it performing well when it comes down to it. 

Beka Garris Hunting Pack and Hunting Buddy

3. Organizing your pack.  I like to leave the basics in my pack every year (binoculars, arm guard, extra shooting glove, knife, waterproof box) and add whatever I’ll need for hunting that particular game when the time comes. For deer I’ll add a grunt tube, face mask, snacks, water and usually an extra layer of clothing. I like organizing everything so I know exactly what I have and where it is when I need it.

Hunting Blind Prep for Season

4. Scouting and Stand Prep. Most hunters have their spots picked out far in advance, and many sit the same spot every year with success. If you are going to use a treestand, make sure you don’t need to replace any cables or straps. If you’re hunting from a blind and setting it up in advance, make sure you have your chair setup and all crunchy grass and leaves removed from the floor in the blind. Also, do a wasp nest check before opening day. Trust me on this one…you don’t want to be sharing your blind with a dozen wasps when the sun comes up. 

Beka Garris Prepping her Hunting Blind

Check shooting lanes and then check again. Trim anything that could even remotely prevent you from getting your shot.

5. Wash your camo. It seems this varies from hunter to hunter… Some hunters like to wash their clothes in scent free detergent and store them in tubs. Others like to air them outside and spray down with scent killer. Whatever you do, make sure it’s done before opening day!

Beka using the slow cooker for dinner prep

6. House and Food prep. This one may sound a bit out of the ordinary on this list, but in truth it is extremely helpful. Especially if you’re planning on being away from home for long periods of time, it’s nice to have things prepped. No one likes to clean their house, but organizing and cleaning your house before hunting season just means you won’t have to worry about it during hunting season. Planning easy meals and making them ahead of time to stick in the freezer has been a game changer…meal prep and throw something in the crock pot before you leave in the morning. When you come home at night you’ll have a hot meal without having to actually cook. 

By Beka Garris
Follow Beka on Instagram

The Five Cardinal Rules of Hunting Public Land

By Beka Garris
On Instagram @bekagarris |

If you frequently hunt public land, I am sure that you have had your share of mishaps and run-ins with other hunters. You’d like to think that as hunters, we are all on the same page and therefore will be respectful of others and the area we are hunting… but this is not always true. Whether you are hunting deer, turkey, small game or something else, there are Five Rules that every hunter should follow. I like to think they are common sense, but it seems they are not for some.

Public Land Hunting with Beka Garris

1.       First Come, First Serve. You pull into a small lot at 5:00 in the morning, and see that there is already someone parked there. You walk in to the woods and arrive at your favorite tree, only to discover someone else is hunting in it. Sure, it’s easy to get angry or frustrated but lets be honest…it’s public land and they have as much right to be there as you do. If they got there first, simply be respectful and back off. Find another spot to hunt, or move a safe distance away so you won’t be disturbing them while they are hunting. On multiple occasions I have arrived at a little pull off area to find someone else already there, and I have simply kept driving. It’s tough to do if you’re hunting a specific animal but I consider it common courtesy.

A big guy seen while hunting public land

2.       Know Your Target And Beyond. This one should be common sense, but every year you read about someone getting shot by a fellow hunter because they never actually identified their target before pulling the trigger. If you see something moving in the brush and you think it’s an animal, don’t just blindly shoot. If you hear a gobble coming from behind that tree, make sure it is in fact a turkey and not a fellow hunter.

Hunting with a Bear Kodiak and 3Rivers wood arrows

3.       Personal Space. This is one of the biggest issues I have run into while hunting public land. Although it wasn’t a huge issue during deer season, I had a lot of struggles during this past turkey season. If you know someone else is hunting in the area, or if you accidentally stumble into each other, make sure you move a safe distance away and let them continue on their hunt. Don’t make loud noises or angrily confront them, and don’t decide to park close enough that they can’t get into their vehicle on the way out (someone actually did this to me.) And lastly, don’t take advantage of their location if they are calling/sitting over bait/ etc and set up to cut off anything that comes their way. Keep in mind, the road less traveled is always best. Going the extra mile and taking the time to go deeper into the woods  will also eliminate the chances of running into anyone else.

4.       Don’t Steal. Although I have never been a fan of leaving stands, blinds, or cameras in the woods on public land… I know many people who do. It can be tough to constantly pack in and out, especially if you don’t live close to the area or if you only hunt on weekends. If you find someone else’s hunting gear in the woods, just leave it alone. Chances are, they’ll be back for it.

Beka with her beauty of a turkey from hunting public land

5.       Be Courteous. Just because someone is hunting the same area that you are, doesn’t mean they are intentionally invading “your spot” or that they even knew that you were there. If you meet another hunter in the woods, whether you got there first or they did, be polite and courteous instead of confrontational. Most hunters are great people and they are out there for the same reason you are… and they certainly don’t want to run across other hunters any more than you do.

Finding the Right Hunting Pack

Badlands 2200 and Badlands Monster

Like many people, I own more than a few pairs of shoes. Dress shoes, tennis shoes, hunting boots… The list goes on. There is not one shoe that works for all occasions. The same goes with hunting packs.

From chasing elk in Colorado, whitetails in Indiana, or hogs in Florida the hunting pack you need can vary greatly. I have been very slow to realize this myself, and often force a pack to fit for a situation that it’s not ideal for. The best example of this is when I take an oversized hunting pack for an evening treestand sit in the deer woods.

When I have shopped for packs I have been like many folks and look at getting the max volume size for a pack. Hunting packs are not cheap, so my thought has always been to go bigger than what I believe I need, and just not fill the space. Problem with this is I find myself with more than half a backpack empty, and then I talk myself into putting more in as, “I have the space, so why not.”

Now, the dedicated person may have the mental strength to avoid doing this, but I’m betting I am not the only hunter sitting in the woods carrying the “kitchen sink” worth of gear. What I have done over the past few years to limit the over packing when I get ready for a hunt is first writing down a list of all items I truly ‘need’ for a hunt, then start expanding out from there. I don’t even look at a pack till I have my list in hand, and the items laid out in front of me.

Hunting Gear Laid Out

What to pack in your hunting pack

When writing your own list, think about how long you plan to be out, how far away from your vehicle or home/camp (where I keep non-essential gear),  and on every item you are about to write down ask yourself, “If I didn’t have this on me,  what would it hurt?”

Now, this may seem like a silly question, but it can really shed some gear from a pack. I no longer carry a folding saw with me when I head to treestand. I have hand shears for smaller branches, but I’ll make sure any large branches or logs are removed when I first set up the tree stand, and I’ve gotten better with my knife to not need a bone saw when I’m field dressing.

For an example on writing a list, here is what I take for an evening sit in my tree stand in Indiana. What I take into consideration is I’m never really that far from my truck and even with leaving work a bit early, I’m only out for a few hours.

  1. License and transport tag (put in license holder with small pencil)
  2. Bow and arrows (4-5 with broadheads, 1-2 with hammer blunts)
  3. Shooting glove and armguard
  4. Headlamp
  5. Safety harness and tree strap
  6. Phone / Camera
  7. Pull up rope (doubles as drag rope)
  8. Seat cushion
  9. Whisper dust
  10. Bow, 2nd arrow, and gear holders
  11. Field dressing kit – Knife, latex gloves, and wash cloth
  12. Back-up shooting glove and bow string
  13. Camo gloves
  14. Ratchet shears
  15. Bottle of water
  16. Medic kit (small one)
  17. Face paint
  18. CC-sharpener
  19. Toilet paper

Now, some of this is carried on my person (numbers 1 – 6 mainly), so always keep that in mind. As I keep the, “cannot afford to lose” items always within grasp. This is an early season list. Which will grow as the weather dictates. Add a rain coat, grunt tube, insect repellent, etc. All going off what I expect to happen that day.

When I first started writing a list two things happened immediately for me. First, I start cutting the unneeded items before I even finish writing. This example list is 19 items long. That “feels” like a lot, but you should have seen the first lists I made. Secondly, I stopped forgetting gear I needed when I went on my hunts.

Now with your list done lay all of the items out. I set up a card table in my garage and organize items best I can. So have your broadhead sharpening gear next to each other, and your clothing in order from base layer to outer layer. Being able to visualize my gear I try to imagine each piece being used on the hunt, and how likely that is. If I could do without it, I put it aside as a secondary item. If there is space I’ll take it, but most likely it stays in the truck.

Early Season Gear in Haversack

Now that I can see what I need, I pull my hunting packs out. I have a Badlands 2200, an old Keyes hunting pack, and a 3Rivers Haversack. For long hours moving about I like the Badlands packs as they have a waist belt and tons of space. So I can comfortably wear it all day and I can carry some meat if I’m lucky enough to put something on the ground. The Keyes pack has tons of space, and I have used it for many years as I have hunted from treestands here in Indiana. The added space lets me pack extra clothing with ease. So great as the weather gets colder. For early season the 3Rivers Haversack is the perfect size. I have the least amount of gear I need to take with me, and the smaller bag makes it easier to move around. I have recently started hunting with a ghillie suit, and having the smaller pack makes it easier to balance a bulkier item like the ghillie suit. Nice thing with the 3Rivers Haversack and the Badlands 2200 pack is the bedroll straps. As strapping a ghillie suit to the bottom of the pack is a breeze.

The only item that always makes it is my med kit. I have it stripped down, but in case of emergency it will save my life.

I hope all of us get more time in the woods to get the experience of “doing stuff.” Learn what you can from others, but never let the hands on fun get away from you. Straight Shooting!

By: Johnathan Karch

How to Make a Ghillie Suit Fit

The ghillie suit is an excellent addition to the traditional bowhunter’s bag of tricks. The textured camouflage clothing of a ghillie suit is designed to break up your outline to help you blend into your environment. Ghillie suits are also called sniper suits as they are used by military sniper units all over the world.

Wearing a ghillie when bowhunting can offer more opportunities to get you closer to big game and out of the treestand. The challenge for the traditional bowhunter is customizing the ghillie suit to not interfere when you are shooting your bow. Getting your ghillie suit ready for hunting season only requires time and a good pair of scissors. We are using the Rancho Safari Shaggie® longcoat. If you use a different brand of ghillie suit, it may require more trimming.

Ghillie suits are made to travel easilyUnrolling the ghillie suit

Ghillie suits are hot. Adding strips of material, such as jute burlap and cotton, helps to break up an outline, but it also reflects your body heat back on you. So when wearing a ghillie suit you have to take into consideration that it will not be comfortable to walk around in. Many hunters will carry them to where they intend to hunt, then put them on.

Open your ghillie suit up outside Shake your ghillie suit to get loose strips off

When you first get your ghillie it is best to open it up outside in case of any loose material. We recommend giving it a good shake into the wind to force anything not sewn down to come off.

Size your ghillie suit for a close fit. Not loose. Ghillie suit cinch straps keep it closer to your body

Cinch down all straps on your ghillie suit for maximum mobility Ghillie suits use velcro straps to keep them in place

When first fitting a ghillie suit be aware of all straps, ties, and Velcro® strips. You want your suit to fit tight against you so as not to be cumbersome, get in the way when shooting, or get snagged on brush. The Shaggie longcoat has a waist level cinch cord, zippered front, forearm straps, and a Velcro® collar strip.

Ghillie suit sized and adjusted

Now with the ghillie suit situated, do some walking around. Try some stretches, stalking (crouched slow walking), and just anything to confirm the ghillie fits properly to your body.

The Shaggie Cat-Guard Arm Guard is a great accessory for the ghillie suit

One great accessory to have is an extra long armguard. Rancho Safari offers the Cat-Guard Armguard and fits nicely on most arms and is made to bend with your arm for great comfort.

TECH TIP: When putting on your armguard, turn your arm so your palm faces up and the straps point downward. This will get more of the camo strips to the outside of your arm and away from the bow string.

Watch for ghillie suit threads getting in the way of the bow string Ghillie suits normally catch the bow string in the chest area

Now, it is time to practice shooting your bow and arrow with a ghillie suit on. This is best done with a friend to watch where the ghillie suit is interfering with the bow string. You can do this step alone, either by setting up a camera to record yourself, or by pulling to full draw and holding while inspecting. Pay close attention to your upper chest nearest to the bow. Depending upon your form, this is the area that will require the most trimming.

Use scissors to trim your ghillie suit Cut all ghillie suit fabric that will interfer with the bow string

Using a pair of good scissors, trim down any strip that comes in contact with the bow string when at full draw. How much that will be cut is up to you, but you don’t want to miss the shot of a lifetime, or wound an animal, because your bow string got caught on a strand. This process can be quick, or it can take an hour(s). It really depends on how much the string is being interfered with and how many different shooting positions you are trimming for.

The ghillie suit carrying strap can do more than carry the suit Using the ghillie suit carry strap for keeping the chest area tight to the body

TECH TIP: Wear a chest guard, or the included carry strap, to cinch down material across your chest.

Trim the ghillie suit boonie hat Be sure to shoot with the ghillie suit boonie hat on during practice

Most ghillie suits will include something for your head; a facemask and/or a hat. These help break up your outline, and may require trimming as well to make sure they do not interfere with your anchor.

The Shaggie longcoat comes with a boonie hat. It is best to trim all that you can in front of your face so as not to have any strands in your peripheral vision that may distract you during the shot.

Wear the ghillie suit boonie hat behind the left ear for a right handed archer Wear the ghillie suit boonie hat in front of the right ear for the right handed archer

TECH TIP: For the right handed shooter, put the straps of the boonie hat behind your LEFT ear and in front of your RIGHT ear. This will help keep the hat in place when you go to draw your bow.

Practive shooting your bow and arrow with your ghillie suit on Practice different shooting stances while wearing your ghillie suit

With all of your trimming done it is time to practice, practice, practice. Shoot your bow with your ghillie suit on any chance you get. You want to be 100% comfortable shooting with it on by the time you are using it during a hunt. Be sure to shoot standing, sitting, kneeling, and any and all positions you can safely shoot a bow from. Always be willing to trim unneeded pieces to make sure your shot is not interfered with.

Bowhunting with a ghillie suit is an exciting undertaking. Once you get your ghillie suit fitted to your body and shooting style you will be on your way to an exciting new chapter in your hunting career. Best of luck, and be sure to share with us your hunting successes at our online trophy room here.

By: Johnathan Karch

[subscribe2]

How to Layer Hunting Clothes for All-Day Comfort

When you layer hunting clothes you control your core temperature in any weather

This story has been re-published with the permission of Core4Element. The link to the original story is no longer available.

One of the most important things a hunter must consider before going out into the field is choosing the best hunting clothing for the conditions. But even the best gear is useless without knowing the best way to wear it. The Core4Element line of hunting clothes is designed to be used as a system of three layers: a base layer, a mid-layer, and an outer layer. Dressing in layers like this allows you to control your core temperature in any weather, which helps you stay focused on the hunt instead of your clothes.

Layering allows you to prepare for all weather extremes, but there is a right way to do it. The first thing you need to keep in mind when creating your layering system is to abandon the thought of wearing cotton on your hunt. Cotton is a light fabric, yes, but it also traps moisture and chafes after wearing it for a long time. These are not ideal conditions for anyone, especially hunters competing with the elements for long periods of time.

Merino Wool Base Layers

Begin your layering system with a base layer. This layer will have direct contact with your skin, so you’ll want to choose something relatively lightweight, breathable and comfortable against your skin. At Core4, we create our base layers with 100% Merino wool, which is soft to the touch, anti-microbial, and has moisture wicking capabilities. Base layers should fit snuggly to make the most use of the wicking technology and allow for other layers to be put on top without bunching up. Depending on the climate of your preferred hunting area, you may want to consider heavier (thicker) or lighter base layers. Since base layers are pretty much impossible to remove once you’re out in the field, do your best to anticipate the weather conditions of your hunting grounds so you can choose the appropriate weight.

Versatile Mid-Layers

Mid-layer hunting clothes allow for a little more versatility than base layers because you can either wear one or several, depending on your comfort level. Mid-layers tend to be looser than base layers, but they do not need to be baggy by any means. The mid-layers are where you really control the body temperature. Adding multiple mid-weight layers for colder temperatures will better protect your from the cold than a heavy, bulky outer layer. Core4Element hunting apparel is tailored to an “athletic fit” to maintain contact with the base layer in order to optimize wicking capabilities. This will keep you warm while still being moisture and odor free. Mid-layers typically have special features to provide maximum comfort and breathability. Core4Element mid-layers often have underarm zippered vents and extra long front zippers for superior ventilation on all-day hunts. Layer the Mid Mountain Vest over the Selway Zip for extra warmth or use the Pivot Shirt as your mid-layer on warmer hunting days.

Protective Outer Layers

The outer layer of a system is going to be the most important layer in terms of protecting against the elements. Whether hunting in rain, wind or snow, Core4 has the high-performance, high-quality gear you need for creating the best final layer to your system. The key to the most effective outer layer is durability. Your pants and jacket need to be able to stand up against tree branches, rocks and whatever else you may encounter in the woods or backcountry. All of our pants and jackets are treated with Durable Water Repellent (DWR) to provide maximum protection against the elements. This is exactly what you want in an outer layer. Pay attention to the weights of the pants and jackets, as some are made for colder conditions than others. Pay close attention to the moisture in the weather. An outer layer protected by a DWR treatment will keep the rain and snow out for a while but if heavy rain or wet snow is in your future you’ll want a fully waterproof outer layer like the C4E Torrent jacket and pants. Torrent is waterproof, breathable, and just as important on the hunt, quiet.

When building your layering system, be sure not to neglect your head, hands and feet. Core4 offers Merino wool or synthetic options to keep you as comfortable as possible on your hunt. Be sure to keep your head covered on bitter hunts, as heat leaves most quickly through the head. Keep extra pairs of wool socks in your pack in case your boots do not protect your feet from water, as they should. Nothing ruins a hunt faster than suffering from soggy socks. Choose a pair of gloves that provides warmth, grip and mobility.

Layering is one of the smartest choices you can make on a hunt. Using the right method, you won’t have to worry about your clothing and comfort for the rest of your hunt, and that’s how it should be. Stay dry, warm and odor free when hunting with the Core4Element layering system. Ready to turn your hunting clothing into a system of specialized gear? Build your system now.

But How do I Bowfish?

Bowfishing from a boat

By Jason D. Mills

You know what bowfishing is, and you’re interested in trying, but you’re still not quite sure how or where to start. Bowfishing is unique in the world of archery in that it can be practiced day or night, on land, while wading in the water, or on a boat.

To get started you’ll need a bow, a recurve is best simply because smaller bows are a bit easier to manage while bowfishing. There is no need for sites because of refraction and because they can’t account for depth. You’ll probably want a bow that shoots 45 pounds or greater in order to have sufficient force.

Bowfishing rig

You will also need a reel and special bowfishing arrows; typically, bowfishing arrows are heavier, use barbed broadhead, don’t have fletchings, and are longer than traditional arrows. They are also attached to a fishing line. On that note, never tie a line to the back of an arrow, it should always be attached to the slide near the front of the arrow. If tied to the back, the line could get tangled in the bowstring, causing the arrow to snap back at you, resulting in facial injuries and even death.

You might also want to bring a pair of hip waders, some gloves, sunglasses (if you’re fishing during the day), sunblock, and a hat. If you’re fishing at night you’ll probably want to bring a decent flashlight or spotlight.

If you have the option, and if you’re shooting from a boat, you’ll probably want to use a flat-bottom vessel, so you can take it into shallower water. Like sport fishing and hunting, individual states regulate bowfishing, so you will probably have to pickup a fishing license.

When you’re bowfishing on fresh water you’ll be looking for fish like carp, eels, suckers, perch, catfish, gars, or even alligators. If you’re saltwater bowfishing you’ll probably target fish like dogfish, sharks, and stingrays. The exact type of fish that you’re allowed to bowhunt legally is regulated by the state, so check on your local regulations.

Something that seems obvious, but should also be mentioned about bowfishing. there is no catch-and-release in this sport. Bowfishing kills the fish.

If you decide to give bowfishing a try, but you don’t have access to a boat, then you’ll be limited to wading or bank bowfishing. You’ll want to do this kind of bowfishing in the spring, while the fish are spawning, before and after the spawn the fish can be harder to find. If you’ll be bowfishing from a bank, you’ll want to target lakes, rivers, and ponds with shore access. If you’ll be wading, you have the option of heading to a marsh with tall grass, where the fish feel safe.

If you’re having trouble narrowing down a good spot for your first bowfishing trip, just give your local DNR fisheries biologist a call and tell them you are looking for heavy concentrations of carp, eels, suckers, perch, catfish, or gars.

If you’ve got a few places in mind, but you’re still not sure about the perfect spot, the most important thing you should consider is the consistency of water depth and overall water clarity – clear water that is between 3-4’ deep is ideal for bowfishing.

Now, if you’re like me you don’t hunt what you won’t eat. That said, many of the fish that you’ll be after (such as carp) can contain contaminants, so it’s a smart idea to contact your local DNR office and ask about fish advisories before heading out.

Refraction

When you finally do get to your fishing spot, the main difficulty that most new bowfishers have is refraction. When light waves pass through water they are deflected, which makes things look like they are where they are not. This is most easily demonstrated using a straw and a glass of water.

Refraction

To compensate for this, you’ll want to aim about 10” below the fish you’re aiming at; keep in mind this is just a general rule of thumb and you should be prepare to miss quite a bit your first time out.

Don’t Leave Your Bow Hanging This Summer!

By Patrick Durkin

Bowfishing has been growing in popularity in recent years as more beginning archers look for fun shooting opportunities for spring and summer. As with almost everything in archery, you can get into bowfishing at nearly any price point you choose.

For basic equipment, some archers simply buy a kit that includes:

One solid-fiberglass fishing arrow

Fishing points

bowfishing reel

Some people who bowfish transfer all the equipment back and forth to their regular hunting bow, or buy a new bow for hunting and put their bowfishing gear on the old bow. Regardless of what you choose to do, our expert techs at 3Rivers Archery can guide you into the right product whether you’re just starting out or looking to upgrade your equipment.

Carp 101

Various species of carp are the most commonly targeted fish. Carp aren’t native to North America. They were brought over from Europe in the 1800s and released across much of the continent.

Because carp are destructive rough fish that reproduce readily almost everywhere they’re found, archers who bowfish typically shoot all they can, often using the fish as fertilizer for gardens and flower beds. Some also are smoked, canned or added to fish stew. About the only requirement is that those who bowfish take home everything they catch.

Bowfishing Is a Good “Next Step” From Recreational Shooting to Bowhunting

Bowfishing provides multiple shooting opportunities. For those archers interested in expanding their interest and archery skill into an outdoor adventure, it’s an ideal stepping-stone between target archery and bowhunting. No two shots are ever the same in bowfishing, and there’s usually much more action than in bowhunting. When bowhunting deer, elk or bears, bowhunters can go weeks – or several hunting seasons – between shots.

It’s also accessible.

Bowfishing can be done from piers, shorelines, and boats. This includes canoes, kayaks, airboats, motorboats, and Jon boats. As paddleboards become increasingly popular across the U.S., bowfishing from paddleboards is also gaining traction, particularly among a younger demographic eager to get outdoors. Several years ago, the Florida-based company, BOTE, partnered with ATA member Realtree, to offer its customers several camo-clad boards.

With bowfishing, you’re seldom restricted to one small area like you are when bowhunting deer from a tree stand or turkeys from a ground blind. If you see carp or gar nearby, you can stalk closer to try intercepting them. Those experiences also help prepare you for stalking or setting up on deer, elk or other game animals.

Gators Too?!

Carp and other rough fish like gar and buffalo make for exciting bowfishing, but perhaps the ultimate in big-game bowfishing is an alligator hunt. States like Florida, Georgia, and South Carolina allow bowfishing for ’gators, but no state offers more alligator tags each year than Florida. This requires specialized equipment, however, so it’s probably best to hire a guide or hunt with an experienced friend before taking on an alligator.

Amy Hatfield contributed to this story.

Tales From the Rut: Spur of The Moment Bowhunting Success

By Patrick Kelly

This story has been republished with the permission of Patrick Kelly, who, at the time of writing this article, was preparing to go on a bear hunt.

I was planning on leaving for my bear hunt early Friday (June 12) morning, but I decided to leave Thursday (June 11) instead, so I could make a stop on the way. I cleared it with my hunting partner, and got off of work around 7:30 p.m. on the 11th, and headed home. After dosing a sick horse with some medicine, I decided to go grab a battery from a light by a feeder, so that I could charge it and put it out tomorrow morning before I left, so that, hopefully, it would last through my bear trip.

“No sense in not taking a bow,” I thought to myself. So, I grabbed my Silvertip recurve, and one arrow tipped with a 175 VPA 3-blade broadhead and a lit nock and began the 1/2 mile walk to the feeder.

I got there around 8:30 p.m. and, wouldn’t you know it, there was a hog under the feeder who spotted me and took off – with a raccoon hot on his heels.

“Oh well, nothing ventured, nothing gained,” I thought.

I decided to back off into a small cluster of trees around 90 yards from the feeder and see what happened in the short time until dark. I promised my wife that I would head home by 9:45 p.m. to eat the steak she was cooking.

A little before 9:30 p.m. came around, and I was just getting ready to head out, and I saw a hog sneak out of the drainage to my east and make it’s way to the feeder. I figured it to be around 100 pounds or so.

I was wearing very faded jeans that seemed to glow in the low light, so waited a few minutes for it to get a little darker to make my move. I slowly moved to the west to put the light (a slow glow light, which was already in position) between me and him, and then headed toward the feeder.

The stalk was a little complicated, because between me putting on some weight and my jeans having shrunk some, they actually were squeaking when I walked, and the wind was dead still. I was also wearing a pair of hard sole Wellingtons and the ground had dried out considerable in the last two weeks in which we haven’t had any rain. I actually covered the distances sidestepping as quietly as I could, while holding my pants to keep from squeaking, all the while bearing in mind that a light wind could swirl at any minute and bust me.

I quickly covered the distance, and as I approached the light, I could see the hog, which now looked more like 175 pounds, under the feeder, and a raccoon feeding between him and the light. The light is not even 10 yards from the feeder.

Just before I made it to the light, the raccoon heard my slight noise, which the hog didn’t hear with his corn munching, and stood on it’s hind legs. He couldn’t smell me, and the light was blinding him, but he knew something wasn’t right. He decided to head for the drainage, and I moved a couple steps closer to the light, now only around 8-10 yards from the hog.

I could see him bending at the knees to get under the feeder, and I could see his front leg clearly, but waited a few moments to see if I would get a better shot. He was facing to my right, and he decided to back up to my left and step just away from the feeder. When I saw his front leg clear the feeder, I quickly came to draw and release. The nock lit up, but the hog took off toward the west (my left), banging the arrow off of the feeder legs and breaking the nock. I heard him circle into the brush toward the south and it sounded like thrashing. I thought that he probably was dead, but I texted my wife to tell her I was on my way to get flashlight, and that I had shot a 150-175 pound hog.

I headed home, ate some steak, and went back out with my wife and the dog to make a quick track and get started. Poor blood on the dry ground, but the dog found the hog in a couple of minutes, and I was pleasantly surprised with my very quick glance that the hog would go 225 pounds. I marked the spot, drove my wife back to the house, headed in to town to pick up a couple bags of ice, then came back to start the field dressing. When I got a good look, I was very happy. I didn’t weigh him, but I am sure that he would go 275 pounds. What a chore it was getting him into the truck. I really had to be creative.

I double lunged him, and he went around 50 or 60 yards, but no more. The arrow stopped on the far side of the shield and broke off when he dropped. Dropping this hog off at the butcher for my mother-in-law, but I’m going to really be needing another freezer if my luck holds up on this bear hunt.

Traditional Archery Community Fights Childhood Illness

Above is Edward Seales, one of the auction donors, and his son Asher, who is now deceased. Asher is the reason Edward is participating in the auction . “We don't even understand the disease that killed him. It doesn't have a name, just a location on a chromosome. He may have been the only person to have it,” he said. “We know it has some relation to Marfan syndrome, as it had connective tissue abnormalities, but it was far more severe than anything I have ever experienced.” “I hate to hear ‘I don't know what this disease is.’ I've heard it enough, and nobody could ever figure out my only son. Maybe the money we raise will help one family not go through this.” You can bid on Edward’s donation here.
Above is Edward Seales, one of the auction donors, and his son Asher, who is now deceased. Asher is the reason Edward is participating in the auction. 
“We don’t even understand the disease that killed him. It doesn’t have a name, just a location on a chromosome. He may have been the only person to have it,” he said. “We know it has some relation to Marfan syndrome, as it had connective tissue abnormalities, but it was far more severe than anything I have ever experienced. I hate to hear ‘I don’t know what this disease is.’ I’ve heard it enough, and nobody could ever figure out my only son. Maybe the money we raise will help one family not go through this.”

It’s a fate no parent ever wants to face, but it’s something that tens of thousands of families face each year – serious childhood illness.

Children, often too young to speak, many times cannot express exactly what ails them, which can make diagnosis go from difficult to nearly impossible. This coupled with the high cost of specialty medical care in the United States can make an already stressful situation go from challenging to emotionally crushing.

This is where St. Jude Children’s Hospital tries to help. Despite the more than 65 thousand children they see annually, no family is ever sent a bill and every patient is given top-level care and attention.

This is part of the reason why the administrators at TradGang.com, an online traditional archery forum, decided to hold an annual auction to benefit the children’s hospital. Started in 2004, the members of the forum have raised more than $735 thousand to date.

This year they are hoping to donate at least another $75 thousand more, but Terry Green, a site administrator, explained that the economy isn’t what it was when the annual auction was founded. He said that he isn’t sure if the turnout will be as pronounced this year.

However, he said that, “The kids are sick regardless of the economy” and that they will hold the auction as long as the traditional archery community is willing to give.

So far, this has been a great system and everyone has benefited. However, it takes a massive amount of work.

The auction had such a huge influx of participants the administrators had to setup on a different server. Green explained that between everyone involved there are hundreds of man hours donated before a single item ever gets shipped.

Each year a group of administrators get together and donate their time to run a benefit auction , where 100% of all proceeds are donated directly to St. Jude Children’s Hospital. The members of the forum will donate items to the auction and then other members will bid on those items.

“I had seen it done on another website and a member suggested doing it on TradGang,” said Green, on the initial motivation to have the auction. “Now, we’re one of their biggest annual donors.”

In fact, Doug Campbell, another administrator of the site, visited St. Jude to accept an award on behalf of TradGang, which recognized them as one of the hospitals largest donors. The site even made it onto the hospital’s wall of fame, which proves that even the smallest donation – when combined with the strength of others – can make a huge difference.

Green explained that no one from the site ever touches the money; everything goes directly to St. Jude Children’s hospital.

The auction features everything from custom bows to home made cookies.

“It’s a lot of fun, there’s some bantering that goes back and forth,” Green explained. “We had a lady donate two dozen cookies and one guy bid a pretty large amount and another guy got some buddies together to out bid him.”

Things ended up escalating and the two dozen cookies ended up going for a whopping $6,000. The next year? The same two bidders went at it again and a pound cake went for $7,000.

“Donate whatever you want to donate; we take anything but firearms and ammunition. I’d just like to encourage folks to visit and bid high,” Green said. “One hundred percent goes to the kids.”

By Jason D. Mills

Back to Top