.jpg "Welcome to the 3Rivers Archer's Den")
Learn Two Ways of How to Serve a String
By Stephen P Anderson
Learning to serve your own bow string is a simple and valuable skill to learn. Really, it’s as easy as learning how to start the serving, how to tie the serving off at the end, and acquiring a feel for maintaining good tension in between. Of course, we need to select the appropriate material for the particular application.
As far as traditional bow strings, there are two main string serving applications to be concerned with – center serving and endloop serving (for an endless loop bow string). Center serving is a great place to start learning. It’s the most likely serving to need replacing during the life of the string. Plus, both Flemish twist and endless loop bow strings have center servings. Only an endless loop bow string will require endloop servings.
The center serving stratifies two main purposes. Number 1 – it protects the bow string from direct contact with clothing, fingers, nocks, etc. and #2 – it creates the appropriate diameter and release material to accept the arrow nock. Most modern serving material for traditional bow strings measures .018”-.022” in diameter. The three typical materials are polyester, spectra, and nylon.
Selecting the Material
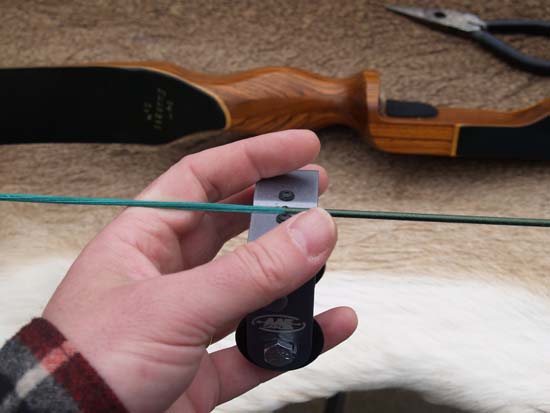
I love Brownell #4 Nylon – .018” serving material. I make a LOT of B-50 bow strings. I use #4 serving material on all the endless loop end servings and on all center servings for my 14-strand strings accepting classic glue-on nocks. If I were serving a 12-strand string for classic nocks – I’d probably select the slightly fatter .021” Halo serving material for a better nock fit. Halo is also a good choice when working with some of the skinnier low stretch materials as well, as it grips tight.
Starting the Serving
 There’s more than one way to start a string serving.
The objective is to catch the first loop of string so that it holds as we add successive wraps over the tag end and begin moving our serving along.
One experienced string builder I know starts with a simple overhand knot. Another standard method is to simply lay 2” of serving on the bow string and just start serving over the tag. My favorite method is to split the string in half, and pass 2” of tag end through the strings and start serving over the tag end. It’s best to set those first few revolutions by hand before letting the serving tool snug up to the string to take over and speed the process.
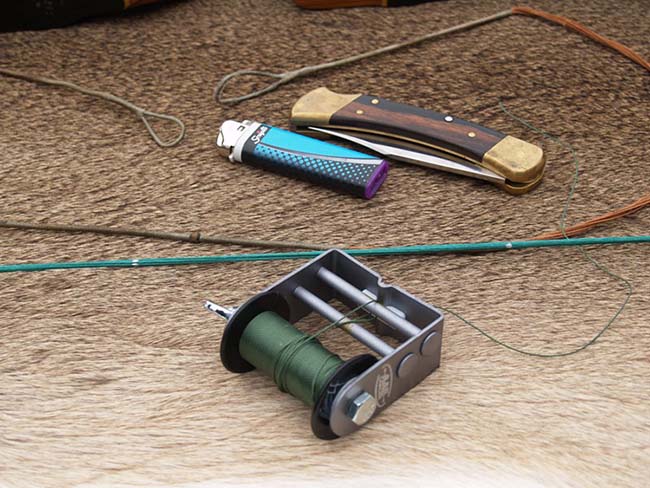
 For my first hundred or so Endless loop bow strings I built, I used an inexpensive Bohning plastic string server and it has done its job well. More recently I’ve obtained a metal AAE string serving jig. I notice marked improvements in the tensioning system, weight, and slightly shorter height of this jig.
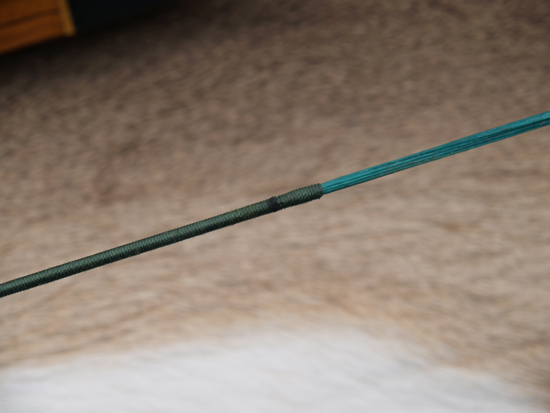
Center servings are typically 7-10” in length – according to preference. The idea is to start about 2-3” above where the arrow is nocked, and end somewhere near the bottom of the grip. You want enough coverage above and below the nock point where you contact with your fingers or arm.
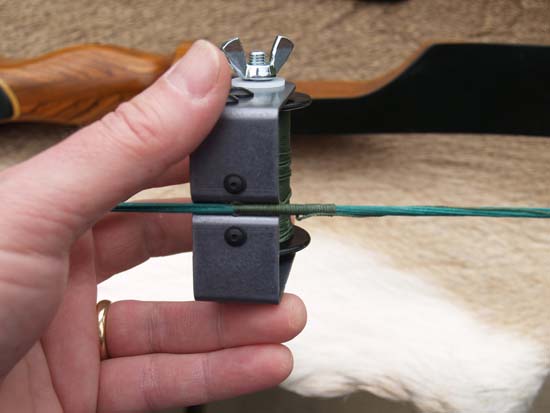
Spinning the Jig
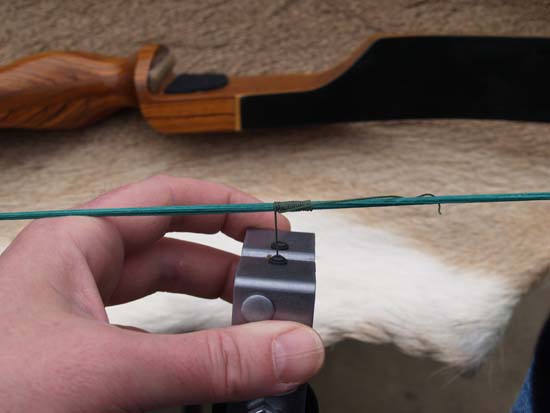
 With a bow laid out in front of you, and the top limb to the right, begin the serving approximately 2-3” above the nocking point on string. Lay down 8-10 wraps over the tag end of the string (I do these all by hand). At this point, move the remainder of tag end out of the way and continue wraps with the string jig until a good length of center serving has been laid down.
Tying off the Serving
There are various techniques for tying off the serving, but the two most common are back-serve and needle pull through. I use back-serve to tie off all of my endloop and center servings. Back-serve is a difficult technique to explain without showing (watch our YouTube video below for a visual). But once you’ve tried it and understand it, it’s magic – it becomes immediately understandable and…easy.
Learning the techniques to build and serve my own endless loop Dacron bow strings has given me great freedom. Suddenly, it meant used bows became cheaper. You can get a great price on a vintage bow with no string – or a damaged string and build your own in a half hour. Bow string and serving materials are cheap. I found Anthony Carrara’s book, Shooting the Stickbow, to be a valuable learning resource and reference guide for this.
Method A: Back-serve
Stop serving approximately 1” before reaching the point where you would like the center serving to end.
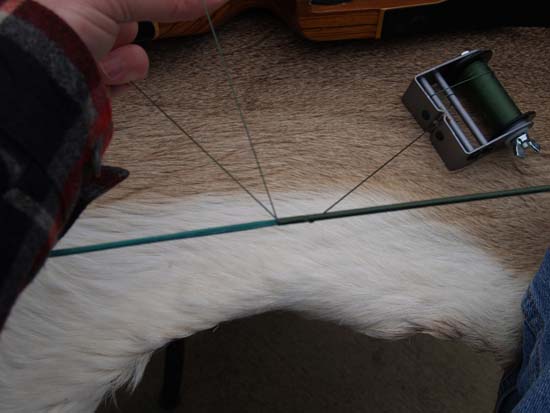
Hold the last loop tight at the string with right hand and pull out 10” of serving to make a large loop. Place serving jig 4-5” down the string and continue serving 12 more revolutions, but this time wrap from left to right with successive revolutions coming toward the completed section. The jig will be passing through the large loop of 10” of serving string we made. After we have these dozen revolutions on the string, and holding everything in place with left hand, pull another 10” out from the jig and place the jig to the right of your work with the exposed length of serving laying along the string. Then grab the large loop and start wrapping it around the string away from you as we have been doing with the jig. Each wrap will remove one of the dozen revolutions from the left of the loop and place it in line against the center serving. Once you have back served all 12 revolutions to the end of the center serving, quickly pull the jig tight to pull the slack from the loop through which secures the work.
Method B: Needle Pull-through
An alternate method is to stop serving at the same point. Hold work tight with right hand. Take an 8” piece of serving material and fold it in half. Lay this halved piece of string along the area where we need to finish the end serving, with the folded end of the string oriented to the left (direction of the already placed serving) and the tag ends to the right. Complete the final 12 revolutions over this folded length of string. Cut the serving material free of the jig, leaving a few inches of material after the last wrap. Take the end of the last center serving loop and pass it through the small loop produced by the folded end of the ‘needle’ string, which is now peaking out of the end of the center serving.
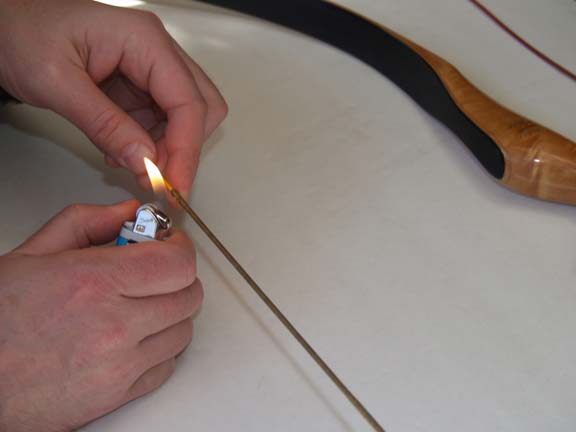 In either case, pull that tag end snug, which will snug up those last twelve loops. Snip excess string leaving 1/8” exposed. Using a heat source like a cigarette lighter, quickly light the exposed end and smash flat against the serving. This creates a swollen dot which helps to lock the end.
The tools and materials are inexpensive, and you have just added a precious new skill to your archer’s toolbox – every bit as simple and important to know as fletching an arrow.