Welcome to the Archer's Den. Here you will find a gathering of traditional archery stories, tips and techniques, trophy animals taken with traditional bows, and plenty more. Stay a while and learn something. We hope you enjoy and even submit a trophy of your own, or leave a comment on a post.
How to Build a Flemish Twist Bow String
By Stephen P. Anderson
Flemish twist bow strings have been made from hemp, flax, or linen likely for centuries, and were widely used until the recurve production boom in the 1960s and 70s when machine-made endless loop bow strings became popular for production bows. Modern bow string materials came along after the second Word War, and today we have many varieties of low-stretch materials. Flemish twist strings are enjoying a resurgence today, both with the many custom longbows and recurve bows, and the surging popularity of the great glass laminated recurves of the 50s, 60s and 70s.
There is much debate regarding the merits of modern bow strings of Flemish twist design vs. endless loop design. While there are no absolutes – and a bow’s design, as well as an archer’s form, are additional variables which may skew the data – generally it is accepted that a Flemish twist bow string has a greater effect on brace height when twisted in one direction or the other. Other arguments still open to debate are that an endless loop string may be a hair faster or that a Flemish twist string is somewhat quieter.
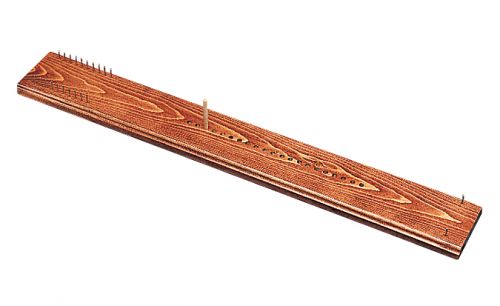
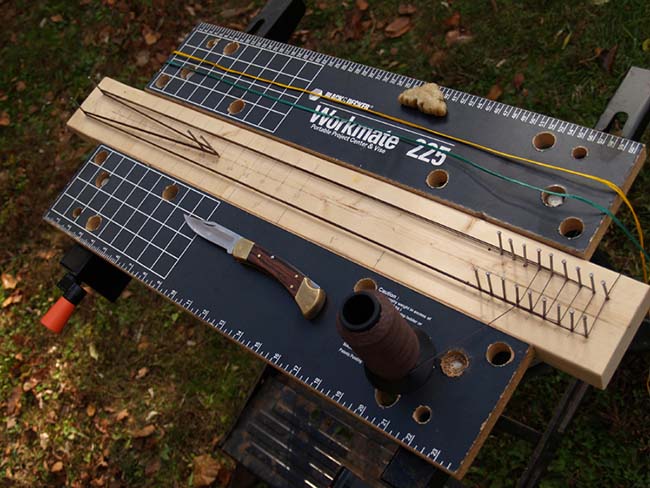
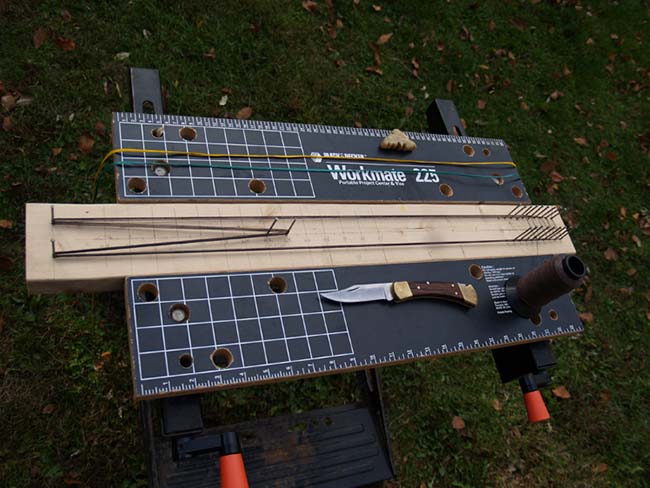
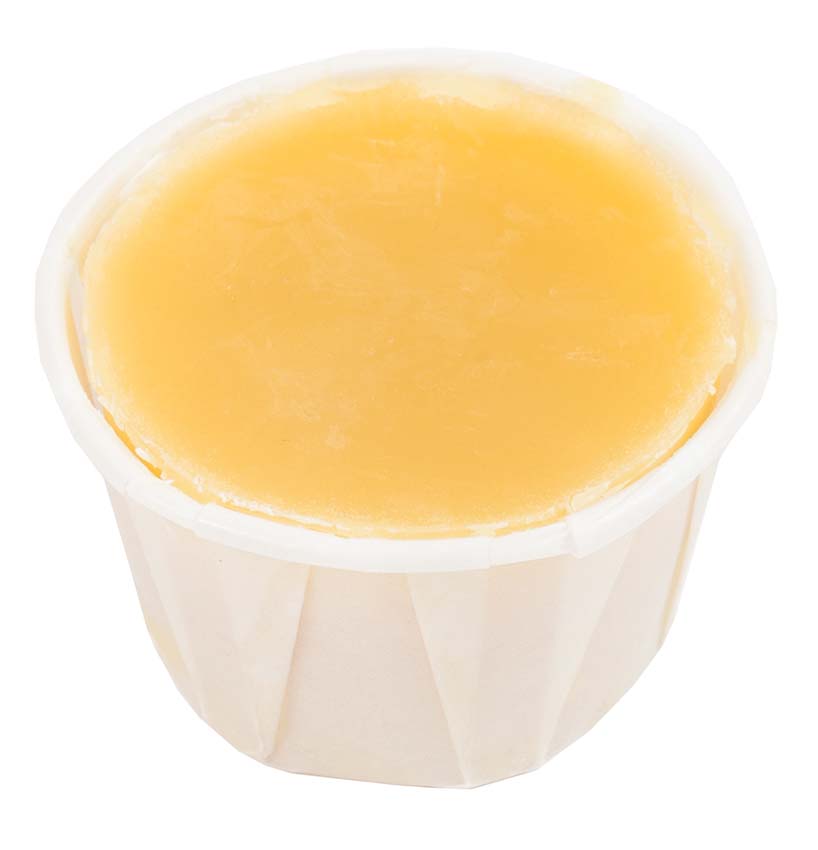
Building your own Flemish twist bow string is not difficult, and while it is possible to build strings without any specialized tools – there are some tools that will make the task quicker and easier. Of course we need bow string material, serving material, and a sharp knife. A Flemish string jig is a useful tool to help quickly and accurately measure off the staggered length strands required in the string bundles and highly recommended for the beginner. String wax, appropriate to the string material selected, will be needed. Needle nose pliers and a lighter will come in handy to neatly finish off the center serving. Optionally, a string stretcher can be used to pre-stretch the finished string, which will need to otherwise be “shot in.”
Buy a Flemish String Jig to get started today
First thing to do is establish some specs – string length, strand count, and number of bundles or plies. If an old string is available that gave the bow a proper brace height, measure for string length. Hang the old string by a nail and pull taught. Measure with a tape measure from the outside end of one loop to the outside end of the other. This is our string length. If no string is available, we likely have some investigative work to do. AMO is an industry standard for defining bow lengths. Many bows have their AMO length written, or printed, on the lower limb. If AMO length is not known, we can arrive at the measurement of the unstrung bow by measuring from nock groove to nock groove along the back of the bow (side that faces away from the shooter) following any curves. As a general rule subtract 4” from the bow length for recurves, and 3” for longbows, to arrive at the preferred string length. This works most of the time, although I have seen an occasional longbow which wanted only 2” shorter than its’ AMO length and some recurves which needed 5” shorter. Contact the bowyer if you can for recommended brace height and string lengths.
Next, we need to consider strand and bundle count. Flemish twist strings are typically made of 2 or 3 bundles depending on the desired strand count. An appropriate number of strands should be used to accommodate a given bow’s draw weight, and failing to use enough strands could void a bow’s warranty and/or result in a potentially dangerous failure. There may also be times when we wish to add an extra strand or two for a tighter fit on a particular arrow nock. For example a 14 strand 2-bundle bow string with a .018″ serving may fit a GT nock well, while a 3-bundle 15 strand string with .021″ #4 serving would give a better fit for a glue-on classic nock. 14 strands of B-50 is plenty strong enough for a 45# traditional bow.
3Rivers Tip: Many people recommend using 15-18 strands of Fast Flight string material in a bow string, or 12-15 strands of B-50 string material for most common weight bows.
Brownell’s Dacron B-50 string material should be used for vintage recurves and longbows. Modern stickbows typically have reinforced bow tips making them safe to use modern low stretch bow string materials. There are some who will say you can use low stretch on any bow, and others who will use nothing other than Dacron – even on their modern bows with reinforced tips. It’s my suggestion that if you cannot confirm with the bowyer or manufacturer, use Dacron B-50 to be safe. For our demonstration purposes here, I am using B-50.
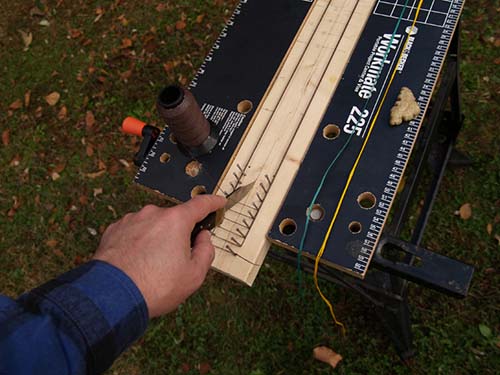
The bundles of a Flemish twist bow string are made up of groups of strands which are successively shorter by half inch increments at each end. This is what gives the string its elegant taper of loop into main body as the ends of the bundles get woven back in. By running our strands around a Flemish string jig, the taper gets figured for us. Wrap the string continuously around all the jigs pegs for a given length string – 5X for a 5-strand bundle, 7X for a 7-strand bundle, etc. When we cut the strand from the jig we end up with multiple staggered length strings. Run a cake of string maker’s wax over the last foot and a half of each end of the bundle and smooth them together, assuring also that no kinks exist throughout the middle of the bundle’s length. Make 2 or 3 bundles depending on the required strand count. Make each bundle a different color.
It’s time to form the first loop. Line up the ends of the bundles and measure 7-8” in from the end and clamp the string securely. I use a large binder clamp. You can go 7” if needing a smaller loop, 8” for a larger loop. Getting the loop size just right is a feel thing that will come with some experience.
3Rivers Tip: When building for a recurve bow the upper loop is larger to compensate for the wider limbs, so be sure to add approximately one inch more for this.
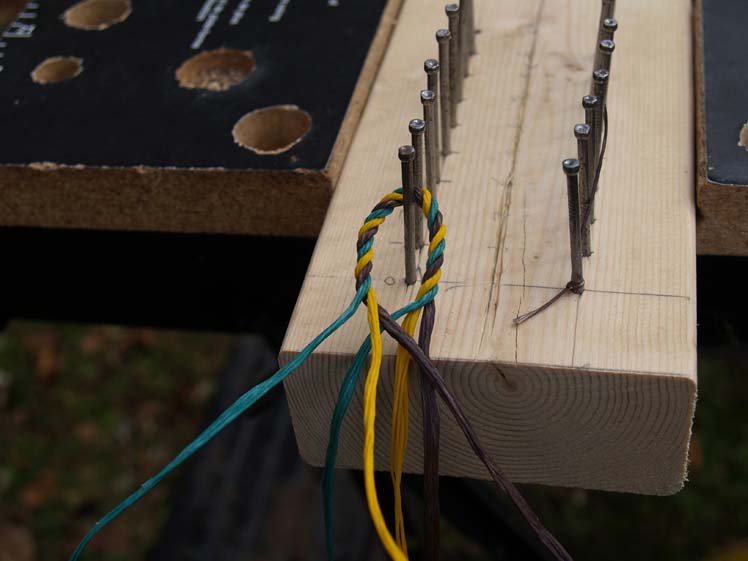
Next, we mount the clamp to something stationary so that the tag ends are facing us. Twist the individual bundle tag ends tight up to the clamp in a clockwise direction to the right, and then begin braiding bundles together by pulling on the right twisted bundle and crossing it over the other bundle(s) to the left – keeping good tension on the entire workings. Each time you grab a new bundle in your right hand, pull and twist it tight to the right before crossing it over to the left of the previous bundle. After two or more inches of braid, bend the braided area over to the body and check loop size.
When an appropriately sized loop has been reached pinch the sections together at their intersection at the bottom of the loop and carefully remove clamp. Place our unsecured loop on a hook or peg to start the process of joining the loop tags to the string body. Align same colored bundles from tag ends with same colored bundles in the body and smooth together. Before proceeding to splice the two together, it is a good idea to add about seven revolutions of back-twist to our newly joined body bundles and loop tags. This will help as we proceed twisting clockwise into the body. Give each joined tag and bundle at least seven counterclockwise twists to the left. For each twist, place your hand further down the string until the seventh twist occurs near the very end of the first loop’s tag end. Now pinch each bundle up tight against the newly formed loop intersection. Try to keep bundles at far end of string from tangling as we work this first loop.
Follow the same process that was used to form the first part of the loop. Pull right furthermost bundle taught and twist the uppermost part tight against the loop intersection point. Cross it left over the other bundles and repeat. Continue this process until all tag ends have been blended into the main string body and then add one more series of pull, twist right, cross over for all bundles and stop. Secure this stopping point with a twist tie to keep the work from coming apart as we proceed to the next step.
Leave the string on the hook/peg and stand back with the opposite ends of the bundles in you hands. It’s imperative here that we check that all bundles are of equal length at the other end of the string before proceeding. If they are — great. If not, a small adjustment to one of the bundles may be made by giving a couple of clockwise twists to the right to shorten by a small increment. If the lengths differ greatly, then something went wrong. Keeping the equal length bundles pulled out somewhat taught, add about 20-25 clockwise twists to the right to each bundle.
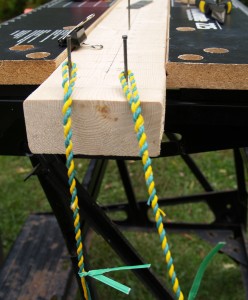
Next, measure from these tag ends so that we may repeat the steps above to form the second loop. Do everything as before and in the same direction. Clamp the string bundles 7-8” from the end and secure the clamp with the tag ends facing you. Twist each bundle up tight against clamp and begin… pull, twist to right, cross over to left. Follow all of the steps again to form the second loop same as the first and secure with a twist tie. Take the newly formed string, with twist ties in place, and pull it tight between your thumbs. Examine the string that all bundles have an equal amount of pressure on them throughout the string body. If any one of he bundles sags, the string will be no good. All bundles should be doing an equal amount of work. If it looks okay, place one loop on the hook again, pull tight and add another 20 or so twists to the entire finished string and remove the twist ties.
The finished bow string should be either put on the bow to stretch and settle in for a couple days, or pre-stretched using a string stretcher. While the string is in this settling in phase, it’s a good time to apply some additional bow string wax and burnish the string with a piece of leather until the body becomes nice and rounded. After some initial stretching, a center serving can be wrapped onto the string, while the string is on the bow. Consider arrow nock fit when selecting serving material. It is recommended to start the serving three inches above where the arrow nock sits on the string, and continue down seven inches to give protection from clothing, armguard, etc.
Apply some temporary nock points with string or tape. A good starting point is 5/8” above the point level with the shelf (recommend using a t-square). Once a good nocking point location is established, install either brass, or tied-on, nock points. I prefer tied-on using a serving thread of a diameter slightly greater than the center serving and tied with a nail knot. If your arrow nock’s fit is loose enough to let nock slide up and down on the string, a second nocking point should be added below the arrow.
Proceed to tuning with appropriate arrows and heads, fine-tuning by adjusting brace height up and down by twisting the string. Do not untwist a Flemish string too far or the string can come apart. One full twist per inch of string is a good place to be. When arrows are flying well, decide if string silencers should be used. There are fur silencers that can be inserted between the string bundles and wrapped around the string with the other end also inserted through the bundles. Cat whiskers or wool puff silencers can be tied onto the string using a double constrictor knot of B-50 string material. Place the silencers 1/4 of the way down from where the string contacts the upper limb, and place the other silencer 1/3 of the way up from where the string contacts the lower limb. Adjust as necessary.
Shoot the new bow string in, readjust tune, record that optimal brace height and nocking point location and then build a back-up string! See – there’s nothing to it…
How to Build a Flemish Twist Bow String was last modified: September 19th, 2022 by Wil
Get the Newsletter
Be the first to know about sales, upcoming events, and happenings at 3Rivers Archery!


.jpg "Welcome to the 3Rivers Archer's Den")