


.jpg "Welcome to the 3Rivers Archer's Den")
By Jason D. Mills
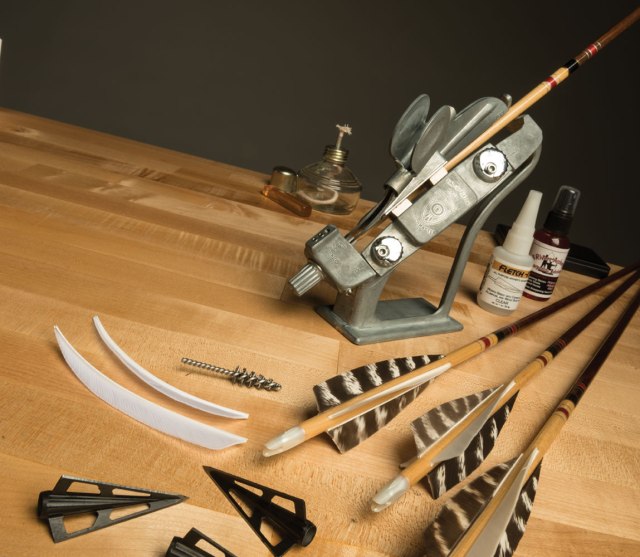
Arrow building, like bow building, can be extremely satisfying. Arrow building, however, is much cheaper and easier to get started than bow building. Besides, every archer will need more arrows at some point, and crafting arrows can give the archer one more way to be connected with their beloved sport and enable them to be the master of every facet of their rig.
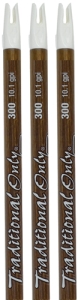
Not all shafts are created equal. That said, this build-along should help DIY-ers turn most carbon shafts into true-flying arrows.
Choosing your arrow
There are a few things you need to know before starting to build your arrows. First, you must know your draw length and draw weight. These two numbers will tell you what arrow spine you’ll be looking for. An arrow’s spine is how much the arrow flexes during flight. You want your arrow to recover as fast as possible, which means you want the correct spine. Ensuring you have the proper spine is arguably the most important thing to consider when choosing an arrow.

Your draw length is the distance from the back of the bow (the point furthest from the shooter) at your grip to the maximum distance you draw the bow. Find your draw length by measuring your arm-span in inches from tip-to-tip of each middle finger and then divide that number by 2.5.
Pro-Tip: This is your draw length, not your arrow length.
If you have someone around to help, another, arguably more accurate, method you could use to find your draw length is by drawing back an extra-long arrow to full draw and having someone mark the arrow right in back of the handle. Measure the arrow from the mark to the deepest part of the nock groove. The measurement you get is your draw length.

Finally, you could simply use the Easton Draw Length Indicator Shaft to check your draw length.
The next thing you need is your bow’s draw weight. If you don’t have hand held bow scale you’ll just have to go with what is written on your bow, which might not be the most accurate information. First, your bow’s draw weight can be as much as two to three pounds different for every inch of draw length. Second, bow manufactures are allowed to be two pounds off of what is printed on your bow, so your 45# bow could actually be 43# or 47#. This will affect your spine.
Using your hand held bow scale, draw the string until you hit your draw length and hold. Observe the weight on the scale. This is your actual bow peak weight.
Once you have determined your draw length and your actual bow peak weight you are ready to find your arrow length. It’s recommended that your arrow length be 1″-2″ longer than your draw length for the safety of keeping the arrow point outside the bow. Arrows that are less than the recommended arrow length can fall from the string, jam or otherwise cause damage to the arrow or the bow, and could even lead to personal injury.
If you had a friend help you mark the bow, simply add an inch or two to your mark and, voila, you’ve got your arrow length. If you used math to find your draw length, I’m afraid you’ll have to use math to find your arrow length too (that is unless you can find someone to help you mark an arrow while you’re at full draw).
Once you have your arrow length and actual bow peak weight, you are ready to select your correct arrow spine. For your benefit, we’ve created a handy chart for just that purpose. The 1/2″ marks over lap on the chart. That said, if you are on two different spines we highly recommend getting a test kit first.
Time to Cut Your Arrow Shafts
- Wear safety glasses before cutting
- Never touch the blade while it is moving
Lock your arrow saw in at your desired measurement

Pro-Tip: It’s a good idea to double check your measurement after each arrow, the lock can move
Ensure your nock is pushed flush against the lock at all times. Otherwise, you could end up with different sized arrows
As you cut your arrows, ensure you bring the arrow to the saw rotate it backward until it is cut all the way through
Squaring the arrow
 First, lets square the arrow. The cutting process sometimes lead to an uneven edge. The blade can cause slight imperfections, which you won’t see until you put your insert into the arrow shaft or even when you go to spin test your arrows.
Pro-Tip: Let 3Rivers do the cut and mount for you when you buy your shafts. We can cut to length and mount inserts.
Place the arrow on your arrow square, putting the cut end flush against end of the square tool. Rotate each arrow for approximately 30 seconds.
Clean out the inside of the shaft to a depth of 1″ with a Q-tip and some clean water or acetone.
Glue the insert into the shaft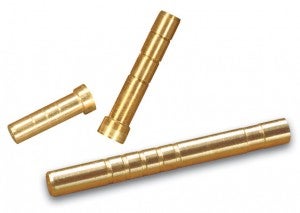
- Read warning and first aid instructions before use
- Wear safety glasses
- Do not handle inserts by gluing surfaces, doing so may lead to improper adhesion
- Disposable gloves are recommended
- Do not use heat directly on carbon
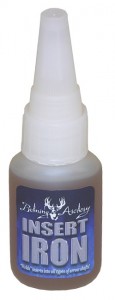 While holding the insert, apply an even amount of glue onto the back half of the insert
Pro-Tip: You apply it to the back half because as you push the insert into the shaft it will push the glue forward onto the rest of the insert
Rotate the insert while pushing it into shaft
Pro-Tip: It helps to finish this process off by pressing the insert tightly against a table or other hard surface
Immediately clean off the excess glue
Installing the arrow wrap
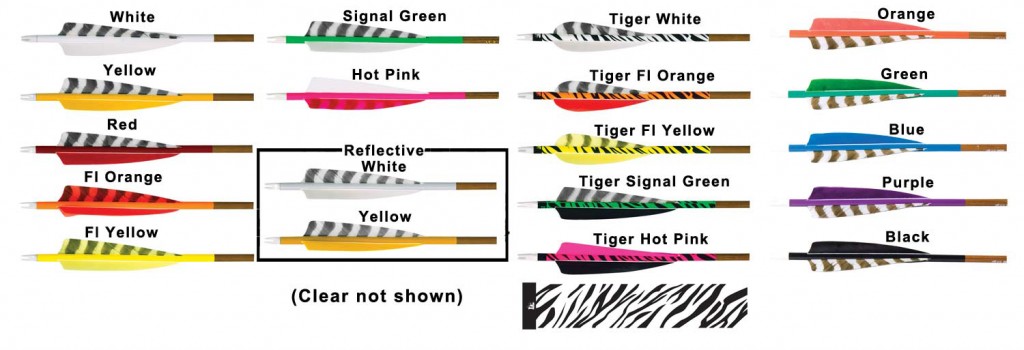 Install an arrow wrap for an instant arrow cap dips, but with no paint, no fumes, and no waiting. Arrow Cap wraps not only make your arrows look good, they make it easier to fletch and allow for easy re-fletching.
Peel cap wrap from backing
Place adhesive side up on a soft surface, such as a mouse pad
Align the edge of the cap wrap with the bottom of the nock
Press down and roll all the way through.
Fletching the Arrows
In your fletching jig, nock down place the arrow firmly into the nock holder, if it’s not in the same place every time, you will end up with arrows with different fletchings
Holding the clamp in one hand, place the feather into the clamp 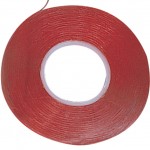 – start the arrow about half way back in the clamp, open the clamp slightly and use your index finger to gently push the arrow the rest of the way into the clamp.
Line your fletching tape up with your fletching and cut to length. Apply the tape downward, the entire length of the feather. Use a knife beard trimming scissors to take off the fletching tape’s backing. Install the clamp onto the fletching jig and apply downward pressure. Repeat these steps to apply all of your fletchings.
Although you have the option of using glue, fletching tape is cleaner and simpler
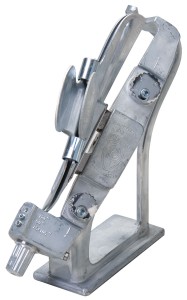
Time for the spin test
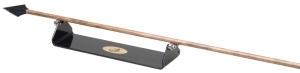
Place your arrow on the spin tester and rotate the arrow backward. You will want to watch the broadhead end and the fletching end – you should see a perfect spin. If you see any wobble it means that something was off during the arrow building process.
Weigh the arrows

Turn on your arrow scale and place an arrow holder onto the scale; zero out the scale to ensure the holder isn’t included in your measurements
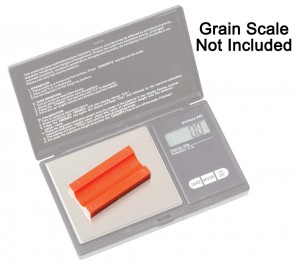
Place the middle of the arrow on the arrow holder
Using a permanent marker, write the grain weight on your arrow
Pro-Tip: It makes sense to write the arrow’s grain on one of the fletchings or the wrap, so you can see it easily
Repeat this process for all of your new arrows
Congratulations! You’ve just built your own custom arrows.
Reblogged this on abdillhomebrew and commented:
This is a nice little build along that can easily be adapted to wood arrows.
Any chance you could put all the required gear for building arrows into a kit- Premium and “Standard” so I could order it all at once?