Free Shipping on orders of $99+ click for details

Ask the experts: 260.587.9501 | Customer Service

Call Us: 260.587.9501 | Customer Service

Your cart is currently empty.
Free Shipping on orders $99+ click for details
Welcome to the 3Rivers Archer's Den

Archer's Den

Welcome to the Archer's Den. Here you will find a gathering of traditional archery stories, tips and techniques, trophy animals taken with traditional bows, and plenty more. Stay a while and learn something. We hope you enjoy and even submit a trophy of your own, or leave a comment on a post.

Tag Archives: techniques

3Rivers’ Pre-Season Turkey Tips

Fred Eichler Turkey Hunt May 2011 065
Fred Eichler shows off his Tom from a successful Turkey Hunt in May 2011

The days are getting longer and the air is getting warmer, which can mean only one thing – turkey season is almost here. Getting a trophy tom with a shotgun can be hard, but when you decide to do it with your bow, especially a recurve or longbow, it can be considerably more difficult. The last thing you want to do is to be caught unprepared on opening day – making an already challenging hunt nearly impossible, but don’t worry 3Rivers Archery has your back.

There are a few things to consider before venturing out into the woods this season, and the best time to start thinking about them is in the weeks prior to opening day.

Where are you hunting?

Many bowhunters will likely already have their hunting area secured. If you fall into that category, now would be a good time to start scouting – you should become intimately familiar with your territory. If you’re still not sure where you’re going to be hunting this season, the advice is the same; don’t wait for opening day to find out where the birds are roosting and feeding.

Will you be hunting from a blind or ‘running and gunning?’

Many archers find it easier to hunt from a blind because it can conceal the extra movement of drawing a bow. When hunting with a shotgun it’s easy to simply get set-up, put the gun on you knee and wait for a bird to get within range. With a bow, however, it’s never that simple. If you do decide to ‘run-and-gun’ consider using a bow sock in conjunction with some bow camo and a ghillie suit. Although this won’t hide your movements completely, it will soften them and it can be much more effective at concealing the human form than camouflage alone.

Is your blind ready to go?

A good ground blind is invaluable to the bowhunter when he is matching wits with a seasoned tom. Turkeys have some of the sharpest eyes in the woods, and your trophy tom has been hunted before, so he’s already weary of even the slightest movements. You can’t hold your bow at full draw for too long and drawing takes a lot of movement, so what do you do? You get a ground blind. There are many different kinds of blinds from single panels to large pop-up blinds and even the high-tech GhostBlind®. Which one is the right one for you? That depends on preference, hunting style, and budget, but I love the GhostBlind®. It works just about anywhere and can be moved easily and setup quickly.

Are your decoys ready to go?

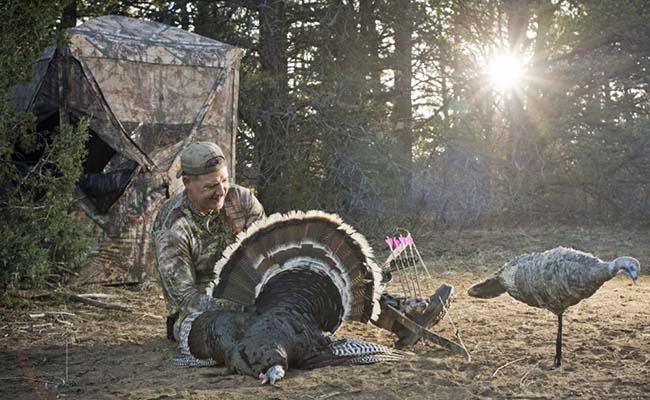
Most hunters can get the old longbeards within 50 or so yards, but arguably the most difficult part of luring a tom within shooting range are those last few yards. A good decoy can be the difference between success or failure this season. That said, it’s hard to find a reason to not recommend the Miss Purr-Fect Hen. It just works. The Miss Purr-Fect weighs about as much as a bottle of water and features perfect pose technology, allowing for detailed adjustable neck/head positioning.

Do you have a good hunting seat?

Whether you will be sitting at the base of a tree or in a ground blind this season, it is important to think about comfort. If you can’t sit still then you might as well not go out at all, because a turkey will see your movement and your hunt will be over. If you’re going to be sitting on the ground, then at least make sure your back is comfortable with some lumbar support. Or, if you’re going to be hunting from a blind you might want to check out the Chama Swivel Hunting Chair.

Is your camo right for the season?

You’re going to need to get your bird within your kill zone, and for most traditional bowhunters that means 20 yards or less. This means the detail of your camouflage is critical. The wild turkey’s ability to pick up movement is truly impressive, so you need to make sure you’re camo is on point. The new Core4Element Realtree Xtra® Camo line by Easton is impressive and has been designed for early season hunting.

Do you have the appropriate broadheads?

What’s the best broadhead for hunting turkey? The one that flies the straightest and gets the job done. The vital area on a turkey is roughly the size of a fist; that said, the best broad head is the one you can shoot confidently into that small of an area time and time again. You do not want to be second guessing how an arrow will fly or your ability to hit a tom when he is at 20 yards.

However, it’s best to avoid a pass though with turkey, because if they can run or fly after the shot, they usually will, which won’t leave a blood trail or, if it does, it won’t be a good one. If you can, try and place your arrow so it penetrates at least one wing, both would be better, while also hitting the vitals. Another good way to avoid a pass through is to add a Zwickey Scorpios Broadhead Stopper to your broadhead.

Have you practiced shooting enough to be confident?

DuraMesh Turkey Target Face

As with all things, the key to successful traditional bowhunting is practice. In the military they have a saying, train like you fight. It would be a good idea to find an area where you can practice shooting, which will closely replicate your actual hunting conditions. It’s also a good idea to get a decent target for practice. I love practicing with a good 3D target, but not every hunter can afford that. The next best option is to get a high-quality lifelike paper target.

Have you purchased your hunting license?

This one seems like such a no-brainer, but it never fails – someone will forget or put it off too long. So, do it now, well not right now, but as soon as you’re done reading this article.

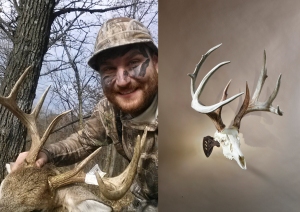
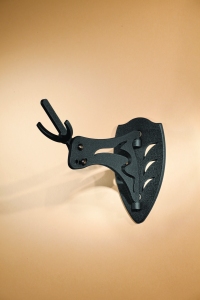
Finally, how are you going to display that big longbeard once you bag him?

Arrowhead Plaque
Turkey beard and tail feathers pictured with an Arrowhead Plaque

Because you will get him, if not this year then maybe next year, but it will happen. I suggest mounting the tail feathers and longbeard yourself. It’s a good DIY project and is much more satisfying to point at your trophy and say you did everything. Try mounting it on our Arrowhead plaque to show off your pride as a traditional bowhunter.

In closing, I hope this helped. If you think of anything that I might have forgotten, please leave a comment and let me know. Remember to stay safe in the woods this season and as always, good luck and shoot straight. Be sure to share your tom with us and we’ll add it to our Trophy Room.

By Jason D. Mills

Archery, Getting Started

Are you thinking about trying archery, but you’re still not quite sure where to start? Olympic silver medalist Jake Kaminski is here to help.

In this useful video, Kaminski covers what the different parts of the bow are called, basic bow set-up, eye dominance, proper bow size, draw length, arrow selection, form, grip, release, and aiming.

Although this is not the end-all-be-all guide, it’s a good place for new shooters to start.

If you’d like to learn more about accessories, the difference between wood, aluminum, carbon, and fiberglass arrows; general arrow selection, or how to string and unstring a bow, visit our website for additional resources.

How to Clean, Whiten, and Mount a Whitetail Deer Skull

Skull Hooker
From the field to the wall; you’ll love bleaching and mounting your own trophy.


By Jason D. Mills and Art Myers

During hunting season, there are three great days for every successful hunter: the day you get your tag, the day you fill your tag, and the day you hang your new trophy. However, shoulder mounts are expensive, costing anywhere from $400-500, and aren’t necessarily suited for every deer. This DIY should take between 1-3 hours of labor throughout the course of 1-2 days.

If you can’t begin the cleaning and whitening process immediately, you’ll want to store the head in a freezer – this will stop any staining. Take the head out of the freezer about 24-hours before starting the cleaning and whitening process to give the meat plenty of time to thaw.

You’ll need

  1. A sharp knife
  2. A high-pressure garden hose with adjustable nozzle
  3. Outdoor propane cooker (with a regulator)
  4. A large pot
  5. Needle-nose pliers
  6. Turkey baster with a bulb
  7. Large container to place to skull in
  8. Rubber gloves
  9. Eye protection
  10. Apron to wear while washing
  11. Bottle of 40 volume peroxide
  12. Oxiclean
  13. Borax (used in removing smaller, more stubborn pieces of meat that’s stuck to the skull)
    (You also have the option of using our Skull Bleaching Kit

Pro-Tip: Never use bleach when whitening a skull as it could cause serious, irreversible damage to your trophy

Fill a large pot of water; it should be big enough to completely submerge the deer’s skull

Pro-Tip: Don’t get to much water covering the antlers because it may discolor them

Add one scoop of Oxiclean into the water, this will act as a degreaser

De-flesh the skull; you want to clean off the head as best as possible, removing all excess meat

Pro-Tip: Once the water has started to boil turn the burner down just enough so that it does not overflow

Once you’ve cleaned the skull as best as you can, place it into your pot of boiling water. Ensure the water covers all the meat on the back of the skull. The water should be about 1/2″ above the base of the antlers.

Pro-Tip: Keep an eye on the skull through the whole boiling process to make sure it stays submerged. If not any meat on top will be very difficult to remove later on

Leave the skull in the boiling water for about 30 minutes

Pro-Tip: Do not get antlers to hot. Most antlers will rest on the edge of the pot, which can scorch them

Pro-Tip: You’ll know it’s the perfect time to pull the head out of your boiling water when the flesh on the skull cap just begins to split

Remove skull and begin spraying it with a high-pressure garden hose .If the tissue can be easily removed you can start pulling it off with pliers. Once the skull starts to cool down the tissue and fat will start Harding up. If this happens place it back in the water and wait half an hour before removing more.

Pro-Tip: Anytime you will be handling the skull after it has been in the pot wear gloves. Bone can be very hot and holds heat well

Be sure not to get to close to the nasal cavity, as high pressure water can blow right through it.

Once all tissue is easily coming off you can remove the lower jaw bone. The lower jaw is typically easily removed by spreading the mouth open as long as the tissue and mussel have had plenty of time to soak.

Pro-Tip: Although there is some debate on whether or not to remove the nasal cartilage, it’s near impossible to completely clean the skull with it in tact. That said, before beginning the washing process you will want to use a pair of needle-nose pliers or forceps to remove the nasal cartilage.

After you’ve removed 70-80% of the meat from the skull re-submerge it into your boiling water and leave it for another 20-30 minutes

Pro-Tip: On deer there will be two nasal covers that will need to come off while boiling so you can clean all membrane from the nasal cavity. If any teeth or any other bones fall off during the cleaning process do not get worried. All pieces will need to be cleaned and can be glued back on later. Also a lot of times the lower jaw will split in two half’s which can be glued back together if it is to be used with the finished skull.

Pro-Tip: Do no rush the removal of the lower jaw. If it does not want to dislocate soak it longer.

One the jaw has been removed now it is time to remove the brain matter. I prefer to take a piece of copper wire about 10 to 12 inches long and make a J hook on the end I will be inserting into the skull. The J hook will help grab on to brain mater and pull it out.

Pro-Tip: The Borax will aid in tedious tissue removal. Sometimes the tissue is greasy and neither pliers nor your bare fingers can grab it. Add a little Borax and you will be able to grab right on to it.

Wash off the remaining meat (including any meat you might have missed in the nasal cavities and brain)

Repeat all processes until you are sure that all tissue has been removed. If it has, you now can dry all pieces off and wait about a day to glue any teeth or bones back on. Make sure that you have removed all tissue from the skull. The last thing you will want is to find out that you missed some after it has been hanging in the house.

Allow the skull to dry completely

Pro-Tip: Although you don’t have to, it’s not a bad idea to wait a full 24-hours

Put on your gloves and eye protection, you’re about to start working with the 40 volume peroxide – you do not want to get this stuff on your skin. It will burn you. In fact, it’s a good idea to keep your apron on as well as a long sleeve shirt, just in case.

Set the skull into your plastic container

Pro-Tip: Shrink wrap the base of the antlers to protect them during the bleaching process. Silicone tape works well too; just avoid any tape with adhesive

Pour about 1/2 a cup of the 40 volume peroxide into your plastic cup

Draw the peroxide into the baster

Pro-Tip: Do not get any of the peroxide onto the antlers, as it will turn them white as well

Using the baster, completely coat the skull in peroxide

You can apply as many as four applications, but you will probably only need two

Pro-Tip: Use the baster to draw up the peroxide that drips into your plastic container and reuse the peroxide – this will save you some money

Allow time for the skull to completely dry

Pro-Tip: Putting your skull in the sun will not only help it dry, it will also assist in the bleaching process

To hang your European skull mount

Skull Hooker's Little Hooker
Skull Hooker’s Little Hooker

Take your Little Hooker out of its box

Pro-Tip: When it comes to European skull mounts, Skull Hooker’s Big and Little Hookers are really some of the best products out there. They’re cheap, require no drilling into the skull, hang securely, have full adjustability, and are exceedingly easy to install.

Locate a stud in the wall where you want to hang your new mount

Hang the plate vertically on the stud

Assemble the arm with the prong attachment

Put the arm onto the wall plate

Slide the resting arm into the back main, natural opening in the skull (the spinal cord cavity)

Straighten or angle your new European wall mount to your liking


Skull Hooker's Skull Cap in Use
Skull Hooker’s Skull Cap in Use with the Bone Bracket

If you only whitened the trimmings, instead of using the Little Hooker, you’ll want to use the Bone Bracket with Skull Hooker’s Skull Cap.

Who Are The Best Bowhunters in the Country?

By Dr. Dave Samuel

Dr. Dave” spent 30 years as a professor of wildlife management at West Virginia University. He is now in his 43rd year as the Conservation Editor of Bowhunter Magazine, where his KnowHunting column still appears. Much of his teaching and writing has centered on white-tailed deer.

This article has been re-published here with permission of Dr. Dave.

Sometime in the 1960’s I joined the Professional Bowhunters Society.  And sometime in the 1970’s, via that organizations publications, I was exposed to Gene and Barry Wensel.  Identical twins who shot recurve bows and took monster bucks in Montana.

In 1981, Gene Wensel published “Bowhunting Rutting Whitetails,” and I learned more about hunting big bucks in two nights reading than the previous twenty years bowhunting. I just pulled my ragged, well-worn copy from the shelf and inside the front cover, it reads, “Good hunting Dave—Hope to meet you someday soon. Gene Wensel, 10/10/81.” I’m not sure when we finally did meet, but over the 33 years since that time, I’ve become friends with Gene and Barry.

In my opinion, these two fine bowhunters are the sharpest minds in bowhunting. Although they’ve hunted other species, and done quite well, the Wensels are whitetail bowhunters extraordinaire. When I read “Bowhunting Rutting Whitetails,” I realized that Gene and Barry think about whitetails at an entirely higher level than most of us. There is a level of knowledge that allows one to take younger bucks often. Then there is a level of knowledge that allows a bowhunter to take mature 2-4 year-old bucks fairly often. Then there is a level of knowledge that allows a bowhunter to take Boone and Crockett bucks once in a while. Then there is the Wensels. They are out there all the time, studying, scouting, learning about the biggest of all bucks. They commonly pass up bucks that most of us would call bucks-of-a-lifetime. Like I said, Gene and Barry think about whitetails at a level far beyond what most of us can even imagine.

In that first book Gene talked about scrapes, pointing out things that wildlife researchers didn’t learn for another twenty years.  Six years later Gene wrote another classic titled “One Man’s Whitetails,” and by then all bowhunters knew that these brothers were way ahead of their time.  Yes, it was a long time ago, but the Wensels were learning things that deer biologists would not confirm with real data for many years. As a wildlife professor who knew a little about deer, every time I walked away from a discussion with Barry or Gene, I just shook my head in amazement. We all walk through deer woods, but when these guys do, they observe a lot more than the rest of us. A lot more.

Six years later Gene wrote another classic titled “One Man’s Whitetails,” and by then all bowhunters knew that these brothers were way ahead of their time. As their website Brothers of the Bow states, when Gene wrote this book, “There were no videos, DVDs or television shows about deer hunting in those days. Specialty magazines were non-existent. One could count on one hand the number of hunting magazines on newsstands. Many books were so old they offered little more than ancient history and market hunting techniques. No one raised deer in those days. A live Boone & Crockett whitetail had never been photographed. Camo was mostly military. Things like food plot seeds, compound bows, carbon gear and trail cameras were unavailable.”

The Wensels had knowledge, shot recurves as if they were born with them in their hands, set ethical standards that many emulated (and a few fools ignored), and passed on that knowledge to thousands of us. Yes, and they did it with a great, sometimes a bit weird, sense of humor that carries on to today. An example of that humor can be seen on the inside front cover of one of Genes later books, “Come November.” My copy was loaned to a friend (and I don’t know who that was) and I never got it back, but I remember the inscription inside the front cover. “To my good friend Dr. Dave. The only guy I know who has a twin brother uglier than mine.” (Yes, I have a twin brother. There’s a scary thought for you). And while we are on books, Barry came out with a wonderful book in 2009 entitled “Once Upon A Tine.”   It too is a gem.

Over the years these brothers gathered a lot of outstanding videos of free ranging deer and other species. Around 2009 (I’m not sure of the exact date, but this is close), the Wensels got together with three other brother/friends, Mike, Mark and David Mitten from Illinoi, guys who also had tons of video, and they produced a video titled “Primal Dreams.” In my mind this is the finest hunting video ever made. Two hours long with breathtaking scenery and incredible footage of animals in their natural habitat. Interesting is the fact that there are no kill shots in the film and few dead animals as well. But this video, more than anything ever produced, lets the non-hunter know what hunting is really about. As their website states, “For those who hunt, it stirs the instinctual primal need we feel to hunt. For non-hunters, after soaking in the experiences, they say, Wow, NOW I get it! Now, I understand why you hunt, and I’m OK with it.”

These two sets of brothers wrote the script, edited the film, narrated the film, put the music together and produced an award-winning video that every hunter, every bowhunter, should watch. It earned three Telly awards for cinematography/video, editing, and use of music. And when you’ve seen it, and your wife and kids have seen it, and your neighbors too, then you need to give it to your kids teachers and then to the local library. It is that good. Actually, it is better than that.

A few years later they came out with a second video, “Essential Encounters.” If you ever wanted to show friends, family, neighbors, why you hunt, these videos do just that, and better than anything that has ever been produced. Yes, give them as Christmas gifts to your hunting and non-hunting friends.

A few years ago I took five of my friends to Barry’s Trophy Whitetail Boot Camp in Iowa.  It was the best 2-1/2 days of learning about deer hunting that I’ve ever spent. Barry walks you into his woods, to his stands, and teaches you exactly why that stand is where it is. I thought I knew how to get to my stand, but I didn’t. I thought I knew how to set a stand relative to wind, but I did not. Barry explains the terrain, the approach, the wind, and a lot of other variables, some of which I’d never thought of. You can watch all the videos and read all the books and watch all the TV shows on deer, but getting in the woods with Barry Wensel will teach you more than all those things put together.

The Wensels live whitetails and in my opinion are the best, most ethical, whitetail bowhunters in the country.  Ethical hunting, the values of hunting, why those things are so important, is in the blood of Barry and Gene Wensel.

Five Tips for Cold Weather Traditional Bow Hunting

Five Tips for Cold Weather Traditional Bow Hunting

By: Jason D. Mills

It’s January, which, for many archers, means cold-weather hunting. Whether you’re hunting small game such as squirrel or rabbits; or you’re headed out to bag that late season buck, there are many difficulties unique to a cold weather hunt.

Here are five tips to remember before heading out:

1. Practice shooting while wearing all of your gear
All those extra layers can hinder how you aim. Bulky gloves can affect your release and limit your ability to feel your bow’s grip – try our Down Under Wool Gloves instead. A face mask could get in the way of your anchor or disturb the string upon release – our Three-in-One Spandex Facemasks are warm and flexible, so you won’t feel bogged down. An unwieldy jacket could be louder than expected when you attempt to draw and could limit your range of motion. The point is, don’t make any assumptions about your gear.
2. Remember to move
From time to time, it’s a good idea to stand up and move a little while hunting in cold weather. Sitting for long periods of time will lead to tired, cold muscles. Simply alternating from standing to sitting can keep the blood flowing, your muscles limber and your mind focused. It’s also a good idea to draw your bow at least once or twice an hour – this will keep your muscles warm and keep your bow from freezing up and making a lot of noise while drawing back. It’s not a bad idea to pack some hand and toe warmers as well.
3. Hunt the ground
When the temperature drops hunters are often better off hunting ground blinds near a good food source or a natural funnel than in a tree stand. The lack of foliage during an end of season hunt usually means many of your early and mid-season trees lack the cover they had just a few short weeks ago. A ground blind will be much warmer and you will be less exposed than in a tree that has lost all of its leaves. It’s also a good idea to look for swamps or pine thickets covered in snow – both are warmer than the surrounding area and make great bedding cover.
4. Find the food
Thick snowfall forces deer and small game into survival mode. Remember that nut-laden flat or fruit filled orchard you saw early in the season? Now would be the time to be there waiting the first afternoon after a snow storm, because deer will be looking for that food. It doesn’t have to be anything that specific, but you will want to find quality food where deer and small game will feel secure. Many deer will look to flowering plants during the latter part of the year – weeds and wild flowers on a southern facing slope are a great food source for deer in the winter and, in turn, a great place for the late season hunt.
5. Hunt the second rut
A doe that did not get bred earlier in the year will often reenter estrus in early to mid-December. If you find a doe in heat, identified by the droplets of red blood she leaves in the snow when she urinates, follow her. If an estrous doe finds and feeds in the forb you’re hunting it will likely prove to be an irresistible breeding opportunity to any nearby buck.

A successful late season hunt can be cold, but it is often worth the effort. Many archers enjoy the brisk weather and the challenge of cold weather bow hunting. However, cold weather can lead to frost bite and hypothermia if not prepared for correctly. That’s why it’s important to stay warm, stay safe and remember the fundamentals.

We’d love to hear from you; what tips and tricks have you found to be successful in your own cold weather hunt? Let us know in the comments.


RECOMMENDED PRODUCTS
Down Under Shooters Glove
Down Under Wool Glove
Back to Top